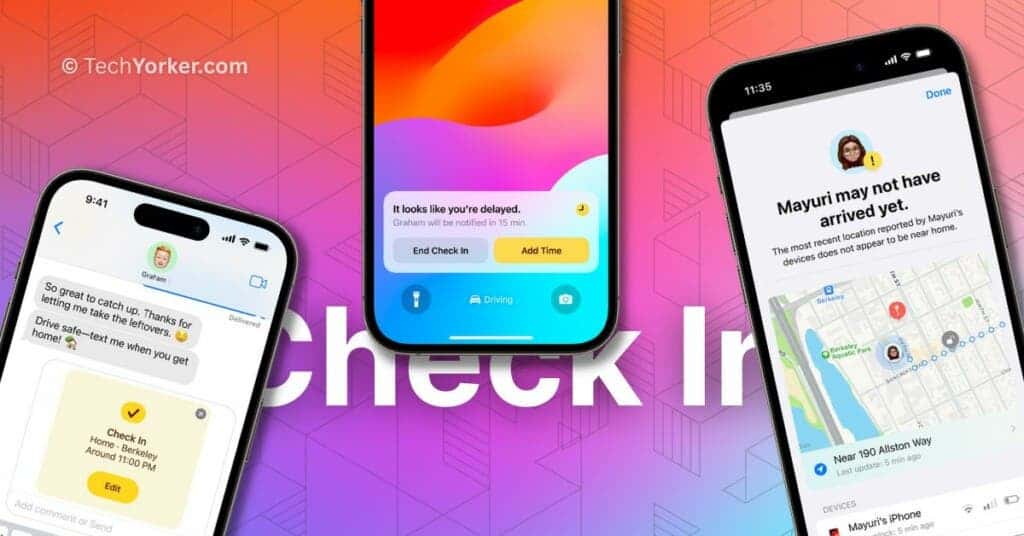
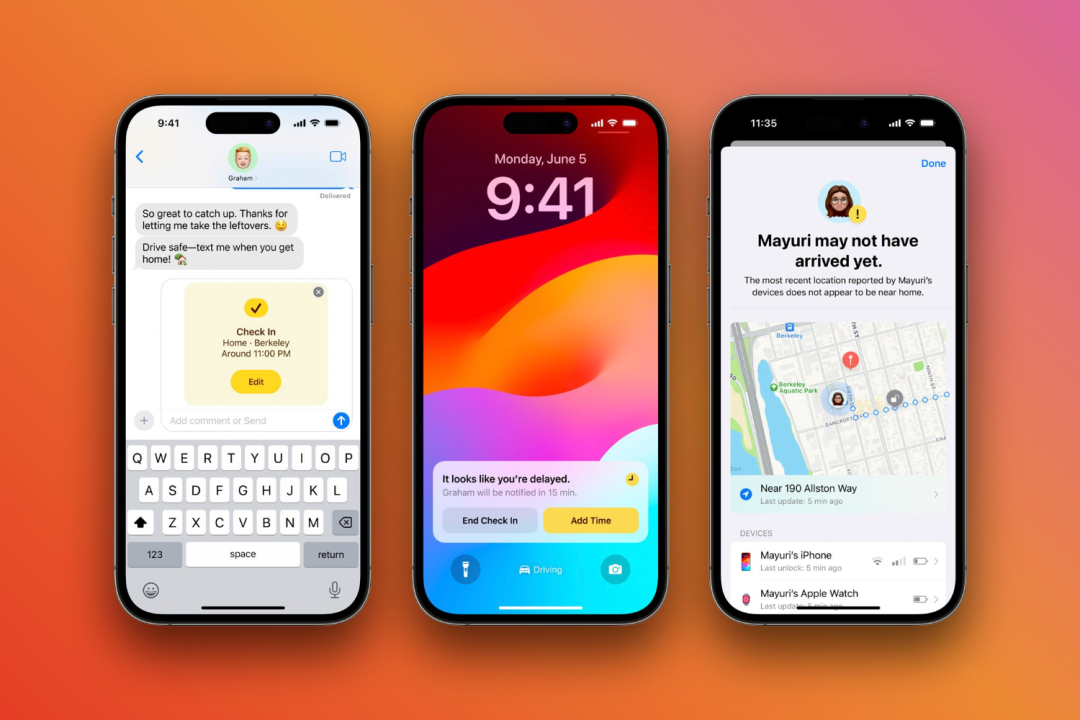
At WWDC 2023, Apple unveiled iOS 17, introducing a range of new features for iPhone users. Among these features, one notable addition is the “Check In” feature. Check In is designed to automatically inform your family and friends that you have safely reached your destination. This feature aims to provide reassurance and peace of mind to your loved ones. It totally eliminates the need for manual check-ins or text messages. By utilizing location services and notifications, Check In ensures that your contacts are notified once you have arrived safely at your intended location.
The Check In feature in iOS 17 goes beyond simply notifying your contacts about your safe arrival. It also automatically shares your location and other essential information with the selected contacts. This eliminates the need for you to manually send updates or remember to check in with your friends or family.
Moreover, if you own an Apple Watch, the Check In feature extends its functionality to your wearable device as well. This means that you can conveniently use your Apple Watch to initiate the Check In process. This allows you to stay connected and ensure your loved ones are informed about your well-being even when you’re on the go.
What Makes the Check In Feature in iOS 17 a Safety Feature? 
The Check In feature aims to enhance your safety and provide peace of mind to both you and your trusted contacts. The feature makes this possible by leveraging the capabilities of your iPhone and a compatible Apple Watch.
Indeed, the Check In feature in iOS 17 goes beyond just notifying your contacts about your safe arrival. It includes advanced functionality to track your journey and provide real-time updates to your chosen contacts.
By tracing the route you’re taking on your trip, Check In can monitor for any delays, detours, or unexpected changes in your progress. If any such events occur, it automatically sends alerts to your contacts. This helps your contact get quick alert if there is any form of a bad situation along the way.
In addition to the updates on your journey’s progress, you have control over the information that you share with your contacts. Depending on your settings, your chosen contact can see your device’s location, battery life, or cellular signal levels. This level of information enables them to assess the status of your journey. Hence, providing them with the necessary details to ensure your well-being.
Overall, the Check In feature in iOS 17 aims to provide peace of mind to your contacts by offering real-time updates on your trip. It allows them to stay informed and aware of any deviations or delays that may occur along the way.
How Safe is your Personal Data When Using Check In on iOS 17?
Absolutely, privacy and user control are key aspects of the Check In feature in iOS 17. Apple understands the importance of protecting personal information and has taken steps to ensure the security of the data shared through Check In.
Apple has emphasized that the information shared through Check In will be encrypted, meaning it is encoded and only authorized individuals can access them. This encryption adds an extra layer of protection to the data being transmitted. With this, the user’s data is safeguarded from any form of unauthorized access.
Furthermore, the Check In feature is designed to be user-centric and customizable. Users have the flexibility to set up Check In on a per-contact basis. Meaning you can choose which specific contacts you want to share information with and what information you want to share with them. This level of control allows you to utilize the feature according to your preferences and adjust it as you need. Hence, the user has complete control over the information they automatically share with their friends and family.
By prioritizing encryption and user control, Apple aims to provide a secure and customizable experience with the Check In feature in iOS 17. This offers peace of mind to users while maintaining their privacy and data security.
How to Initiate the Check In Feature 
In iOS 17, Apple has introduced Check In as a new feature in the Messages app, allowing users to easily access and utilize its functionality. To initiate the Check In feature within a conversation, follow these steps:
1. Open the Messages app on your iPhone.
2. Tap on the conversation with the contact you want to use Check In with.
3. Look for the “+” sign located to the left of the iMessage chat bar and tap on it.
4. A menu will appear with various options. Scroll through the options and tap on “More” to access additional features.
5. In the expanded menu, you should see “Check In” listed as one of the options. Tap on it to select it.
By following these steps, you will be able to activate the Check In feature within the selected conversation. Allowing you to utilize its functionality for sharing your location and important information with your contacts.
How to Configure Your Preference in Check In Feature 
When using the Check In feature for the first time in iOS 17, you will be guided through a setup process to configure your preferences. Here’s how you can get started:
1. After selecting the Check In option within a conversation, you will be prompted with on-screen steps to set it up.
2. The first decision you’ll need to make is whether to grant Limited or Full data-sharing access.
– Limited Access: If you choose Limited access, it means you’ll be sharing your location data, battery life, and network signal information with your selected contact.
– Full Access: Opting for Full access includes all the data shared in Limited access, as well as additional information about your route and location data from when you last unlocked your iPhone or removed your Apple Watch.
Consider your privacy preferences and the level of information you are comfortable sharing with your chosen contact. Once you’ve made your selection, proceed with the setup process by following the on-screen instructions.
By making this choice, you can determine the extent of data shared through the Check In feature and customize it to suit your needs and preferences.
How to Adjust the Details of your Message in Check In Feature
In the Check In feature of iOS 17, you have the ability to adjust the details of your message before sending it to your chosen contact. Here’s how you can do it:
1. After selecting Check In within the Messages app and configuring the data-sharing access, you will see the Check In details screen.
2. Tap on the “Edit” button to modify the Check In details.
3. In the editing screen, you can toggle the estimated time it will take for you to reach your destination based on your mode of transport (e.g., walking, driving, public transportation).
4. Once you have adjusted the time accordingly, tap “Done” to save the changes.
5. Finally, hit the “Send” button to send the Check In message to your selected contact.
If during your journey you decide to make additional stops or need to update the estimated time, you can cancel the existing message or add extra time by tapping “Edit” again and making the necessary adjustments.
When you eventually arrive at your destination, the Check In feature will automatically send a message to your chosen contact, notifying them that you have arrived safely.
By providing these options, Check In helps keep your contacts informed about your progress and ensures they are aware of your well-being throughout your journey.
Conclusion
If for some reason you are not able to get to your destination within the designated timeframe, Check In will show a prompt on Your iPhone. The prompt will ask if everything is okay, which you have to answer within 15 minutes. If you do not answer within 15 minutes, Check In will automatically send an alert to the contact you selected. The message informs them that something may be wrong. With the help of the location sharing, the contact will be able to follow up to come check up on you.


