The Ultimate Tech Guide: Using Windows 11 on Your iPad with Remote Desktop
TechWednesday, 09 August 2023 at 16:54

Nowadays, the difference between a high-quality iPad like the iPad Pro and top Windows tablets like the Surface Pro 9 is getting smaller. Apple has been making changes to iPadOS, adding things like Stage Manager to make it work more like a laptop. But it's not completely the same, especially since it doesn't have a desktop setup like Windows 11 tablets do.
Imagine being able to combine the strengths of both systems and use Windows on your iPad? You won't actually be replacing the iPad's operating system with Windows 11, nor can you run Windows directly on the iPad. However, with a working internet connection, you can use your iPad to access and use Windows from a distance. If you don't already have a Windows PC, you can use Windows 365, which is a service by Microsoft that provides a cloud-based PC. And if you do have a PC, you can stream and use your existing PC on your iPad through the internet. In this article, we will explain both of these methods.
Run Windows 11 on iPad Using Microsoft Remote Desktop
The simplest approach for many is to use Microsoft Remote Desktop to run Windows 11 on an iPad. With this method, you can stream your own PC that you already have using the internet, and then access and use it on your iPad. Just make sure your PC is running Windows 11 Pro, as this capability is not offered in Windows 11 Home.
- Download and install the Remote Desktop Mobile app on your iPad.
- Power up the Windows 11 PC you wish to stream to your iPad. (Make sure you have connected it to the internet).
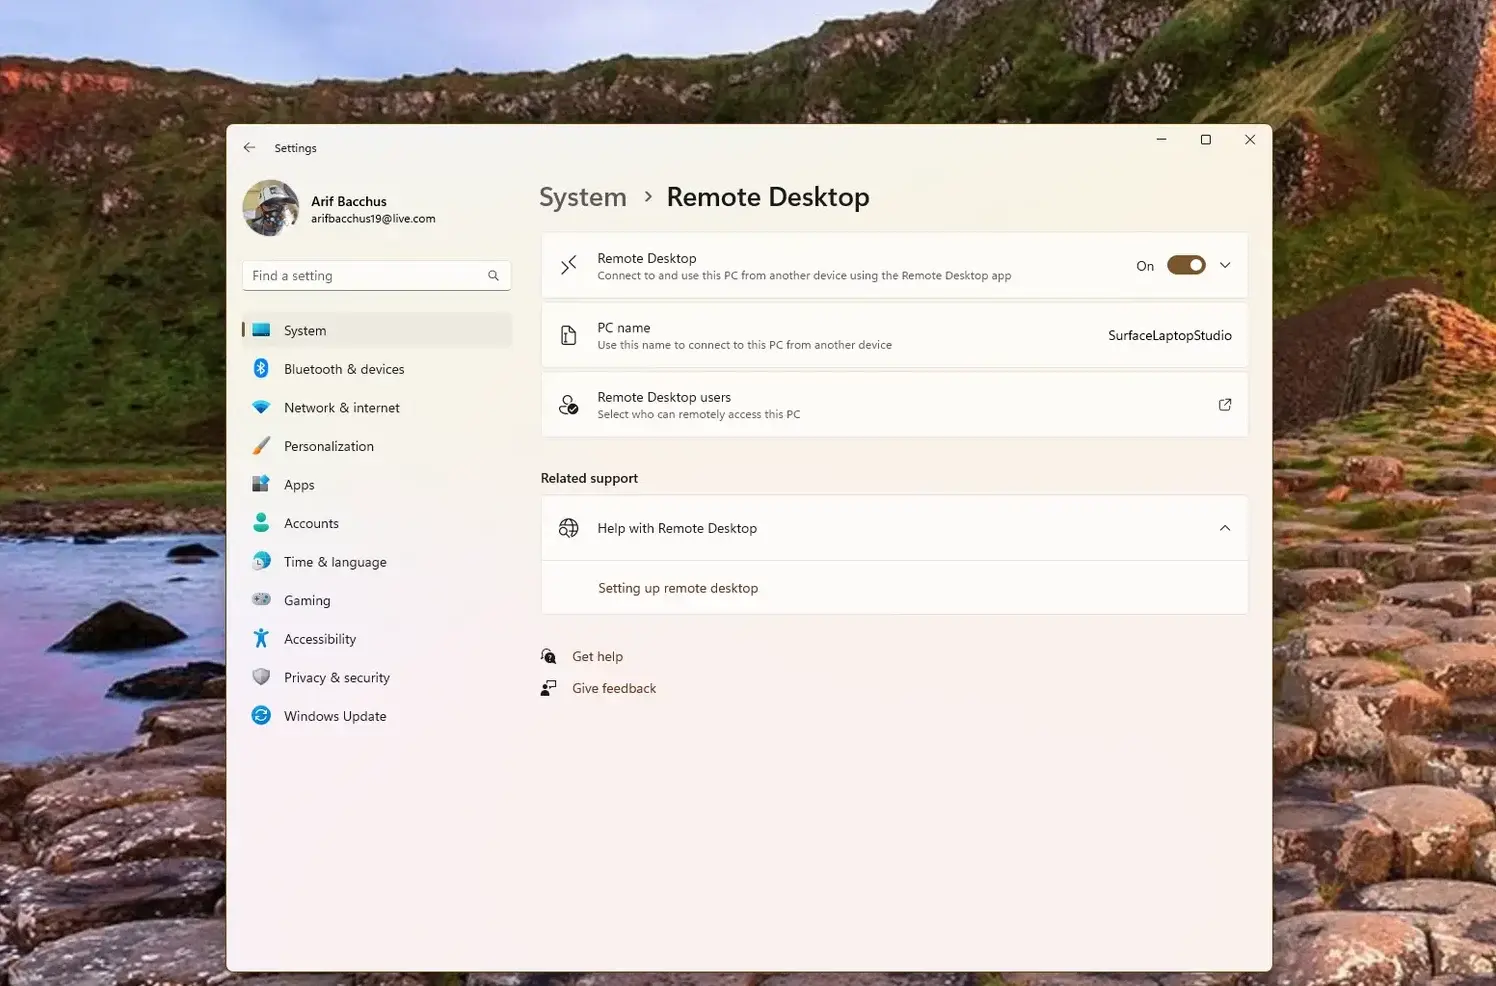
- Open the Settings app on your Windows 11 PC.
- Check the sidebar on the left side and click on Systems.
- Choose Remote Desktop
- Activate the Remote Desktop switch to the "On" position and remember to write down your PC's name. You'll need this information in the future.
- On your iPad, open the Microsoft Remote Desktop App. Make sure it's linked to the same Wi-Fi as your PC.
- Next, click on the + icon at the bottom and choose Add PC
- Now, type the name of your PC in the name area (the PC name you noted earlier).
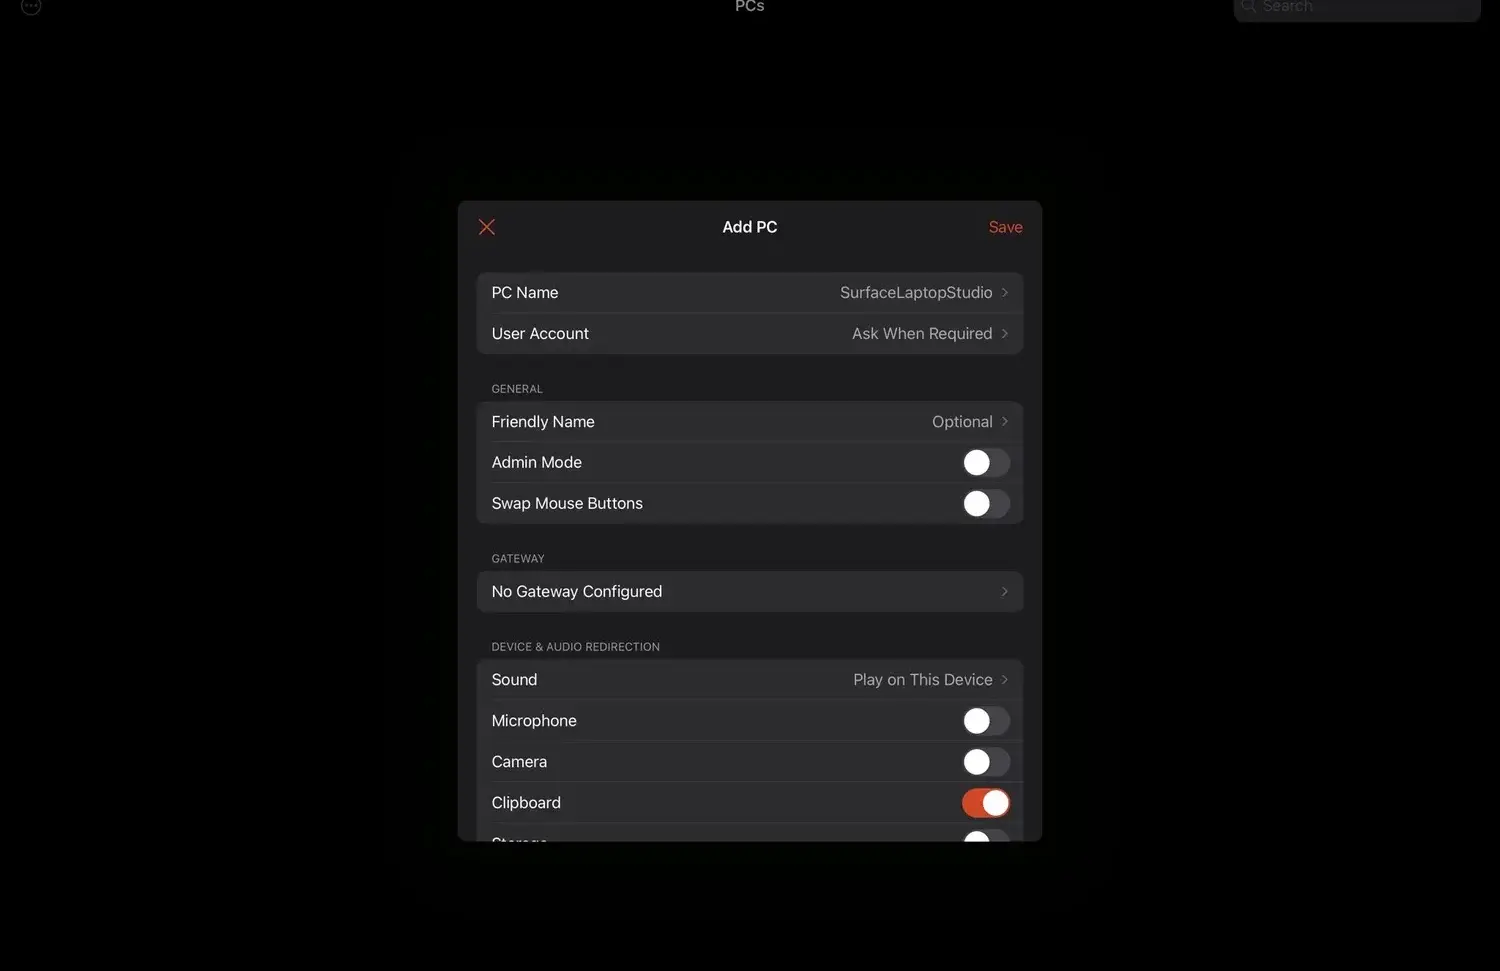
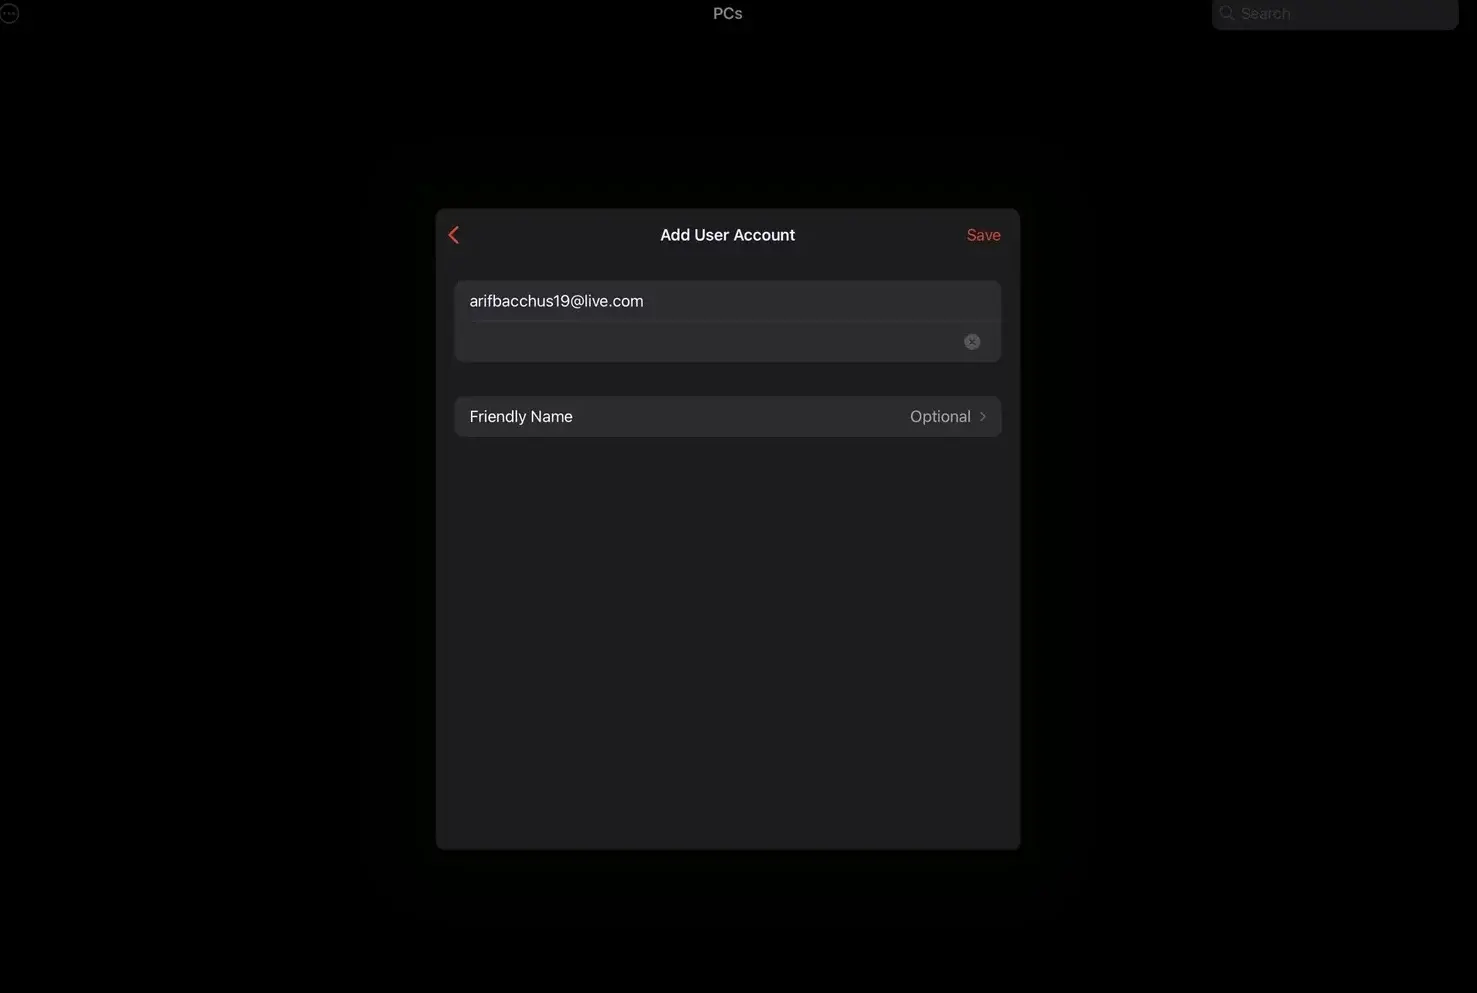
- In the User Account column, choose Add User Account, then type-in the account information on your main PC in here.
- Next, you can give your remote PC any friendly name and press on the Save button.
- Now, just press on the Back button to exit the setup page. Also note that you need to turn on certain important features on your virtual PC. Make sure you turn on sound by selecting Sound, then Play on this device. You may also toggle-on other features such as camera, microphone, clipboard and storage. Press Save after turning on these features to finish the process.
- To begin the remote session, just press on your remote PC icon from the list of your PC.
To end the remote desktop session, just click on the Microsoft Remote Desktop icon on the left side of the screen and select Disconnect all PC Sessions.
Running Windows 11 on iPad May Respond Slower
It is worth noting that using a PC remotely may feel a bit laggy as compared to using the main PC itself. For this reason, you may experience slow response in certain conditions. Even though it is not completely bad, you may definitely feel some difference in response from your original PC. How snappy your remote PC responds also depends on the speed of your network. Users will fast and stable networks may not see much of slower responses. However, if your network is unstable and slow, you will experience a lot of lagging on your remote desktop.
Using Windows 365 to Run Windows 11 on an iPad
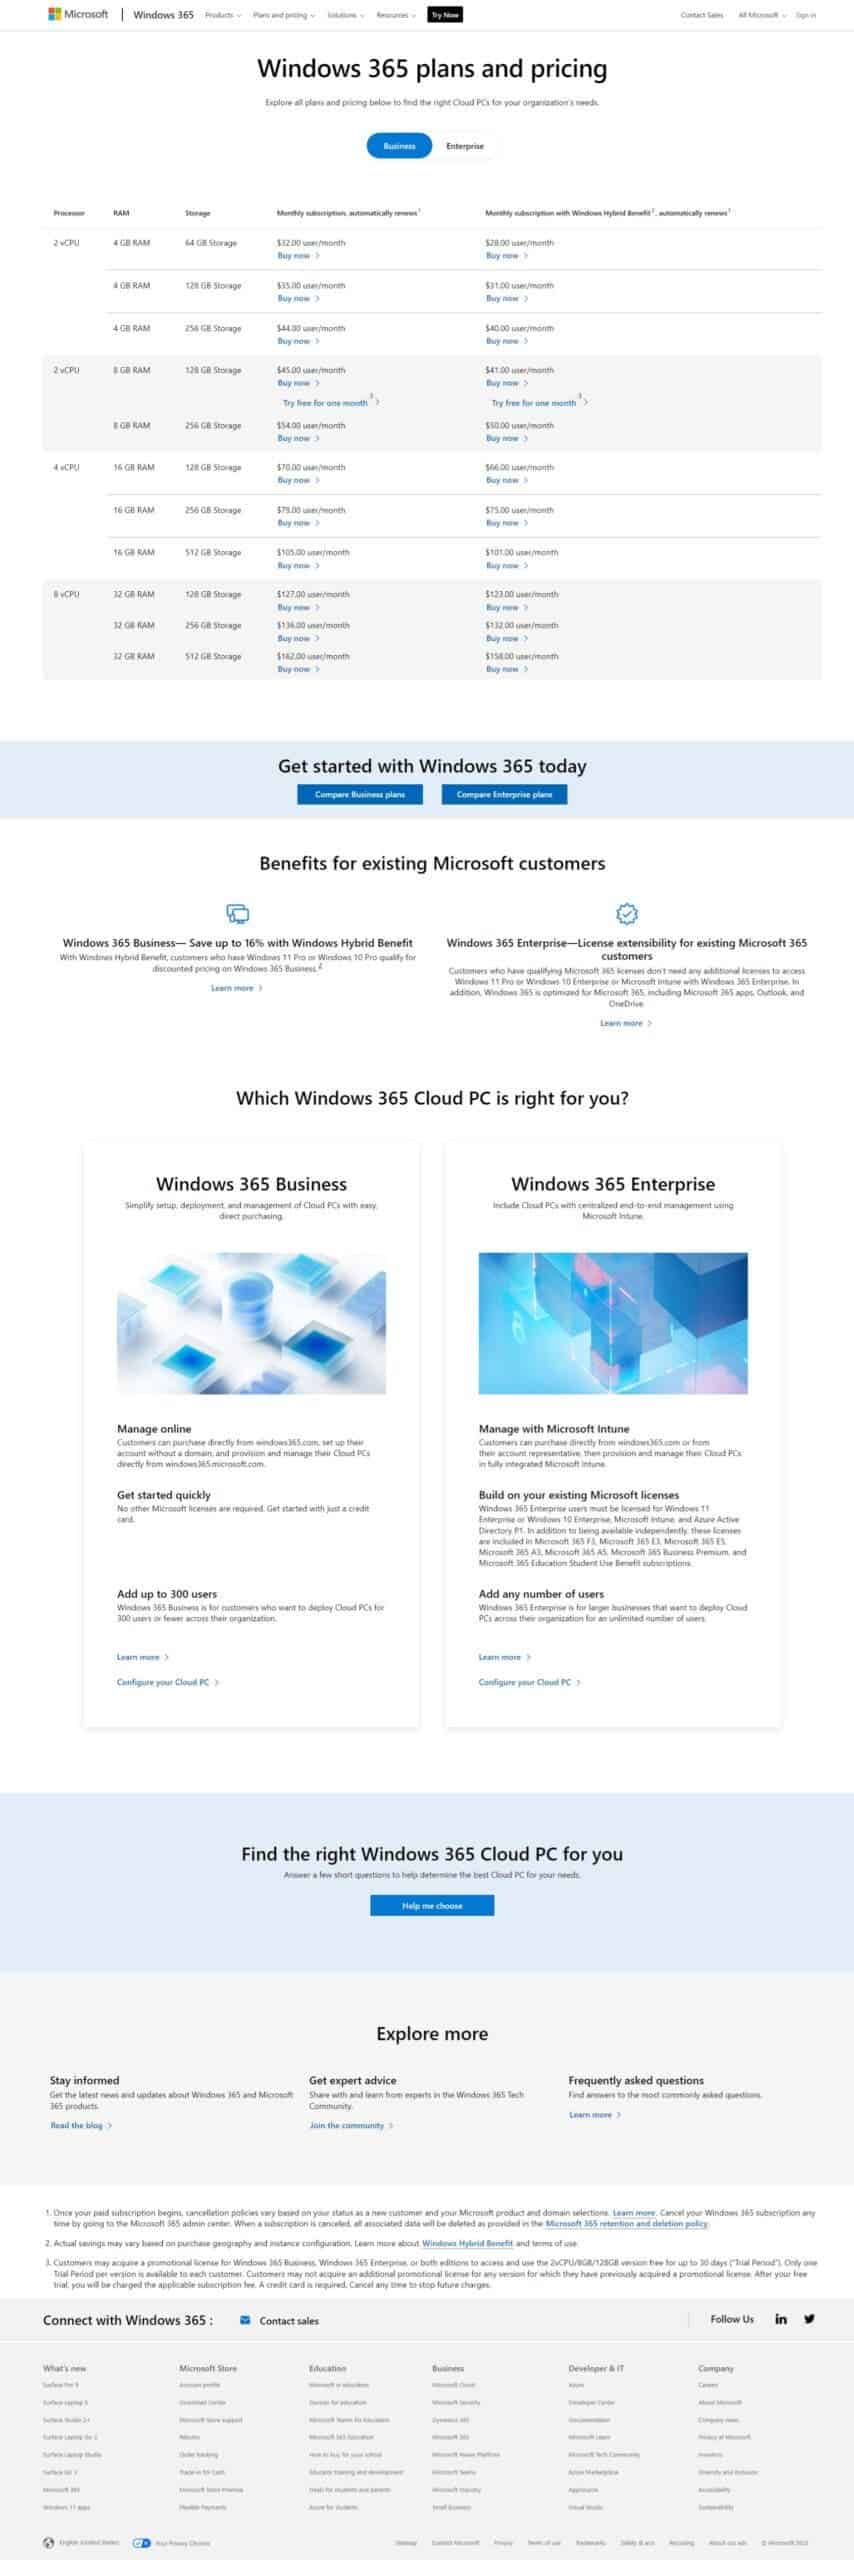
If you don't have a Windows PC and want to use Windows 11 on your iPad, you can still do it! Microsoft has a service called Windows 365 that lets you stream a Windows PC from the cloud. It's mostly for businesses, but regular people can use it too. Signing up is simple, and you get a free month to start. After that, you pay at least $32 each month, depending on the kind of virtual PC you pick.
- Using your iPad, visit the Windows 365 Sign-up page and select any plan that suits your needs.
- Select Buy Now option to purchase your plan.
- Follow the on-screen instructions to create a new Microsoft 365 Business account.
- The next step is to add your payment method. Note that you will not be charged for the first month of using Microsoft 365.
- Now, open the Microsoft 365 website in your browser and click on the download button on the sidebar.
- Next, locate Microsoft 365 for iOS and select Get Subscription URL next to it.
- Make sure you save the URL somewhere on your device for later use.
- Go to the App Store on your iPad and download the Remote Desktop mobile app.
- After downloading the app, click on the plus sign "+" and choose Add Workspace.
- Now, paste the URL you saved earlier here to complete the process.
When you finish, you will see the cloud PC you added before in the Workspaces section. Click on it to start. As long as your internet is working, you can keep using this cloud PC. It acts like a normal Windows PC and fits well on your iPad screen. Try this method and you are really going to enjoy it. It will help you perform a lot of PC-related tasks smoothly just like a normal desktop Windows computer.
Popular News

Latest News
Loading