Spilled Water on Laptop? Check Some Useful Tips to Mitigate The Damage
GuideWednesday, 31 January 2024 at 02:20
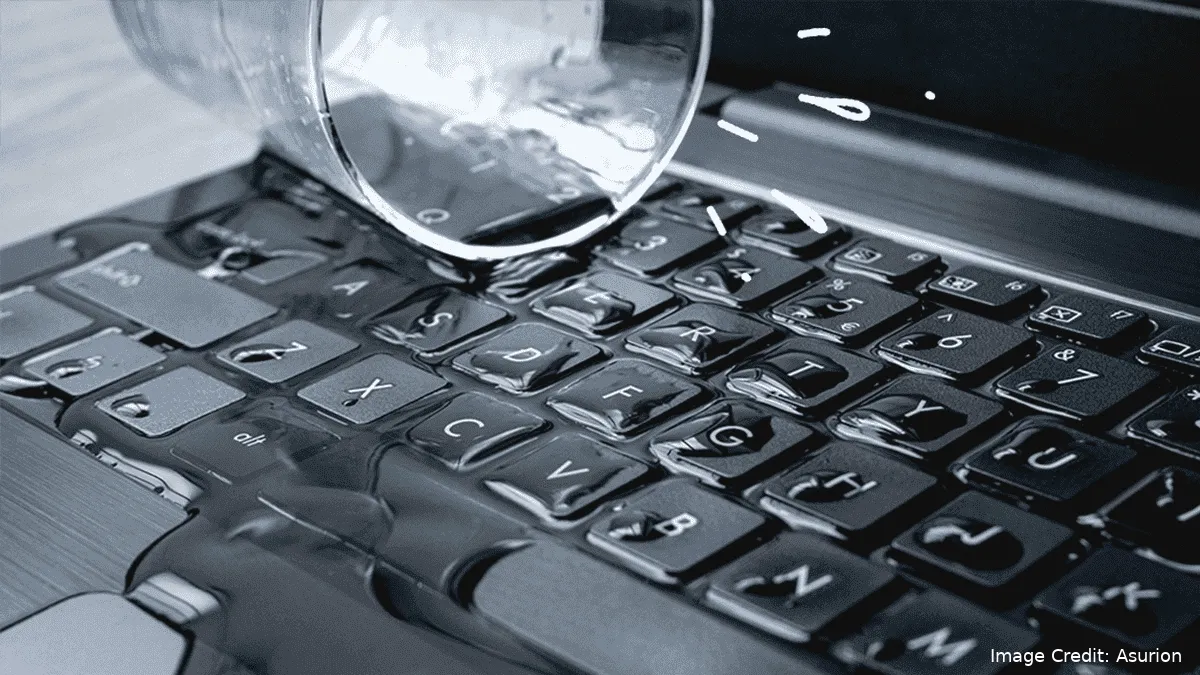
Some users have the bad habit of keeping water and other drinks like Coffee dangerously close to their laptops. There isn't anything wrong with having your drink close to your setup, but we strongly recommend keeping it at least some centimeters away from your laptop full of electronic components that can be easily damaged by certain liquids like water. Accidents can happen at any time, just a few seconds of distraction, and the damage is done, you've spilled water on your laptop.
The situation is alarming, but if you act fast, there are some ways to prevent damage to your equipment. You need to act fast, turn it off immediately, and unplug it from the power source, you also need to remove the battery fast. Now, that you've followed these important steps, you can proceed to read the rest of the article in which we will try to help you to "save" your device or reduce the damage with certain tips.
If you act fast, you can save your laptop from completely dying. You just need to follow the tips below to avoid further damage. The water can easily damage electronic components, but the process is not immediate if you've removed it from the power source and turned it off. So check the tips below and learn how to change the situation for good. (Source: DigitalTrends)
Important Tips To Follow When You've Accidentally Spilled Water on Laptop
If you've accidentally spilled liquid on your laptop, acting fast is important. Time ticks and you need to be careful and precise to save your costlier device. Power down your device and remove the power cable and battery if possible. Follow the steps below to try to mitigate any damage caused by the accident. In some cases, you can save your device for further use. If you can't save, you can at least, mitigate the damage of your components.
- Step 1: Remove all easily detachable components. Remove the peripherals like mouses, keyboards, cables, and flash drives. If you have an easily removable disc driver or HDD tray remove it as well. Leave your laptop bar.
- Step 2: Dry outside of your machine. Open your laptop as far as it goes. Hold it upside down to let any accumulated liquid drain out. Use an absorbent towel or a lint-free absorbent fabric to wipe wet surfaces until they're completely dry. Important: Don't try to dry the computer with forced hot air from a hair dryer, and don't think about using a heat gun. The heat gun can do more harm than good by melting components and the hair dryer won't dry the liquid in enough time.
- Step 3: It is worth noting that the type of liquid you've spilled means a lot. Water is the least acidic, so if you act fast the chances you have are much better. Acidic liquids like sugary or alcoholic fluids are more conductive and more corrosive. They can quickly cause permanent damage to the fragile internal components. If you've spilled something more caustic than water, it's better to head to a repair shop. If you have the kind of warranty that covers accidents like this, it's also better to use the warranty rather than voiding it with hopeless attempts.

Image Credit: TechAdvisor
Act Quickly, Remove All The Liquid
If you've spilled water on your laptop and followed the above tips to immediately remove the exceeding liquid, you can try to dry it further. Try placing the laptop somewhere warm and dry. Of course, don't put it in a hot place or under direct sunlight. The most ideal thing to do is to completely disassemble the laptop to further dry the internals. If you can't do this, and also can't take it to a repair shop, put it in a dry place and leave it there for 24-48 hours.
Ignore the most common ideas like putting it on a bag of rice. It can introduce more problems than solve anything. However, running a dehumidifier in the space or room the laptop is in can also help. Don't try to power on your PC before it's ready. Otherwise, you will be in some trouble. If it is still wet, it can cause a massive shortage in your system and break your laptop for good. So keep it alone for at least a full day.
Disassemble your Device
If you have certain experience with electronics, or enough skill to deal with fragile components, you may try to take your laptop apart to remove the liquid. Opening and removing older laptops was not too difficult, but the situation is more complicated with modern laptops. Newer laptops tend to be glued together, while older ones can have most of their parts easily disassembled. Of Course, there are some Gaming Laptops today that are still easy to open up and get access to the components.

Disclaimer: Only proceed if you have experience and the needed skills to disassemble your laptop. Also, you need certain tools to do so like small screwdrivers that can easily remove the small screws in your laptop's body. We are not responsible for any damage caused to your PC by taking it apart. Only proceed if you have enough knowledge and experience to take the risk.
- Step 1: If you haven't already, and your laptop allows you to do it, remove the battery. Usually, you will find a switch for removing the battery on the underside of your laptop. In most cases, you press the switch or slide it and the battery can be detached. Modern laptops tend to have internal batteries which makes this process more complicated.
- Step 2: On some laptops, you will find panels that allow for their removal on the underside. In most of the cases, you will use a Phillips or Torx screwdriver to remove them. There are multiple laptops in the market, each with different builds and assembling methods. Before you proceed, you can search for videos on YouTube for specific ways to disassemble your particular laptop model.
- Step 3: For the RAM, you just need to press the side clips to eject the stick. Solid-State Drive or Hard Drive, usually requires the removal of screws. Certain laptops have slots for the Hard Drive and the RAM, allowing you to remove them without completely taking them apart. If that is your case, remove these components before moving for a complete disassembly.
- Step 4: Examine each component you've removed. Check for any sign of wetness or corrosion. Any wet parts need to be dried. If the liquid is anything other than water, wipe it off with a clean toothbrush with 99% isopropyl alcohol. This will dissolve gunk without causing liquid damage and evaporate without leaving a sticky residue.

Image Credit: Crucial
Once everything is clean and examined, and you’re sure you’ve brushed away any signs of corrosion, leave everything alone to air-dry for two to three days in a warm, dry area. Don't use a heat gun or hair dryer to hasten the process, it can bring more harm than good. Try to keep the components alone for an entire day before re-assembling. Once you've waited enough time and are sure there is no liquid, you can turn on the device to see if it will work.
Conclusion
The tips above can help you to mitigate the damage caused by spilling water on your laptop. If you act quickly, you can save the device. Of course, the situation is different if you drop a caustic liquid.


Loading