When you connect an iPhone to a Mac computer, you open the gateway to a world of interconnected functionality and versatility. It's not just about plugging in a cable; it's about forging a digital bridge that transcends hardware boundaries, facilitating a seamless exchange of data and resources between your devices.
By connecting it to your Mac, you can effortlessly transfer media files, whether it's the latest snapshots from your iPhone camera or your favorite playlist, between your Mac and iOS device. It extends to the realm of software as well. Need to update your iPhone's firmware to unlock the latest features and enhancements? No problem. By tethering your smartphone to your Mac, you gain access to the latest firmware updates, ensuring your device stays up-to-date and secure.
Fortunately, you don't need to simply rely on physical connections any more. With advancements in technology, you can establish a wireless connection between your iPhone and Mac, liberating you from the constraints of cables and ports. In this guide (via DigitalTrends), we will go beyond the basics, offering detailed instructions for both wired and wireless connection methods. You can choose the approach that best suits your needs and preferences.
In essence, connecting your iPhone to your Mac is more than just a technical task—it's a gateway to a seamless and integrated digital ecosystem. It's about harnessing the power of connectivity to enhance productivity, creativity, and convenience in your digital life.
How to Connect iPhone to Mac Via Cable
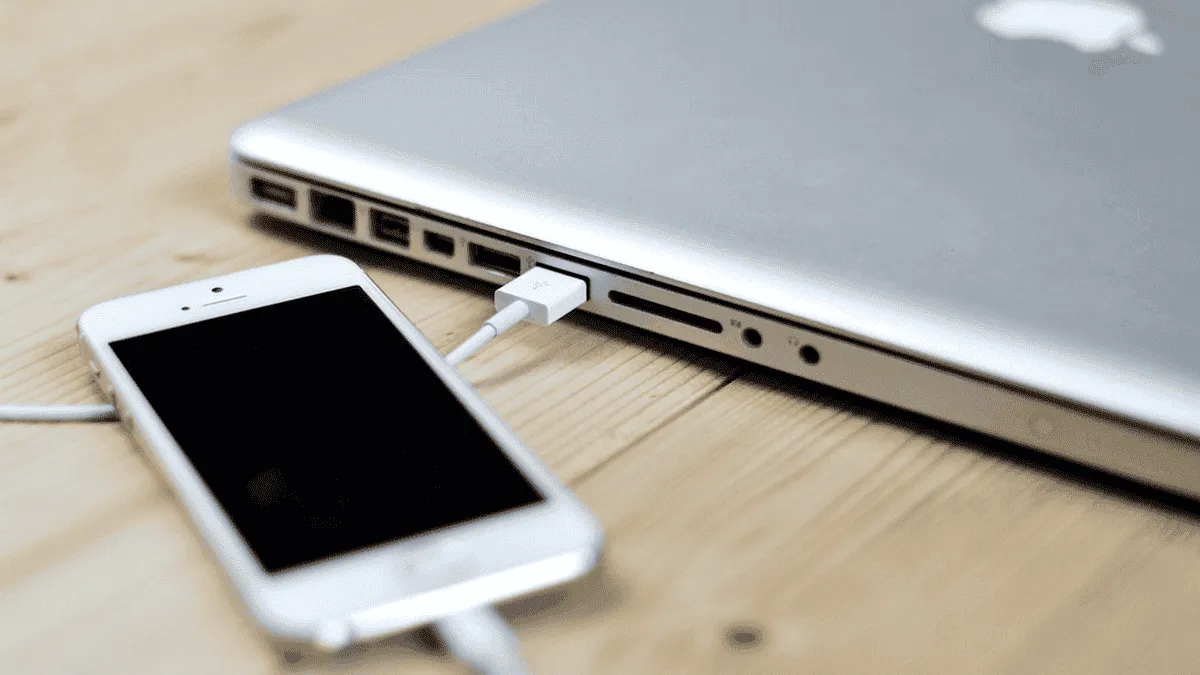
Connecting your iPhone to your Mac using a cable is essential for tasks like syncing content, managing data, or updating your device. It's a straightforward process: just use the charging cable that came with your iPhone. However, depending on your device model, you may need an adapter.
If your iPhone uses a Lightning to USB cable and your Mac has a USB port, you can plug it in directly. But if your Mac has only USB-C ports, like the MacBook Pro 2021, you'll need an adapter. Conversely, if your iPhone uses a USB-C to Lightning cable and your Mac has traditional USB ports, like the MacBook Air M1 2020, it's best to use a Lightning to USB cable.

In short, if your iPhone cable and Mac port don't match, you'll need an adapter or the appropriate cable to make the physical connection.
Once connected, you can use Finder on macOS Catalina or later to manage your data and update your iPhone. If you're using an older macOS version, like before Catalina, you'll need to use iTunes.
How to Connect Mac in the Simple Cable-Way
Here's a simple guide:
- Plug your iPhone into your computer and open Finder.
- In the sidebar, locate and select your iPhone under the "Locations" section.
- During the connection process, you might receive prompts to trust the device or update your iPhone to the latest iOS version if you haven’t already done so. Simply follow the on-screen instructions for these actions.
- Once the connection is established, navigate through the various tabs located at the top, directly below your iPhone details in Finder, to access and manage the content you require.
Alternatively, you can use Wi-Fi:
- If you're tired of plugging in your iPhone every time you want to sync data? Apple offers a solution with Wi-Fi syncing. In Finder, ensure your iPhone is still selected and navigate to the General section. Under Options, choose "Show this iPhone when on Wi-Fi" and click Apply. With this setting enabled, you can access the syncing menu in Finder without the need for a cable connection.
- Once you're done with your tasks and ready to disconnect your iPhone, simply locate the Eject icon to the right of your device's name in the Finder sidebar. Click on it to safely eject your iPhone. Once ejected, you can safely unplug the cable from both your iPhone and Mac.
Connect iPhone to Mac via Bluetooth
Connecting your iPhone to your Mac via Bluetooth is also a nice alternative that has its benefits, By connecting it this way, you get some benefits including Handoff, AirPlay, AirDrop, Continuity Camera, Instant Hotspot, and Universal Clipboard. Here's how to ensure a seamless wireless connection:
Step-To-Step Guide
- Step 1: Ensure Wi-Fi Connectivity
Confirm that both your iPhone and Mac are connected to the same Wi-Fi network. This ensures smooth communication between the devices. - Step 2: Pairing via Bluetooth
If you haven't paired your iPhone and Mac before, begin by selecting the Bluetooth symbol located in the upper-right menu of macOS. Next, choose "Bluetooth Preferences" and keep your iPhone nearby and powered on. Wait for your macOS to detect your iPhone, then select "Connect" to initiate the pairing process. Follow any on-screen prompts for authentication, if required. - Step 3: Enable Handoff on Your iPhone
Navigate to Settings on your iPhone and select "General," then tap on "AirPlay & Handoff." Ensure that the Handoff feature is enabled. With Handoff activated, any compatible app on your iPhone will display a Handoff icon in your Mac's dock. This icon allows you to seamlessly switch from your Mac to your iPhone and continue your task. - Step 4: Utilize AirDrop Seamlessly
For AirDrop functionality, ensure your devices are connected to the same Wi-Fi network. Then, initiate the Share option on your device, such as your iPhone. All available options will appear, with AirDrop indicated by its distinctive radar-like icon next to compatible devices. - Step 5: Harness Continuity Camera Features
To leverage Continuity Camera features, open a compatible app on your Mac. Control-click on the desired location where you wish to insert content. This action will prompt an insert menu to appear. From the menu, select "Import from iPhone or iPad".
Depending on your connected devices, various options will be displayed. Choose "Take Photo" to access the Camera on your iPhone and capture an image that will be seamlessly inserted onto your Mac. Alternatively, select "Scan Documents" for a similar process, but with the resulting document saved as a PDF file.

Image Credit: DigitalTrends
What To Do When the Mac Does Not Recognize My iPhone?
If your Mac fails to recognize your connected iPhone, troubleshooting steps can help resolve the issue. Begin by checking if the device is listed in the Finder app's sidebar or the iTunes app for older macOS versions. Ensure both your Mac and iPhone are running the latest firmware versions. For Macs, verify that you have macOS 14.4.1 Sonoma, while iPhones like the XR/XS and later should have iOS 17.4.1 installed.

If both devices are up-to-date, try restarting both your Mac and iPhone. Whether you're using a physical cable to access data in Finder or opting for wireless connectivity to utilize Continuity features, connecting your iPhone to your Mac is a straightforward process. Additionally, if you're considering a new iPhone purchase, explore our comparison of the latest iPhone 15 models for insights.
Conclusion
In conclusion, connecting your iPhone to your Mac is simple, whether using a cable or wireless methods. If you encounter issues, check device compatibility and ensure both are up-to-date. Restarting your devices can often resolve connectivity problems. With these steps, you'll be seamlessly transferring data and enjoying Continuity features in no time.
Remember, whether you're transferring files or taking advantage of Continuity features, keeping your devices updated is key. If you're still having trouble, don't hesitate to reach out to Apple Support for assistance. With a little troubleshooting, you'll be back to syncing and sharing between your iPhone and Mac effortlessly.


Loading