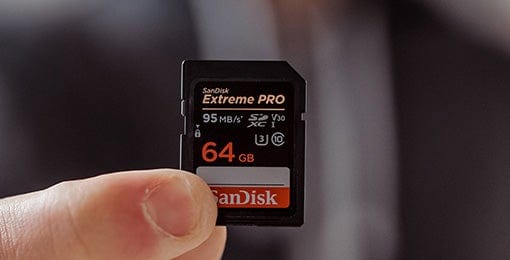
A Secure Digital, abbreviated as SD, card is a small memory card to be used in portable digital devices like digital cameras, GoPro cameras, mobile phones, and MP3 players. It has three different sizes including standard SD cards, miniSD cards and microSD cards. With the popularity of social media, people take and share pictures and videos whole a lot more than before. And most of them will be saved on SD cards for later editing or transferring.
However, SD cards are vulnerable to corruption. It is common that your SD card suddenly stops working without any warning.
Then, a lot of questions may come into your mind. Is it possible to keep my photos and videos safe? How to recover them? How to make my SD card workable again? This post will walk you through things you should know about SD card data recovery and solve all your concerns.
What you should do and shouldn’t do before data recovery
Those tips are important for any deleted or lost data recovery. They can help you maximize the number of recoverable files. Moreover, it may save your time or even money on data recovery.
- Stop using the SD card immediately. If you are aware of lost files on the SD card, don’t keep using it to save any more data. For example, don’t put the SD card back to your digital camera and take photos. The writing operations might overwrite the original files, resulting in corrupted and unrecoverable files.
- Find out if the computer can detect the SD card. Go to the Disk Management on Windows or Disk Utility on Mac to see if you can find the SD card in the disk list. If not, it is very likely that the SD card is physically damaged and beyond any data recovery you can do.
- Check the connection between SD card and the computer. If you insert the SD card to a computer via an SD card slot, try to use a reliable SD card reader to reconnect it to the computer. Meanwhile, if you connect the SD card to the computer through a card reader, change to another card reader too. A poor or instable connection could cause the SD card malfunctioning.
- Run First Aid to repair the SD card. Mac’s First Aid in Disk Utility can check and repair slightly corrupted disk. In some cases, you will be lucky that the SD card can be fixed and all data is safe.
If your photos and videos are still inaccessible after all the activities above, you will need a professional SD card data recovery tool to accomplish the data recovery task.
How to recover lost photos and videos from an SD card
Data recovery software has algorithm to scan the disk sector by sector and rebuild MBR, partition table, root directory, file directory and file content for you. Technically speaking, the damages to the information aforementioned won’t hurt the actual file content, because they are stored on different physical sections on the SD card. As long as the lost photos and videos are intact on the SD card, the software can restore them successfully. However, if they are overwritten or corrupted because of bad sectors, it is impossible to get them back.
Simple steps to recover lost photos and videos from an SD card with data recovery software:
Step 1: Free download, install and launch iBoysoft Data Recovery.
The data recovery software from iBoysoft has both Windows version and Mac version. In the post, iBoysoft Data Recovery for Mac is installed. It is a light-weight program and has an easy installation process.
Step 2: Attach the SD card to the Mac computer and select it from the drive list.
The software will detect the SD card fast. You can see the name, partitions, file system and free space in the drive list in the simple interface of the software.
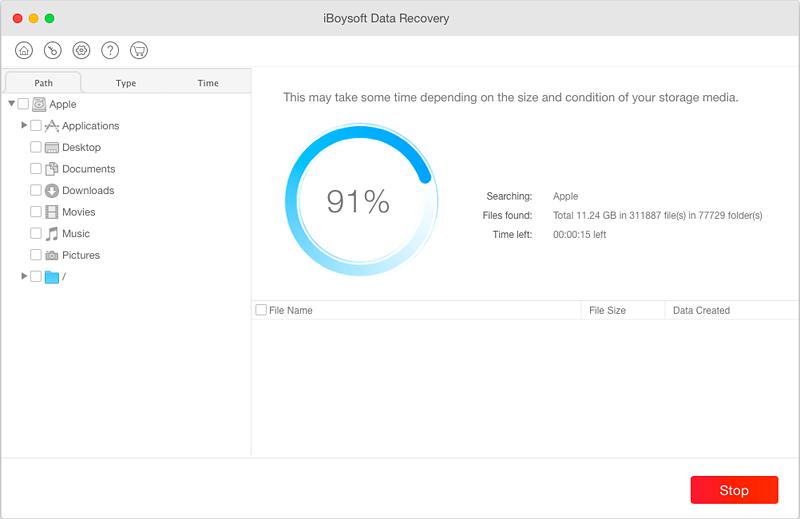
Step 3: Check “Deep scan” and click on “Scan” button.
For recovering lost data, it is recommended that you utilize the deep scan feature of a data recovery application. It can find most files on the SD card. Furthermore, because it is typical that an SD card has relatively small storage capacity, deep scan won’t take much time to finish compared to scanning a hard drive.
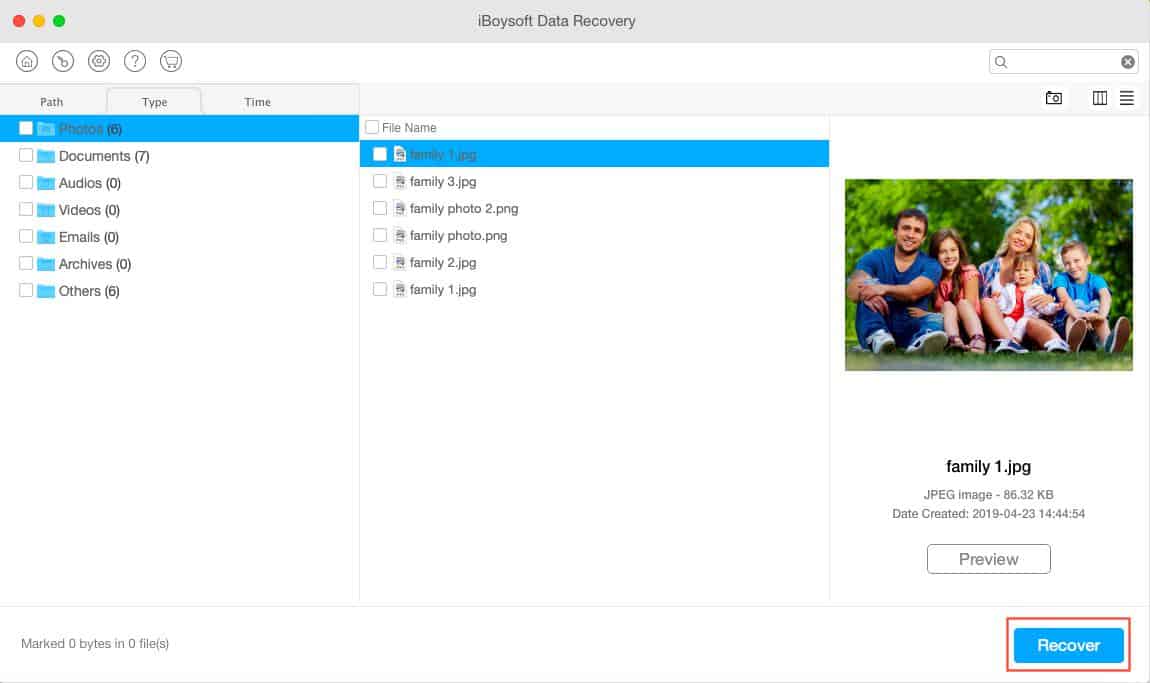
Step 4: Filter the scan results and preview the photos and videos.
The scan results will be categorized in Path, Type and Time in left panel. You can also search for specific photos or videos in the search box. By clicking the “Preview” button, the software will provoke any built-in or pre-installed applications for you to easily preview the photos and videos.
Step 5: Select the wanted files and click on “Recover” button.
The software will ask you to choose a disk to save the recovered photos and videos. If you have enough storage space on your Mac, you can choose your Mac as the saving path. If not, attach another removable disk. Do not save the restored photos and videos to the faulty SD card.
How to make the SD card workable again?
After you are sure that all important photos, videos or other files have been retrieved from the SD card, go ahead to Disk Utility to erase the SD card. When you are erasing the SD card, choose FAT or ExFAT as the format. FAT or ExFAT is a universal file system, so it won’t cause any incompatibility trouble in different operating systems or digital devices.
How to prevent an SD card from corruption?
There are a few precautions you can take to protect an SD card and data on it. Some of them you might have already know.
- Eject SD card safely from a computer.
- Format SD card on a computer instead of on a digital device like cameras.
- Back up photos and videos often on another disk or in a cloud storage
- Don’t leave SD card connected to a computer during the rebooting.
- Don’t bend, scratch, wet or burn SD card.
- Don’t use a same SD card across multiple devices.


