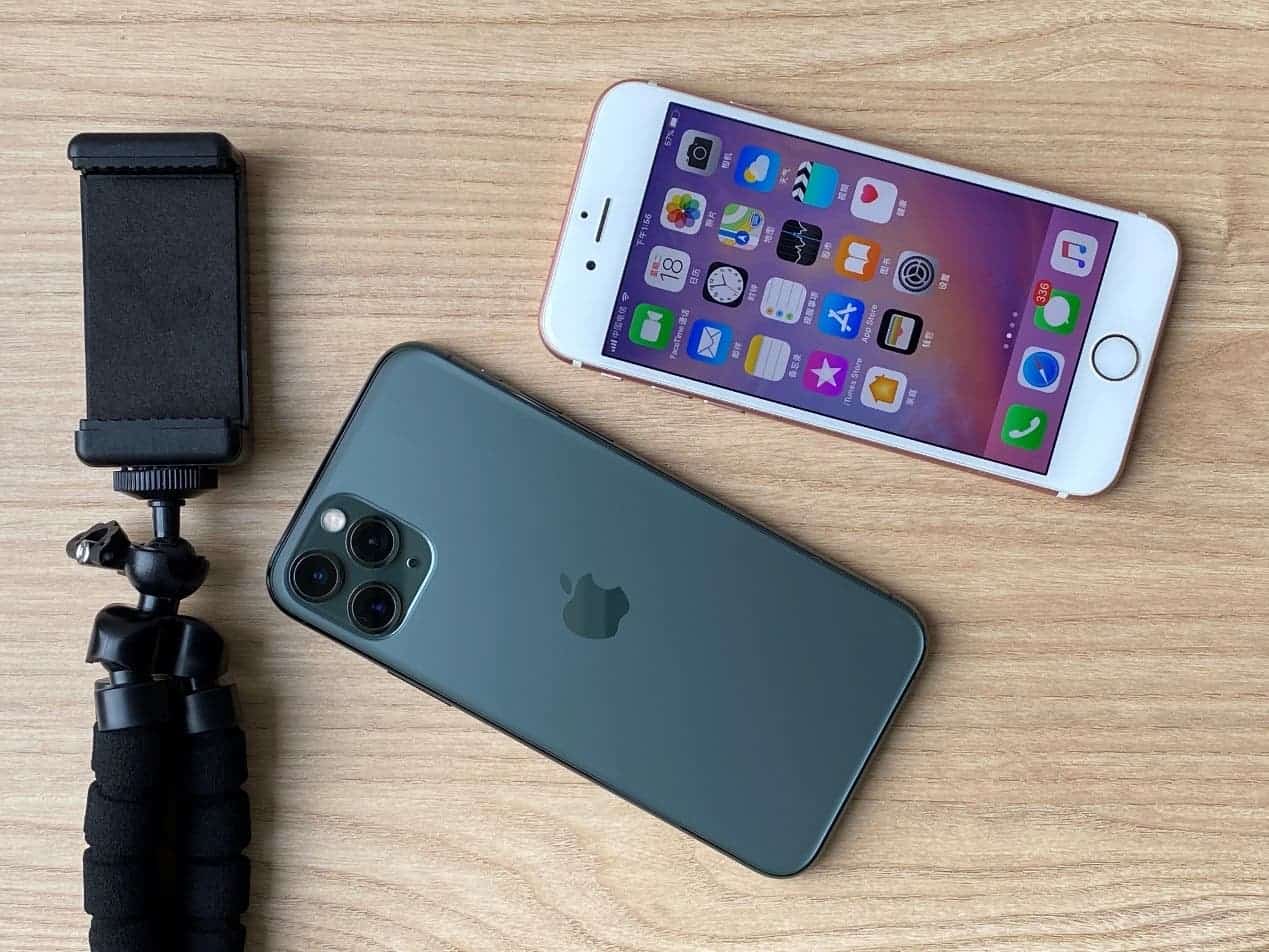
Last week, Xiaomi released an eye-catching ‘Xiaomi Transparent TV’. Through the self-luminous technology of the OLED panel, the company could achieve a transparent display effect without the need for a backlight module. This is quite similar to the future of science fiction. However, although transparent TV has moved from concept to reality, it is still in its infancy, and the price of early adopters is not low. The Xiaomi transparent TV priced at 49,999 yuan ($7219). So in some sense, it’s easier and less expensive to create a ‘transparent iPhone’.
In fact, to achieve the effect of the above picture, you only need to borrow iMovie’s ‘green screen effect’ for some simple post-production. This is a video editing application launched by Apple. You can download it for free in the App Store. The specific preliminary preparations are as follows:
- Camera lens × 1 (iPhone / iPad /…)
- Shooting equipment × 1 (iPhone is recommended, you can edit directly on the phone after shooting)
- Tripod × 1 (not required)
How to make the iPhone transparent?
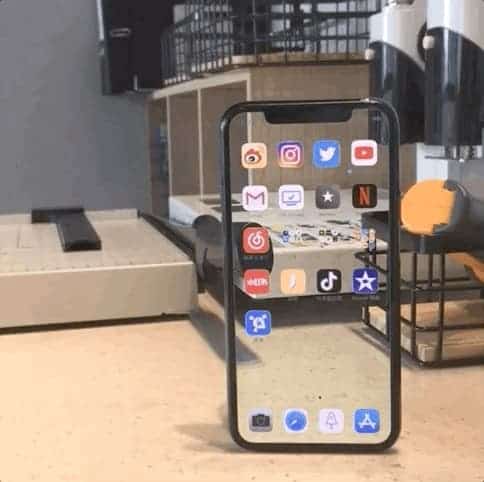
As you need to use iMovie’s ‘green screen effect’ function to achieve the ‘perspective effect’ by replacing the content on the green screen with other backgrounds, you need to make sure that there are no green elements in the desktop of the camera or the screen of the camera before shooting. We mean stuff like green application icons, green environmental backgrounds, etc. Most likely, you should remove the icons of Calls, Messaging, WeChat, etc.

The second step is to replace the lock screen wallpaper and main screen wallpaper of the mirrored device with the following green picture. So the green background will become transparent in the subsequent processing.

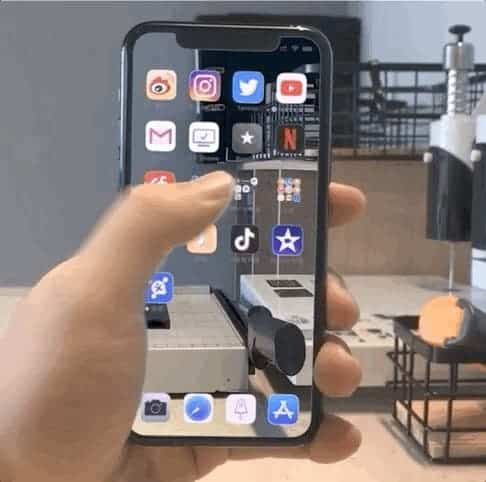
The third step is to choose a camera position. As you need to shoot two pieces of material with exactly the same angle, the shooting equipment needs to be fixed throughout. This can be done by a tripod or other methods. If you don’t have a tripod by your side, you can use a book or a water cup.
After selecting the camera position, you need to shoot a piece of empty lens material. The length of time is added or subtracted according to your needs. It is better to be slightly longer than the actual video you want to shoot. Then take a video of the same camera with the in-mirror device. Here you can record a complete unlocking process and enter the main screen to increase the authenticity of the video. Of course, you can also arrange the shots yourself, such as close-ups from a front angle, or the process of getting started and so on.
In this way, two pieces of video material are obtained. We call the empty lens the ‘A’ lens, and the lens with in-lens equipment is called the ‘B’ lens.
Instructions
After that, iMovie needs to be used for post-processing, the specific steps are as follows:
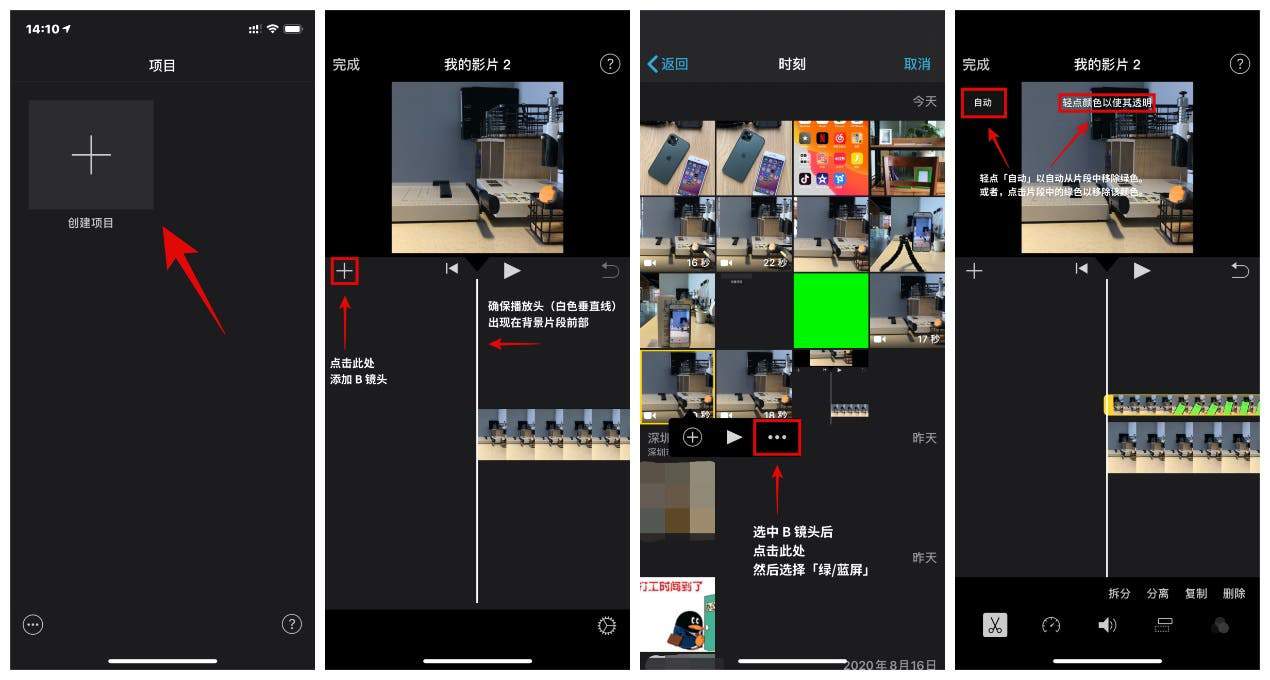
- Open iMovie and create a project, add A lens to the timeline;
- Scroll the timeline so that the playhead (white vertical line) appears above the background clip;
- Tap the ‘Add Media’ button, tap a category from the list, and then tap lens B to select it;
- Tap the ‘More’ button, and then tap ‘Green/Blue Screen’. The green screen clip will be added above the background clip in the timeline;
- In the viewer, tap ‘Auto’ to automatically remove green or blue from the clip. Or, tap the color in the clip in the viewer to remove the color;
- Trim and move the background video clip to make it consistent with the length of the green screen clip;
- Finally, export the video.


