The Solid State Drive (SSD) offers advantages over the old Hard Disk Drives (HDD). They lack mechanical parts and are much more durable than the old HDDs that could suffer irreversible damage from a minimal impact. However, the biggest advantage is how fast they are when compared to the old mechanical hard drives. Thanks to the advantages and the fact that SSDs are becoming cheap now, many users are migrating to the new technology. Using an SSD to store the Operating System and Apps brings huge improvement to the speed when compared to the Hard Drivers. For that reason, users get SSDs to install the OS while the HDDs are present in some setups to store files. The process of installing an SSD on your device is simple, but sometimes it can be tricky when the SSD does not show up. (Via).
Let’s say you’re installing a new SSD and it does not show up in Windows. This can be particularly frustrating. Especially if you’re running a new boot drive and you want to install a new iteration of your operating system or clone the existing partition. As long as the Drive is working correctly, it’s possible to make it appear on Windows. So don’t panic over an SSD that does not show up instantly. Let’s try some steps before assuming it is malfunctioning.
Here are the best alternatives to fix an SSD not showing on Windows.
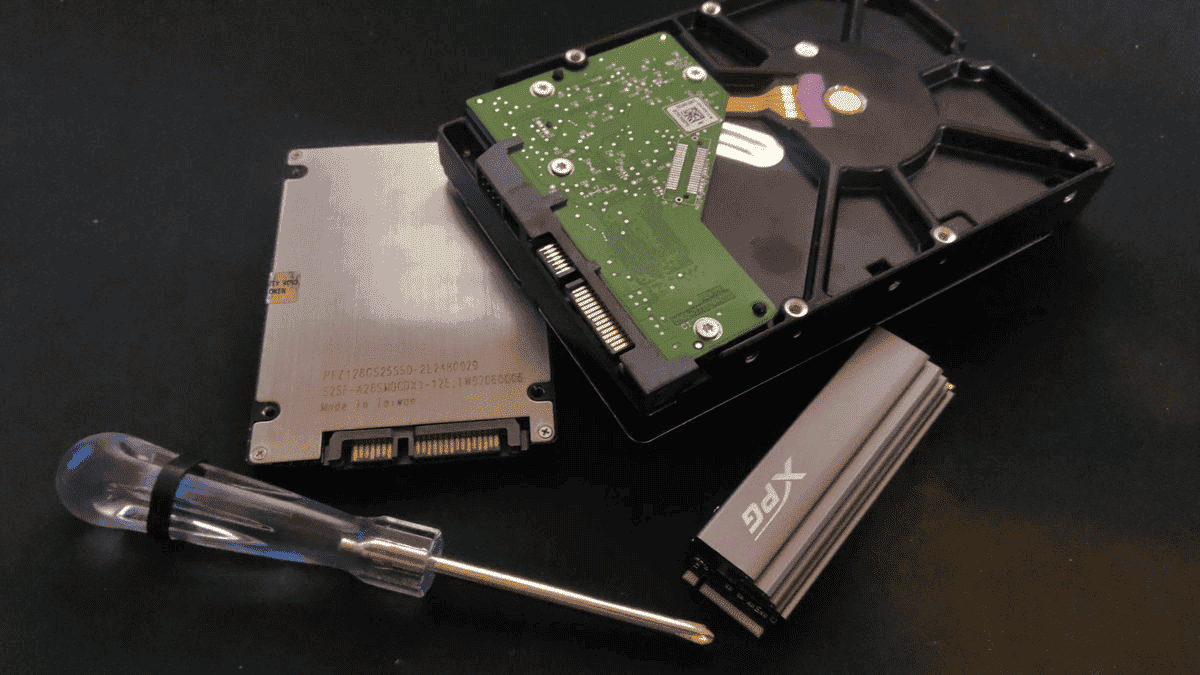
Make Sure your SSD is Installed Correctly
Well, if you’ve installed the SSD on your own we assume you know exactly what you’re doing. However, we need to recommend you make sure the SSD is installed properly. Perhaps, the SATA cable is loose or something is not correctly placed. Regardless of your experience, make sure everything is installed correctly, there is no shame in making mistakes. If it’s your first time installing an SSD on a PC or Laptop, you have another reason to check that you’ve followed the installation steps correctly.
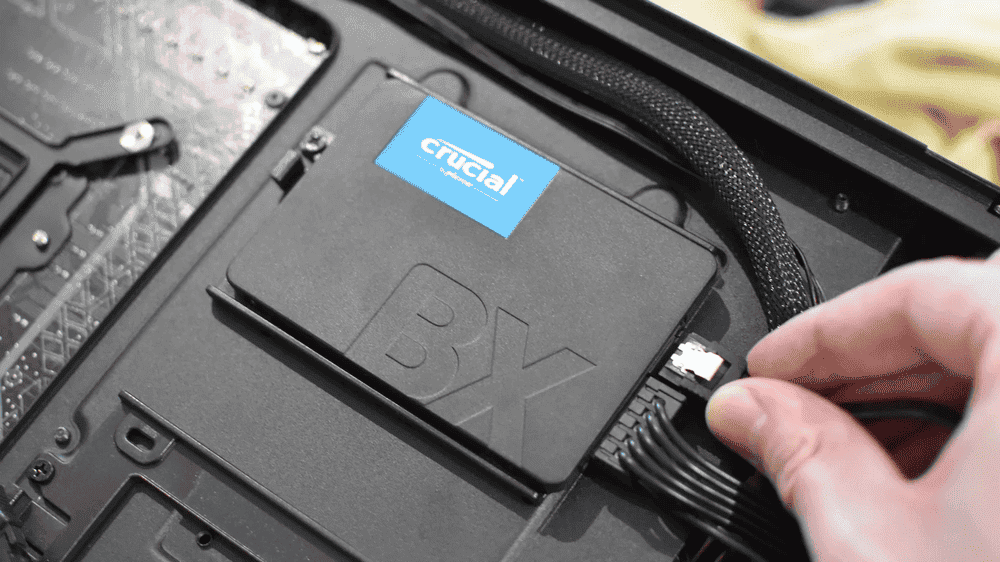
- If you’re installing a SATA SSD, check the SATA Cabe and make sure it is connected properly to the drive and your motherboard. Make sure that the drive has a SATA power connector that runs through to your power supply. If you don’t have sure, unplug the connections and plug them in again. Those installing an NVMe SSD, make sure you’re installing it in a port that supports the size and kind of SSD you’re installing. However, PCI Express generations should support newer ones, but at lower speeds.
- If you suspect this is a problem, try mounting the drive in a different slot on the motherboard, and use a different cable in the case of SATA drives.
- If you’re installing it on a Laptop, make sure it is connected correctly.
Check If the SSDs are Enabled in Your BIOS Settings
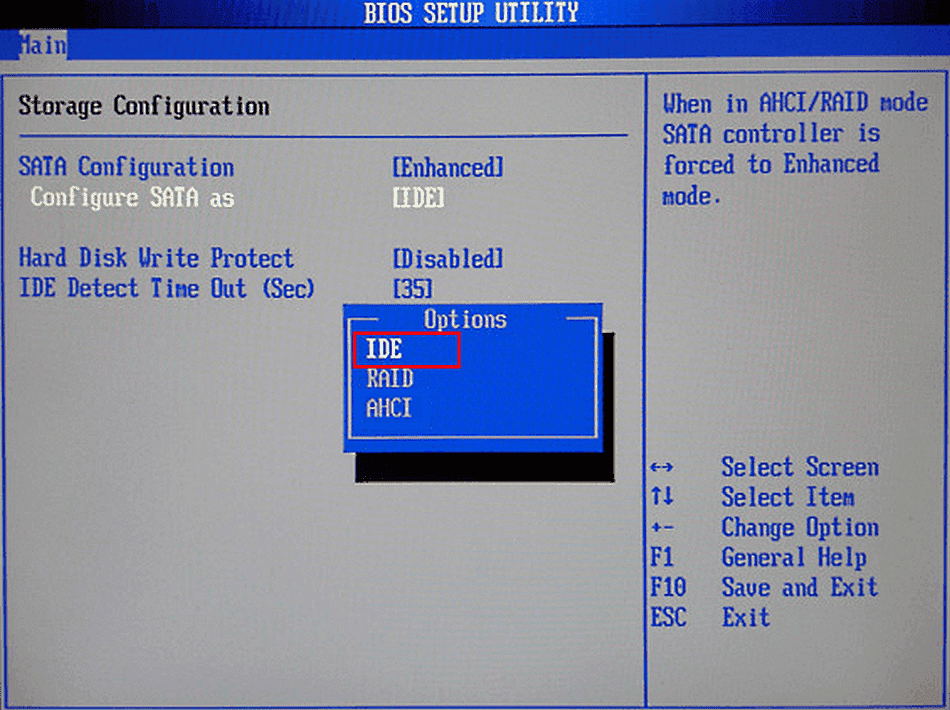
Assuming that everything is fine with the installation, the BIOS settings could be the problem. So make sure how is the behavior of your BIOS when it comes to new Drives.
- Reboot or start up your PC and use your motherboard’s special key to open the UEFI/BIOS. For many, it will be F2 or Del, but it can be any range of buttons. Check your manual or the manufacturer’s website if you’re unsure.
- Look for a section about storage, or configuration. The settings will vary from BIOS to BIOS. If you’re having issues locating the settings, check your manual or manufacturer’s website for help navigating your system’s BIOS.
- If you’re running an older SATA SSD, make sure that the SATA configuration is set to AHCI. Alternatively, if you have trouble with this mode not recognizing your SSD, you can try setting it to IDE or Compatibility Mode. Check if that fixes the issue.
- For some older motherboards, certain SATA ports need to be enabled in the BIOS. Look for any indication this could be your issue, and if it is, enable the SSD ports.
Initialize Your Disk Drive Via Windows Settings
The next step is to try enabling your SSD via the Windows settings. Sometimes certain SSDs are not properly recognized by Windows.
The reasons for it vary, perhaps the SSD is in a distinct file format that is not directly recognized by Windows, or perhaps, it just needs a manual start. If that is the case, you can try Windows native Disk Management Solution to enable it.
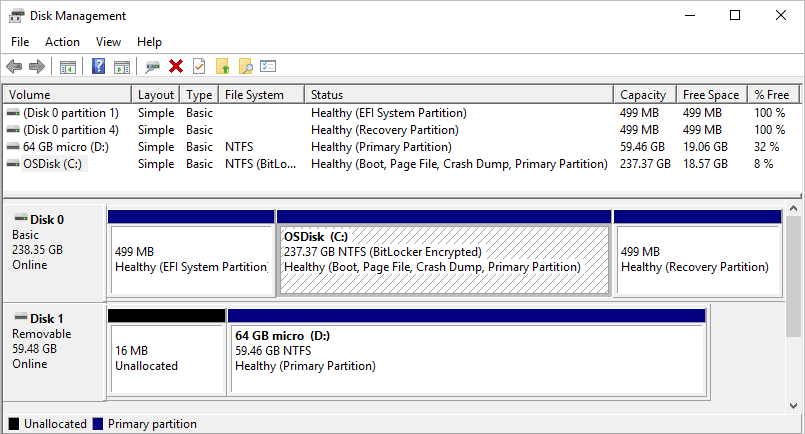
- Step 1 – Select Win + X, and select Disk Management From the List
- Step 2 – Locate your New Drive. You can look for the drive letter, however, the easiest way to recognize your SSD is to check the SSD’s Capacity.
- Step 3 – The app has a graphical helper that will help you to sort out the things. For example, new drives that aren’t initialized will have a black bar along the top of their unallocated space. It will have a small red circle icon next to the drive name.
- Step 4 – Right-click the Drive and Select Initialize Disk.
- Step 5 – Choose your preference for partition style, MBR, or GPT. For modern OS installations and dual-boot, GPT is the best way to go.
- Step 6 – Wait for Drive to finish initializing, then right-click on the unallocated space and select New Simple Volume. Follow the on-screen instructions to create it.
- Step 7 – Your drive should now have the space to install apps and store files and other data.
Change your SSD letter on Windows
The next thing you need to check is if any conflict between drives is causing your SSD to not be recognized. This could happen because your SSD had been installed but the system failed to automatically assign a letter for it. If that is the case, it is just not showing up and we can easily make it appear.
- Step 1 – Press Win + X, and select Disk Management from the list.
- Step 2 – Right-click the SSD you want to change the drive letter for and select Change Drive Letter and Paths.
- Step 3 – If your drive has a letter, select Change. If it does not have one, select Add.
- Step 4 – Select a new drive letter from the drop-down menu. If your drive already had a letter, you may want to remove that too.
- Step 5 – When you’re done adding, changing, or removing letters, select OK to finish. Then reboot your PC and see if the drive is recognized.
Format the Drive
The final thing you can try is to format the Drive through Disk Management to make sure it appears.
- Step 1 – Choose Win + X, and select Disk Management from the list.
- Step 2 – Right-click the Drive you are having trouble with and select Format.
- Step 3 – Select the file system that you want to use (for most people, it will be NTFS), then choose the default allocation size unless you have a very good reason not to.
- Step 4 – Tick the box for a Quick Format and Press OK to Begin.
- Step 5 – Wait for the Format to Finish, then reboot the PC and see if the drive is recognized.
Conclusion
If none of the methods above works for you, then you might be suffering a hardware problem. The best way to check if it’s something related to your new SSD or to your PC is to try another drive. If you try another drive and it works fine, then your new SSD might be the problem.


