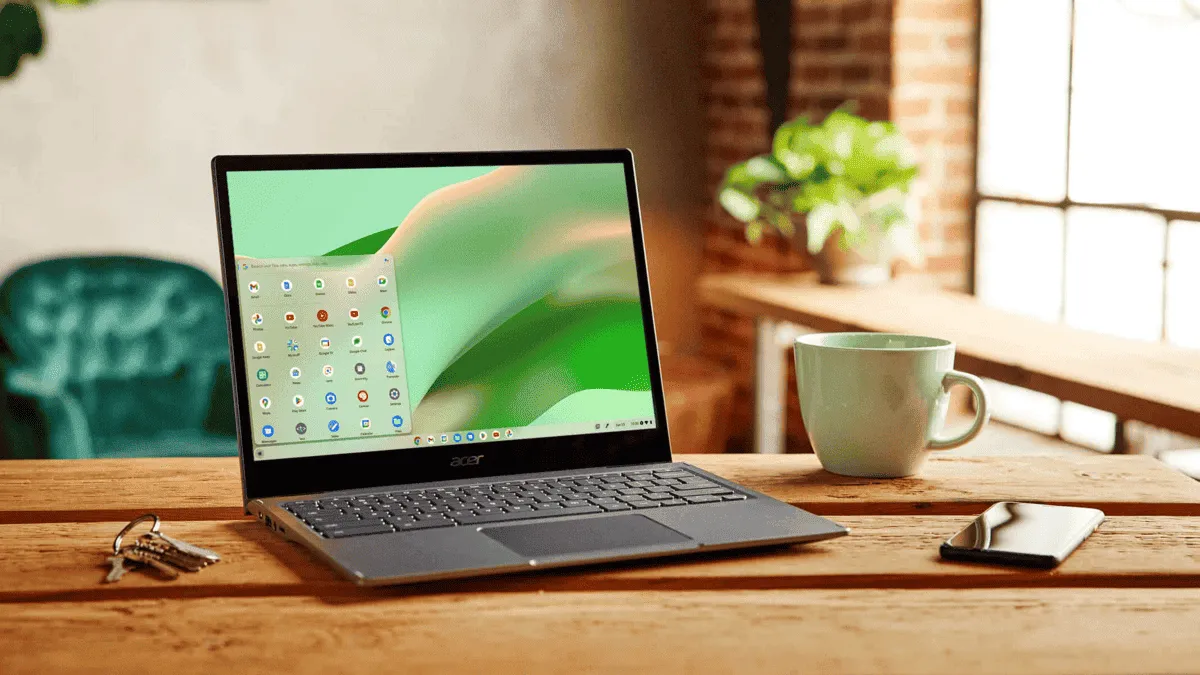
Chromebooks aren't still as popular as Windows or MacBook laptops in certain regions. However, for some markets, these laptops have become great and valid alternatives for those who need compact laptops with a simple OS that can get most of the tasks done without issues. Although they're very nice products, they are still bound to have issues. Some common issues plague Chromebook users with a higher frequency than others. You can find it difficult or even impossible to solve some of these issues, but with the right knowledge, you can do so. (Via: DigitalTrends).

From issues with system updates to internet connectivity, there are ways to fix these issues. Through this troubleshooting article, we will list some of the most common issues in these devices and help you to fix them.
The Diagnostics app
Nowadays, Google Chromebooks provide an interesting app for troubleshooting. It is called the Diagnostics app and can provide valuable information when you need to narrow down your issue, monitor a specific problem, or know exactly what hardware needs repairs or replacement. Here are some of the main benefits of this app:
- You can check the model and motherboard information.
- See information about battery health, cycles, and how much capacity it has lost since its first use.
- See data on CPU usage, speed, and temperature.
- Check your current memory.
- Run tests on all these features to automatically troubleshoot for apparent issues.

It is worth noting that the app is relatively new, So Google may deploy more features shortly. If you're facing issues with your Chromebook and don't know exactly how to fix your issues, the diagnostics app is a good starting point. Refer to the tutorial below and learn how to use the Diagnostics app assuming you're running the latest updates on your Chromebook.
How to operate the Diagnosis App
Step 1: The diagnostics tool does not appear in the app drawer. Select the round Launcher button at the bottom-left of the screen. Use the search box at the top to type in "diagnostics". The app will pop up with an icon that looks like a heart monitor line. Select it.
Step 2: Check your current data and check for any suspicious issues. If you’ve narrowed down your problem to an issue like your battery, or CPU Temperature, check the possible solution.
Step 3: Tests may take a couple of minutes or even 15 to 20 minutes depending on what you are measuring. Battery tests will show basic charging info. Other tests will bring up an itemized list of the functions the test performed. If all the tests go well, you will see a success marker beside each function. If a function keeps showing an error, then that may be the source of your problem. You can choose to Save a session log to record all this current info.
Issue 1: Chromebook Runs Slowly
If you're facing continuous slowdowns with your Chromebook, the best thing to do is to restart to see if the performance issue clears.
Step 1: Select and hold the Power button.
Step 2: The screen dims, and a pop-up appears. Choose the Power off button.
Step 3: Press your Power Button to restart the Chromebook.
Check For a System Update
If that does not work at all, check for a system update. After all, the slowdown issues can be caused by something on the software side. In most instances, a Chromebook will automatically check for updates and install the latest when it's connected to the internet. It will ask you to restart to complete the update. You can manually check by performing the following:
Step 1: Look for the System clock located in the bottom-right corner.
Step 2: Select the Gear icon located on the pop-up menu. This takes you to Settings.
Step 3: Choose About Chrome OS listed on the left.
Step 4: Choose the Check for updates button. This checks for the latest version and installs any updates.
Step 5: If your Chromebook updated, select the Restart button to complete
Issue 2: Your Chromebook keeps restarting
This is another problem that might indicate a serious issue with the operating system. One of the first things you need to do if you're facing constant restarts it's to perform a full recovery. There are three different ways to wipe your Chromebook:
- Hard Reset: This will reset the hardware settings. Such as a keyboard and camera.
- Powerwase: This resets the Chromebook back to its factory settings. Returning it to its out-of-the-box state. You will need to link it to your account, redownload apps, and etc.
- Recovery: This will reinstall Chrome OS from an external source, like a flash drive. Recovery is required when Chrome OS is damaged/corrupted and cannot be repaired.
How to Recover your Chromebook
With this method, you need the Chromebook and a separate computer with access to the Chrome Browser. You will also need a portable SD or USB drive with 8 GB of Space or More for Saving Data. Some Chrome OS devices have a physical recovery button that can be pressed with a paper clip.
There are two main recovery options. One uses the internet, the other uses a USB drive. From the steps below, you will learn how to recover your Chromebook via a USB drive.
- Step 1: Install and launch the Chromebook Recovery Utility extension in Chrome on a separate computer.
- Step 2: Choose the Get Started button in the pop-up window.
- Step 3: Enter your Chromebook’s model number or select it from a list.
- Step 4: Choose Continue.
- Step 5: Select the recovery media type and click Continue.
- Step 6: Choose the Create Now button.
Recovery Utility
Use the storage to move settings to the Recovery Utility. It may be a good idea to keep a backup of your files. To use your flash drive or card again, you will need to open the Recovery Utility app.
- Step 1: Select the Gear icon located at the top.
- Step 2: Select the Erase recovery media option listed on the drop-down menu.
- Step 3: Choose the arrows next to Select and select the storage device.
- Step 4: Choose Continue.
- Step 5: Verify the data you’re erasing is correct and click Erase now.
Google’s app will erase the device so you can use it for other purposes.
Issue 3: Chrome OS is Missing or Damage Issue
This error will pop up after booting the machine. Since it stops accessing the OS in any way, resetting the Chromebook becomes hard. So you will need to insert a recovery drive. Then, go back to the previous Recover your Chromebook instructions.
Issue 4: Errors when trying to Update the Chromebook
The first way to troubleshoot this issue is to check your internet connection. Ideally, a strong Wi-Fi or Ethernet connection might fix this issue. Don't use your cellular data connection. You can also restart your Chromebook to help resolve connection issues.
Step 1: Press and Hold the Power Button.
Step 2: The screen dims, and a pop-up appears. Choose the Power Off option.
Step 3: Press your Chromebook's Power button and turn it back on.
Issue 6: Can't download updates
If you're facing the issue when you try multiple times to download the same update and it does not work, try to reboot the Chromebook. If a restart does not work, sign out of your account and Powerwash your Chromebook. This will wipe away your settings and hard drive. So make sure to save everything to the cloud before you begin.
How to Powerwash your Chromebook

- Step 1: Sign out of your account.
- Step 2: Press and hold Ctrl + Alt + Shift + R.
- Step 3: Select the Restart Option.
- Step 4: Choose the blue Powerwash button in the pop-up window.
- Step 5: Choose the blue Continue button to confirm.
- Step 6: Follow the steps displayed on your Chromebook.
Issue 7: Constant Errors Appear When I Try to Sign Up
If you're having difficulties when trying to sign into a Chromebook. Rather than going through each of them, we suggest you use Google's handy walkthrough for dealing with these errors one at a time. Generally, we advise that you double-check your password, username, and Google account to make sure all are up to date and functioning as expected.
Issue 8: Microphone Stops Working Suddenly
This is an issue when your speakers are working fine, but no one can hear you speak, all they hear is static. Try hard resetting your Chromebook and make sure that Chrome OS is fully updated. You may also need to switch your meetings to Google Meet.
Issue 9: Your Camera Stops Working
If the camera suddenly does not work on Chrome OS and prompts you with an error, the issue may be software-related. You can restart your Chromebook, and use an alternative app to test if the problem is isolated or happens with all apps. Finally, if nothing works you can try to Powerwash your device.
Issue 10: Your Chromebook Won't Turn on or Charge

This could be a battery issue, but you need to check if it's not related to the Chromebook's connection to a power outlet. There are some things you can try before going deep or taking your device to a repair shop.
Give it time to charge
If the Chromebook is completely dead, you can try to plug it in and wait a few minutes to see if the device will get some charge. Sometimes, it does not have energy even for booting. Give it a good 30 minutes before attempting to boot the device again. If it's not charging while connected to a power outlet, try a nearby outlet to see if the issue is related to the charging outlet. If not, try plugging it on another power source.
Issue 11: Bluetooth isn’t connecting
The first thing to be aware of is that not all Chromebooks come with Bluetooth. So check your device's specifications and make sure it has Bluetooth. If the icon appears in on the pop menu when you select the System Clock, a blue icon means the Bluetooth component is enabled. A Gray icon shows it's disabled. Click the Gray Bluetooth icon if it's disabled.
If you're having Bluetooth connection issues, you can remedy this by turning the feature off and on. This will reset the connections. Just make sure all Bluetooth codes, if used, are still accurate, and the devices are properly paired. Never forget to check your surroundings. After all, objects blocking the way and distance can cause some connectivity issues. Sometimes a quick refresh can set things right without too much frustration.
Issue 12: Can't get my printer to work with My Chromebook
If you've connected your printer to the Chromebook and it still does not work, you can try some quick tips to fix it:
- Go to your Chromebook's Settings and make sure your printer's information is correct. If it's all correct, go to the next suggestion.
- Remove the printer from your Chromebook and then add it again.
- It's also possible that your printer's firmware needs to be updated.
Conclusion
These are some of the most common issues that can happen with Chromebook users. Make sure to check each step if you're having issues that are ruining your experience. The Chromebooks are decent devices for quick productivity tasks and the lightweight OS makes it great for basic tasks and portable use.


Loading