Have you ever heard of the brand Svbony? Probably not. There is a very simple reason for that. You are likely not into astronomy. You probably do not spend your weekends tracking rare birds through a spotting scope. In those specific groups, however, this name is very well known, because they make great telescope gear as it seems. They make specialized lenses too and their gear works much better than the price suggests.

Knowing this, I figured that their optical background might yield an impressive action camera. Astronomy enthusiasts love how much value they get from the brand's budget-friendly equipment, and it seems like the company is trying to pull off the same trick here. Their new pocket-sized option is much easier on your wallet than the heavy hitters in this crowded market.

Summary
- A budget-friendly, 43-gram thumb camera priced near $99 that targets everyday casual shooters.
- Built-in 64GB storage eliminates the need for external microSD cards but slows down file transfers.
- Solid optical performance provides true 4K video at 30 frames per second with decent daytime colors.
- The device features a versatile magnetic mounting system with an included neck strap and a rotating clip.
- Battery life reaches 100 minutes alone or up to 300 minutes when docked in its charging cradle.
SVBONY SVGO M3 Specifications
- Product Name: SVBONY SVGO M3 Action Camera
- Waterproof Rating: Up to 10 meters without a waterproof housing
- Dimensions: 58.6 × 28.6 × 26.7 mm
- Weight: 43 g
- Magnetic Mount: Supported (rear and side)
- Battery Life
- Camera only: Up to 100 minutes
- With charging case: Additional 200 minutes
- Test conditions: 4K/30fps, stabilization off, Wi-Fi off, default settings
- Charging Time: Approximately 90 minutes (5V/1A charger)
- Image Stabilization: 6-axis gyroscope electronic stabilization
- Wi-Fi: 2.4 GHz (2.4–2.48 GHz), IEEE 802.11a/n
- Wi-Fi Power Consumption: 260 mA
- Interface: USB Type-C
- Built-in Microphone: 1
- Built-in Speaker: 1
- Storage: 64 GB built-in memory
- Operating Current: 280 mA
- Standby Current: 2 mA
- Charging Input: 5V / 1–2A (fast charging not supported)
- Operating Temperature: -20°C to 50°C
- Storage Temperature: -20°C to 60°C
Video Features
- Video Mode: Standard recording
- Recording Resolutions:
- 4K (3840 × 2160) at 30 fps with stabilization
- 2K (2560 × 1440) at 30 fps with stabilization
- Video Segment Length: 1, 3, 5, 10, or 15 minutes (default: 10 minutes)
- Image Stabilization: On / Off
- Video Format: MP4
- Video Compression: H.264
- Bitrate: 25 Mbps
Photo Features
- Photo Mode: Standard
- Photo Format: JPG
Audio
- Audio Recording: On / Off
- Audio Prompt: On / Off (default: On)
System Settings
- Timestamp Watermark: On / Off
- Status LED: On / Off (default: On)
- Image Rotation: On / Off (default: Off)
- Language Support:Automatic (matches phone language), or English, French, Spanish, German, Italian, Simplified Chinese, Japanese
- Format Storage: Supported
- Factory Reset: Supported
- Auto Power Off:While charging: Powers off after 5 minutes by defaultOn battery: Enters sleep mode after 1 minute by default
- While charging: Powers off after 5 minutes by default
- On battery: Enters sleep mode after 1 minute by default
Pricing and the Everyday User
Let's look at the actual costs involved because price matters to almost everyone. The leading brand names in the action camera market are definitely not cheap. If you want their latest flagship models, you will easily spend four or five hundred dollars. I don't participate in extreme mountain biking, and I have absolutely no plans to climb Mount Everest in the near future. My primary use case for an action camera is far more mundane. I mount it to my handlebars when I take my bicycle out for morning rides.
To be completely honest, I don't use it to capture cinematic downhill stunts. I just want to clearly read the license plate of any car that passes me a little too close on narrow roads. If a careless driver runs me off the blacktop and causes a bad spill, the last thing I want to worry about is destroying an expensive piece of filmmaking gear. I simply don't need a premium device for that kind of daily tracking. At around $99, this tiny option fits that specific role perfectly.
Moving Beyond the Spec Sheet
The consumer camera world is full of people who immediately dismiss a new release based purely on its published technical specifications. Folks often call them pixel peepers. These individuals don't actually care about the creative quality of your final videos. In most cases, they have never even held the physical device they are criticizing on online forums. Yet, they claim to know exactly how it will perform because they read a data chart.
I am definitely not one of those people. Right now, this little thumb-sized shooter is attached to my bike frame for an upcoming afternoon ride. I have spent the last few days shooting a handful of test clips around my property, and the resulting footage looks surprisingly clean. The colors are bright, and the overall image clarity is more than adequate for casual documenting.

Hardware Design and First Impressions
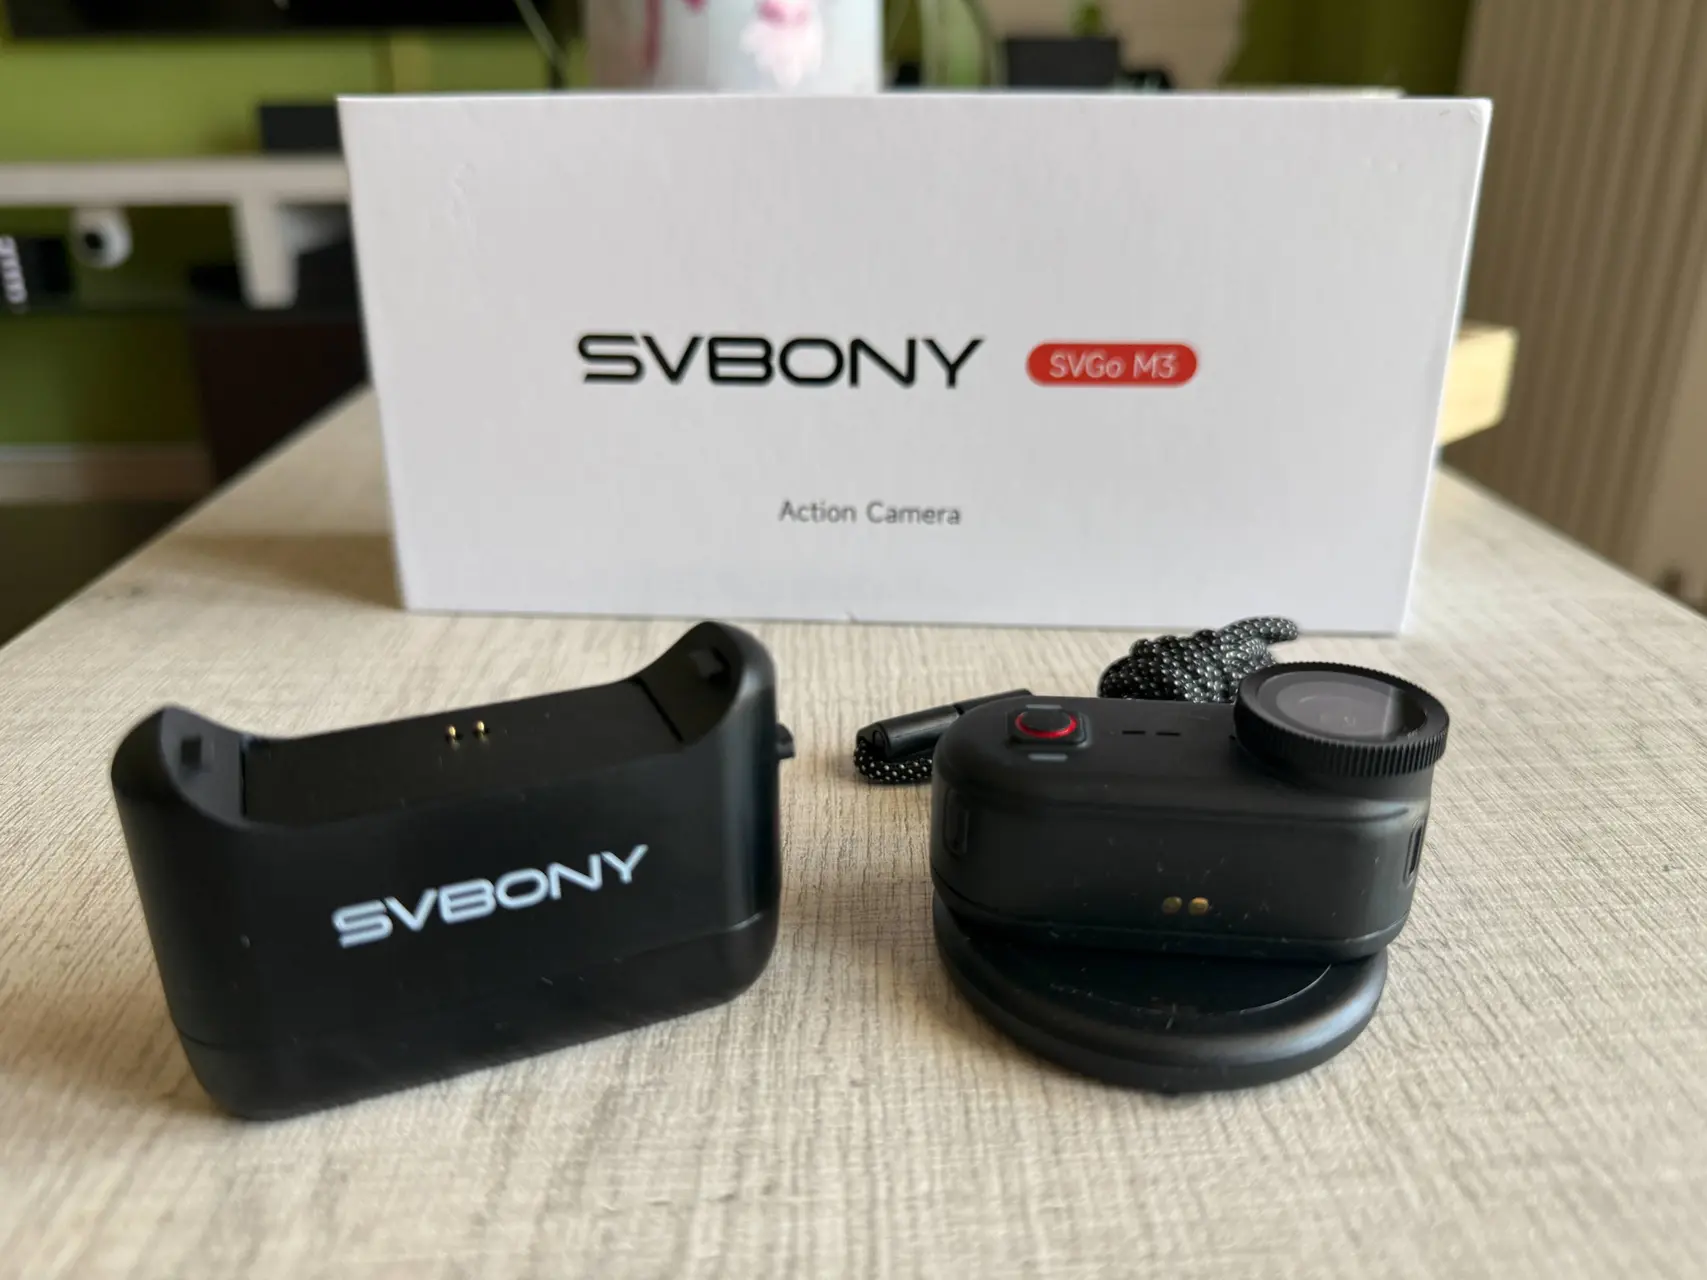
The overall physical setup is remarkably straightforward. The actual thumb unit easily separates from its larger plastic charging cradle. The standalone camera is incredibly light, weighing in at just about 43 grams. This minimal footprint makes it easy to carry around without noticing any extra bulk.
Operating the hardware requires almost no learning curve. The top edge houses a standard USB-C port protected by a small, water-resistant rubber flap. The front face features a single, prominent control button flanked by two small indicator lights. A green light lets you know whether a recording is currently active, while a blue light tells you if the local wireless connection is broadcasting. The entire back panel consists of a strong magnetic plate that snaps securely onto various mounting accessories. It looks modern, feels robust enough for daily use, and avoids unnecessary complications.

Real-World Battery Life and Mounting Options
The standalone thumb module delivers roughly 100 minutes of continuous recording on a single charge. As it happens, my typical cycling routes usually take a bit longer than that to complete. When you dock the camera back into its modular charging base, your total runtime jumps up significantly to around 300 minutes. On my very first outdoor excursion, I decided to mount the entire combined assembly directly to my bicycle handlebars to see how it handled the road.
I quickly discovered that keeping the camera docked in its cradle during high-motion activities isn't the best approach. The internal connections just weren't designed to handle significant road vibrations or sudden jolts while attached to that larger base. If you are taking a slow cruise along a smooth boardwalk at five miles per hour, the full setup works fine. For regular road riding, you really want to detach the main thumb camera and mount it by itself.
While that cuts your continuous recording window down to that 100-minute mark, the camera performs beautifully when isolated from the bulkier base. Svbony also includes a magnetic neck lanyard in the box, which lets you wear the device flat against your chest. I used this wearable disk mount while walking down the beach front of Patras (my hometown in Greece), and it kept the horizon surprisingly steady.

Audio Performance and App Integration
The built-in microphone delivers acceptable results, though it leaves some room for improvement. These devices are always engineered as cameras first and audio recorders second. The vocal track sounds crisp enough when you are standing still or walking through a quiet environment. However, if you hit a sudden pothole or ride over a rough patch of gravel, the microphone captures a noticeable clicking sound from the physical impact. This isn't a major dealbreaker for me, as most casual creators end up muting the ambient track and overlaying background music during editing anyway.
I generally dislike having to install dedicated software on my phone just to use a new piece of hardware. Fortunately, you can operate this camera completely manually once you have adjusted the internal settings to your preference. The companion mobile application is called Vipulse (available for iOS and Android), and the user interface is clean enough to navigate easily. My only real complaint is the naming convention. I really wish they had labeled the software something recognizable like "Svbony Action" in the app store. Six months from now, I will probably look at that vague name on my screen and completely forget what device it controls.
To establish a link, you hold down the main recording button for a few seconds until both the blue and green lights begin to flash. Once you connect your smartphone directly to the camera’s local hotspot, the app opens up a live preview screen. Clicking the gear icon in the top corner brings up your basic configuration options.
From there, you can easily toggle the internal microphone off, flip the lens orientation, or add a digital timestamp to your files. There is also an option for loop recording, which automatically overwrites older footage when the internal storage gets full. I choose to keep that turned off because this device comes with 64GB of built-in memory, which provides plenty of space for my typical clips.

Managing Your Video Files
The image stabilization system is another setting you will find inside the application. I highly recommend leaving the anti-shaking toggle enabled. It definitely puts an extra drain on the built-in battery, but the noticeable jump in smoothness makes the trade-off worthwhile.
One detail that really impressed me was how the camera handles computer connectivity. I originally assumed I would be forced to transfer everything through the mobile app over wireless channels, which can be painfully slow for large video files. Instead, you can just plug the device directly into a laptop using a standard cable. When I attached it to my MacBook Air and hit the power switch, the system recognized the camera immediately as a standard storage drive.
Interestingly, the computer detects the internal hardware as a Linux Foundation webcam interface. Seeing a budget-friendly optics company play nice with open standards is a huge plus in my book. The storage directory opens up like a regular flash drive, allowing you to drag your raw video files directly onto your desktop without any proprietary desktop software getting in the way.

Final Verdict
The device functions quite well if you keep your expectations aligned with its price point. It balances a low financial risk with a highly functional, lightweight design that handles daily recording duties with ease. It is an excellent choice for low-impact outdoor activities like casual trail hiking, family vacations, or capturing your kids playing sports in the local park. The actual video quality is quite sharp for those everyday memories.
That said, it isn't a rugged tank built for intense mountain biking or heavy impacts. If your main goal is filming high-speed trail runs or extreme downhill descents, you will likely need to look at specialized cycling options or invest in a heavily armored alternative. But if you simply want a compact, reliable point-of-view camera to document your daily routines without spending a small fortune, this small shooter offers a lot of practical value for your money.
You can buy the full SVBONY SVGo M3 package from the official website for 99,99$.
Popular News



Latest News
Loading