Technology is evolving and the days of using scanners to scan document are gradually fading out. Now you can even use your phone to scan documents on the go. In this guide, I will show you how to use your iPhone to scan documents in a few minutes and then send it over to whoever you want. You can also save it on your phone or even print it.
Most people don't actually know that they can use their smartphones to do just more than making call, taking pictures, playing games and the rest of the few things that we generally use of phones for. At times, it is a bit tedious to fill a form, go searching for a scanner to scan it before you can use it for which ever purpose you want. Meanwhile, this can easily be done in a few minutes on your mobile phone.
You can do this on your iPhone or on your iPad. All you have to do is to use the Apple Notes App. In the notes app on your iPhone or the iPad, you can use the scan function to scan your documents easily. In this guide, I will also show you how you can use this method to transform your scanned documents into PDF files. With this method you have your scanner with you everywhere you go.
What You Will Be Able To Learn
In this step by step procedure, you will be able to scan documents, convert them into PDF files and transfer it or use it for any purpose that you want to use it for.
Unlike other apps that just take pictures of the document or just a picture of the paper, this new method actually scans the documents like a real scanned document. You can also filter the document into a black and white format, sign with your signature, combine multiple pages into one PDF file. So without further ado, let's get started
Let Us Scan Our Document With The iPhone
To make things easier, you first need a contrasting background. The paper that has the document printed on is definitely white, so you will need to use a background that is not white. I recommend something brown like a table interface, black or maybe red. This is important because it helps the phone camera get the accurate edges of the paper. You can check from the image below to understand this well.

Let us go through the process Now. Every step I mention will follow with an image to help you understand the step well.
- First open the Note App on your iPhone. On the bottom right corner of the Note App, you will find an icon that looks like a paper and a pen. Tap on that to start a new note.

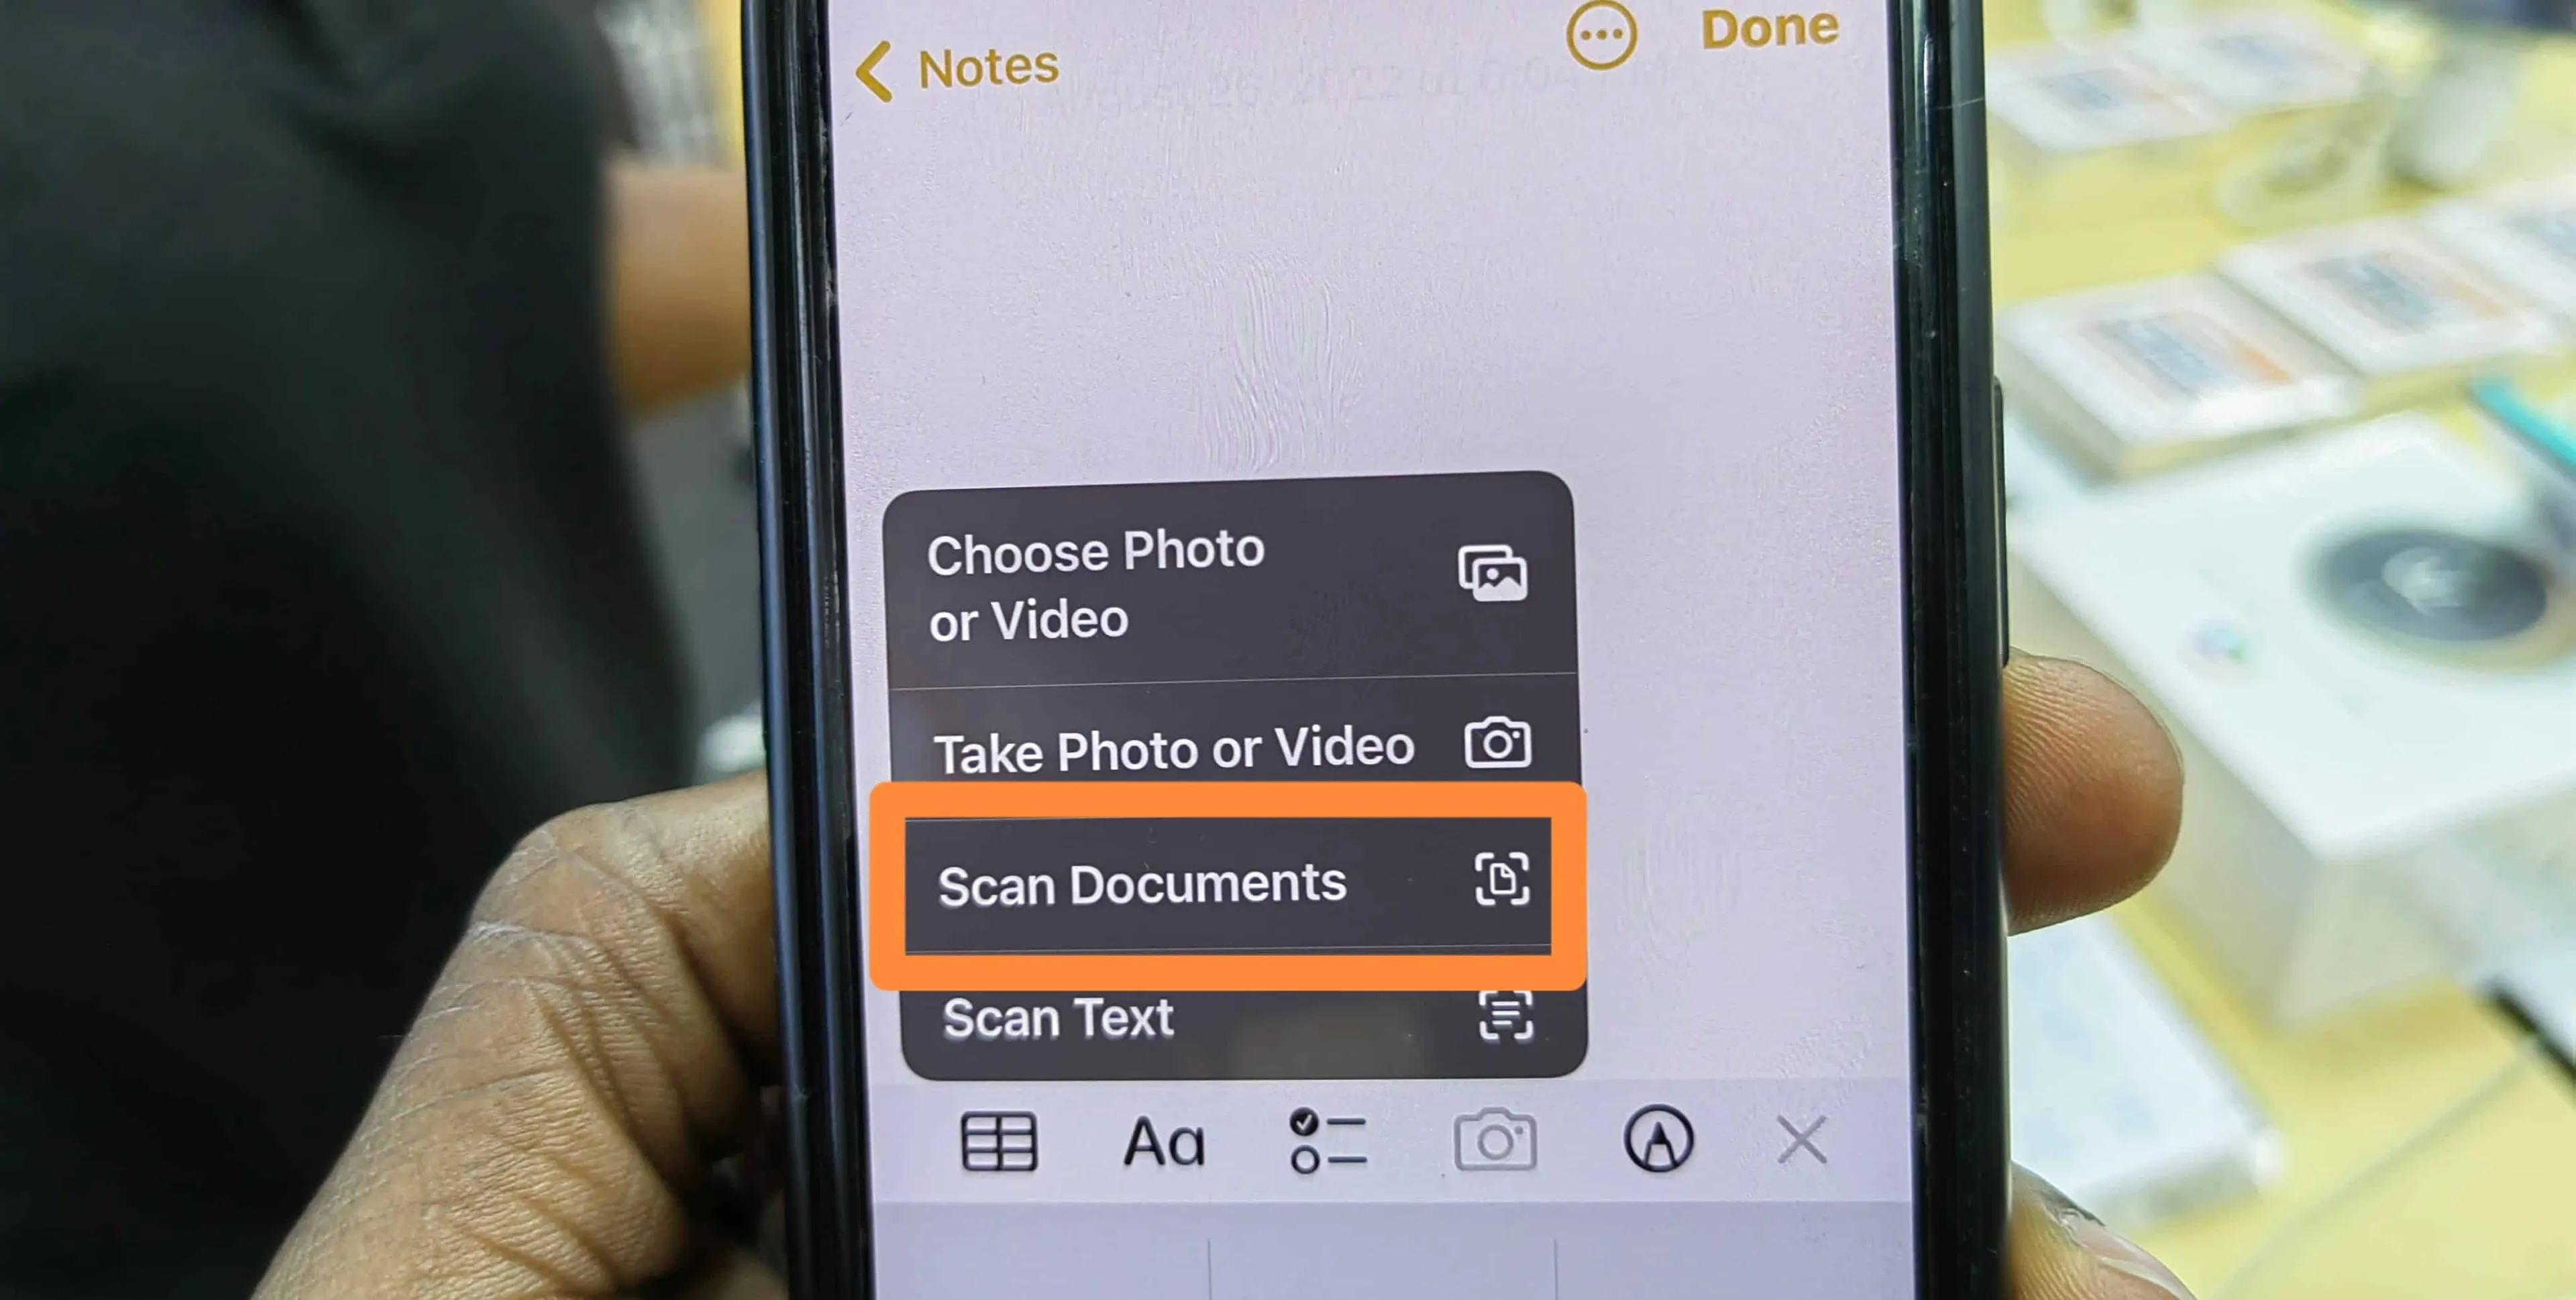
- Next, click on the camera icon within the list of pop up icons like the image below. You will then tap on the 'scan document' option.
- Now place the document that you want scan on a flat contrasting surface. Point your iPhone onto the document. An orange highlighted box will appear around the edges of the document. Some few seconds after the highlight appears, the scan will be taken automatically. If it does not automatically take the scan, you can tap on the shutter button to take a manual scan. You can also take a manual scan using the volume down key. You can take multiple scans at the same time. This will automatically create multiple numbered pages for your documents. The following images will give you a visual representation of the steps above.


- If the scanned document does not look straightened, you can drag from the edges to make it straight.
- After the scan is successfully completed, you can tap on 'Done' to complete the process.
Your Result should look similar to the result below.

Now Let Us Edit Our Document
Next, I will show you how you can edit your document, export it in PDF format, rename the document, print it out or even send it via email
- Renaming : You can easily rename your documents by tapping on the file name above the scan. Just input the name you will like to call your document and tap on done.
- Adding a page: After saving the document, a plus sign will appear below the image. You can just click on that to easily add a new page.
- Cropping your document: The crop icon looks like a square, just click on the icon. You can the drag the sides of the square shape until you get the desired part of the image you want to crop.
- Sharing or printing your documents : To share your documents, tap on the export icon. The export icon is located at the top right side of the document. After tapping on it, different options will appear. Within this list, you will get the option to share as a PDF file. You can also click on Print to print the document via a connected printer.
- Signing your signature on the document: In the options that appear after you click on the export icon, you will also find one option labeled 'Markup' tapping on this options allows you to add a signature you have already saved or you can select the 'new Signature' option to add a new signature.
If the signature size is too small or too large, you can drag from the edges outer or inner to enlarge or reduce the size. You need to do this accurately to fit well on your document.
If you have been able to do this, congratulations!!! You now know how to use your iPhone to scan documents like a real scanner will do. You can also leave your questions below and I will answer them as soon as I can.
Popular News


Latest News
Loading