Top 4 Super-Beautiful iPhone Camera Filters For Amazing Images
AppleSaturday, 29 October 2022 at 11:59
Nowadays, many bloggers retouch pictures and like to use the colour correction function. This is because the function gives good output without reducing the quality of the image. Thankfully, this colour correction function comes with the iPhone. There are a couple of iPhone camera filters for colour correction. Not only that, there is also a much-loved feature in the iPhone's photo album - copy/paste editing points. Using this feature, we can copy and paste the filters that have been adjusted to achieve batch colour correction. With the iPhone camera filters, you can take images with the same phone but they appear different. It depends on whether or not you know the right iPhone camera filter to use.

The final image of a picture edited with the Appetite food filter
Today, we will share with you four very beautiful filters from Amway, each of which is excellent. Each of these filters works better for specific environments. Let us take a look at some of the iPhone camera filters that you can use for amazing images.
1. Cool white skin filter
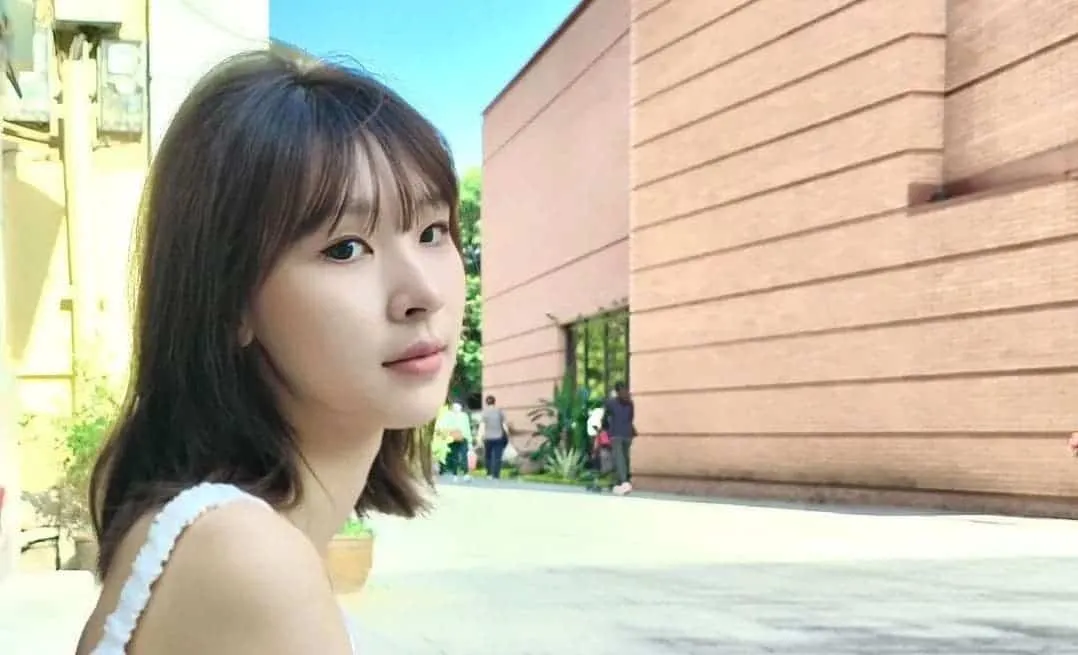
There are some images that come with dark and yellow skin. For such images, when toning in the album editor, we mainly focus on "increasing the sharpness and reducing the colour temperature". We simply adjust the other parameters according to the photo itself. This way, the overall colour of the image remains more natural. The cool white skin filter is for selfie-takers. If you take a lot of selfies, you will more likely use this filter than others. It doesn't matter whether the selfie is an indoor or outdoor image, a single person, a group photo or a partial selfie. As long as the object is a person, we can use this filter to adjust the skin tone.

Before using the filter
Colour parameters for this filter:
- Exposure: +20
- Sharpness: +50 (increases picture brightness)
- Highlights: +30
- Shadows: +30 (makes shadows transparent)
- Contrast: -25 (makes the picture more natural and soft)
- Brightness: +20
- Vibration: +5
- Colour temperature: -25 (lower the colour temperature for cooler tones)
- ・ Hue: +5 (white to red)
- ・ Sharpness: +15
- Sharpness: +15 (enhanced detail for a clearer picture)

After using the filter
After the photos with dark and yellow skin are toned according to the approximate parameters, they can become cold and white in seconds, and the whole picture will be cleaner and brighter. This cool white tone is also relatively clear and natural, giving people a high-level deserted temperament.
2. Appetite food filter
There are some people that never miss getting an image of what they eat. In fact, the camera eats first before they eat. If you are one of them, then you will use more of this filter. This filter mainly adjusts the parameters of sharpness and colour temperature. This makes the photos brighter and more appetizing. Many friends often take pictures of food and record three meals a day in life. As long as you want food photos that create a warm atmosphere, you will never get tired of using this all-purpose food filter.

Before using the filter
Colour parameters for this filter:
- Exposure: +11
- Sharpness: +50 (increases picture brightness)
- Highlights: -50
- Shadows: +16 (makes shadows transparent)
- Contrast: -11 (makes the picture more natural and soft)
- Brightness: +20
- Colour temperature: +22 (increase the colour temperature, the picture becomes warmer)
- ・ Sharpness: +8 (sharpen the photo, make the picture clear)

After using the filter
This gourmet filter can make a dull chaotic waste film for super appetizing and full of atmosphere images.
3. Seaside Healing Filter
This filter is mainly a fresh cool colour filter. The fresh cool colour filter is a cool Japanese style. If you want your photos to have a bright cool colour, you can try this filter more. In the album editor, click the three-ring icon at the bottom and select the fourth filter - fresh and cool colours can be spicy. This filter is especially suitable for photos of the sea in the daytime. The main colour correction idea is to "brighten, reduce highlights, and reduce colour temperature".

Before using the filter
Colour parameters for this filter:
- ・ Fresh Cool Filter: 50%
- Exposure: +11
- Sharpness: +21 (increases picture brightness)
- Highlights: -50
- Shadows: +15 (makes shadows transparent)
- Contrast: -8
- Brightness: +17
- ・Vibration: +27 (increase colour saturation)
- Colour temperature: -40 (lower the colour temperature, the picture becomes cooler)
- ・ Sharpness: +10 (sharpen the photo, make the picture clear)

After using the filter
The colour of the sea in the original camera has been "eaten", and there is no effect seen by the naked eye. The colour of the sea after toning is very transparent and healing. At the same time, it also gives a refreshing feeling!
4. Orange Sunset Filter
The orange sunset filter mainly creates a romantic orange sunset by "increasing the vividness, increasing the colour temperature, and increasing the hue". This gentle sunset filter is suitable for sunsets in most scenes, such as streets, seaside, riverside, etc... If you want a pink-purple sunset, we can increase the value of the hue.

Before using the filter
Colour parameters for this filter:
- Exposure: -13
- Sharpness: 38 (increases picture brightness)
- Highlights: -48
- Shadow: +7
- Contrast: -20 (makes the picture more natural and soft)
- Brightness: -19
- ・ Vibrance: +24
- Colour temperature: +82 (increases warm yellow)
- ・ Hue: +40 (increases pinkish-purple tint)
- ・ Sharpness: +12 (enhances details and makes the picture clearer)

After using the filter
The faint sunset, after putting on the filter, becomes a gentle and romantic orange sunset in seconds.
Conclusion
Friends who like to frequently record their life must have a lot of photos on their mobile phones! If each image is imported into post-processing software for colour correction and retouching, it will be too time-consuming. Taking advantage of the iPhone's own colour grading function, we can "take a picture for 1 minute and retouch a picture for 1 minute". You already have the necessary parameters and their figures in the post. Just capture your image and set those parameters to the figures and you are good to go.


Loading

