Days of Remembering Passwords Are Over! Here’s How to Set Up Google Passkeys
How to's | GuidesTuesday, 09 May 2023 at 05:50
Google passkeys are finally here. And they are bringing us closer to a future where you no longer need to remember your hard-to-crack passwords. But it goes without saying that there are many misconceptions about passkeys, from their usability to their security and privacy benefits.
Long story short, Google passkeys are just the first implementation in making the login process more secure than ever before. In just a matter of months, dozens of industry partners, such as Microsoft and Apple, will finish rolling out the remaining pieces. And the great part is that passkeys are easier to use than passwords, and it takes only a few minutes to set up.
What Are Passkeys Anyway?
Before getting into how to set up Google passkeys, let’s first try to understand how a passkey works. And in this case, Apple provides a very helpful description that offers easier-to-digest info about the technical underpinnings. As Apple describes, passkeys are built on the Web Authentication standard, and they utilize public key cryptography.
During the registration process, the operating system generates a unique cryptographic key pair that gets associated with a website or an app. For every account or website account, passkeys will be generated by the device uniquely and securely.

One of the passkeys that are generated by the operating system becomes public and gets stored in the server. And even though that passkey becomes public, the other one is private, which is required to complete the sign-in process. On an Apple device, there’s the Face ID or Touch ID, which you can use to authorize the use of the private key.
As no shared secret gets transmitted, the server does not need to protect the passkey that’s public. Therefore, passkeys get a different strength level, and the credentials become highly resistant to phishing. Most importantly, platform vendors are working together within the FIDO Alliance, which assures cross-platform compatibility. Most importantly, this login method is about to work on as many devices as possible.
According to FIDO specs, a syncing mechanism is a must. It is required to offer end-to-end encryption, which is how the password syncing mechanism and iCloud Keychain basically work. That means that the private key will remain unknown to the cloud provider. It will only be accessible to you through biometrics or PIN
What Makes Passkeys Safer Than Traditional Passwords
To start with, passkeys eliminate the need to create new or remember sophisticated passwords. It might not be a new revelation for those who use a password manager. However, password managers are not secure as you might have thought. There have been reports of many severe breaches in the past.
And as passwords keep all the vital credentials and passwords in one place, your entire digital life can get exposed once it gets hacked. But with passkeys, that risk basically goes out of the window. Yes, things could likely change in the future when the bad guys develop new tools and methods. However, for now, passkey can provide unrivaled Internet security.
How to Set Up Google Passkeys With Your Google Account
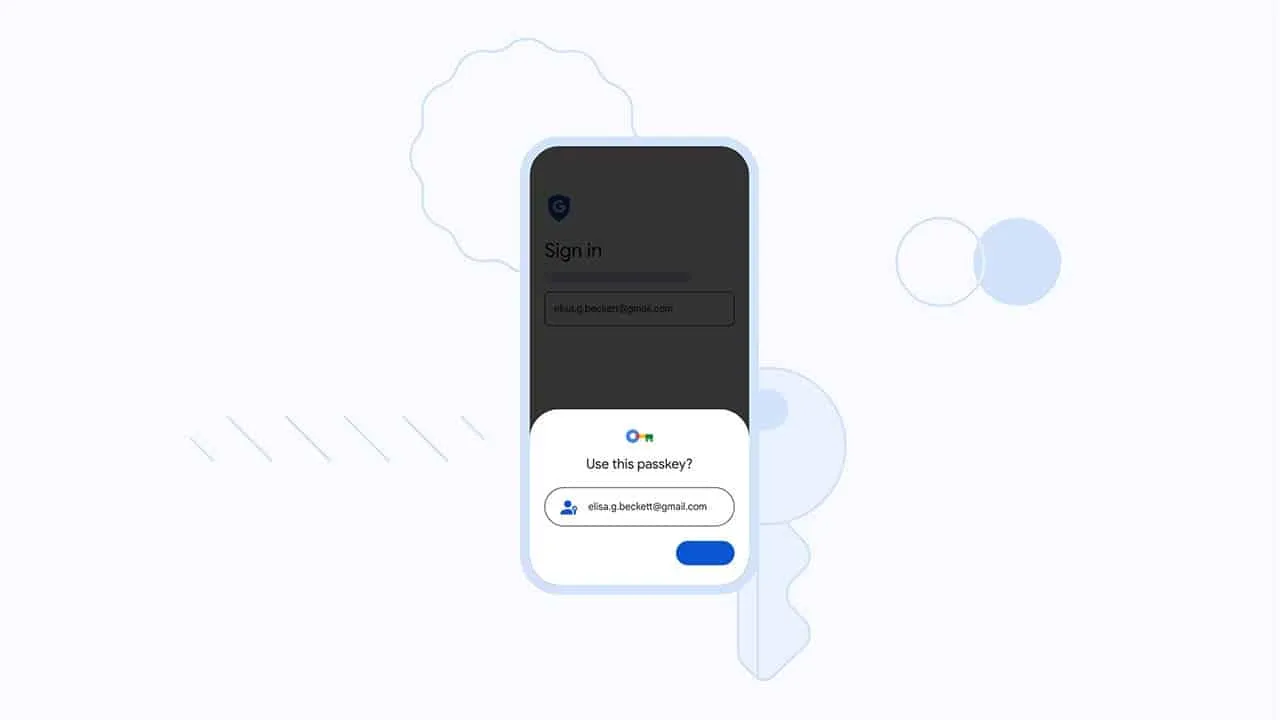
As stated earlier, it literally takes a few minutes to set up Google passkeys. To get started, you just need to log into your account in the traditional way through these simple steps –
- Open the web browser that you regularly use on your Android phone
- Visit the official Google Passkeys page
- Enter the credentials of your Google account
- Click yes when prompted to confirm that you are attempting to log into your Google account
IMG Src: makeuseof
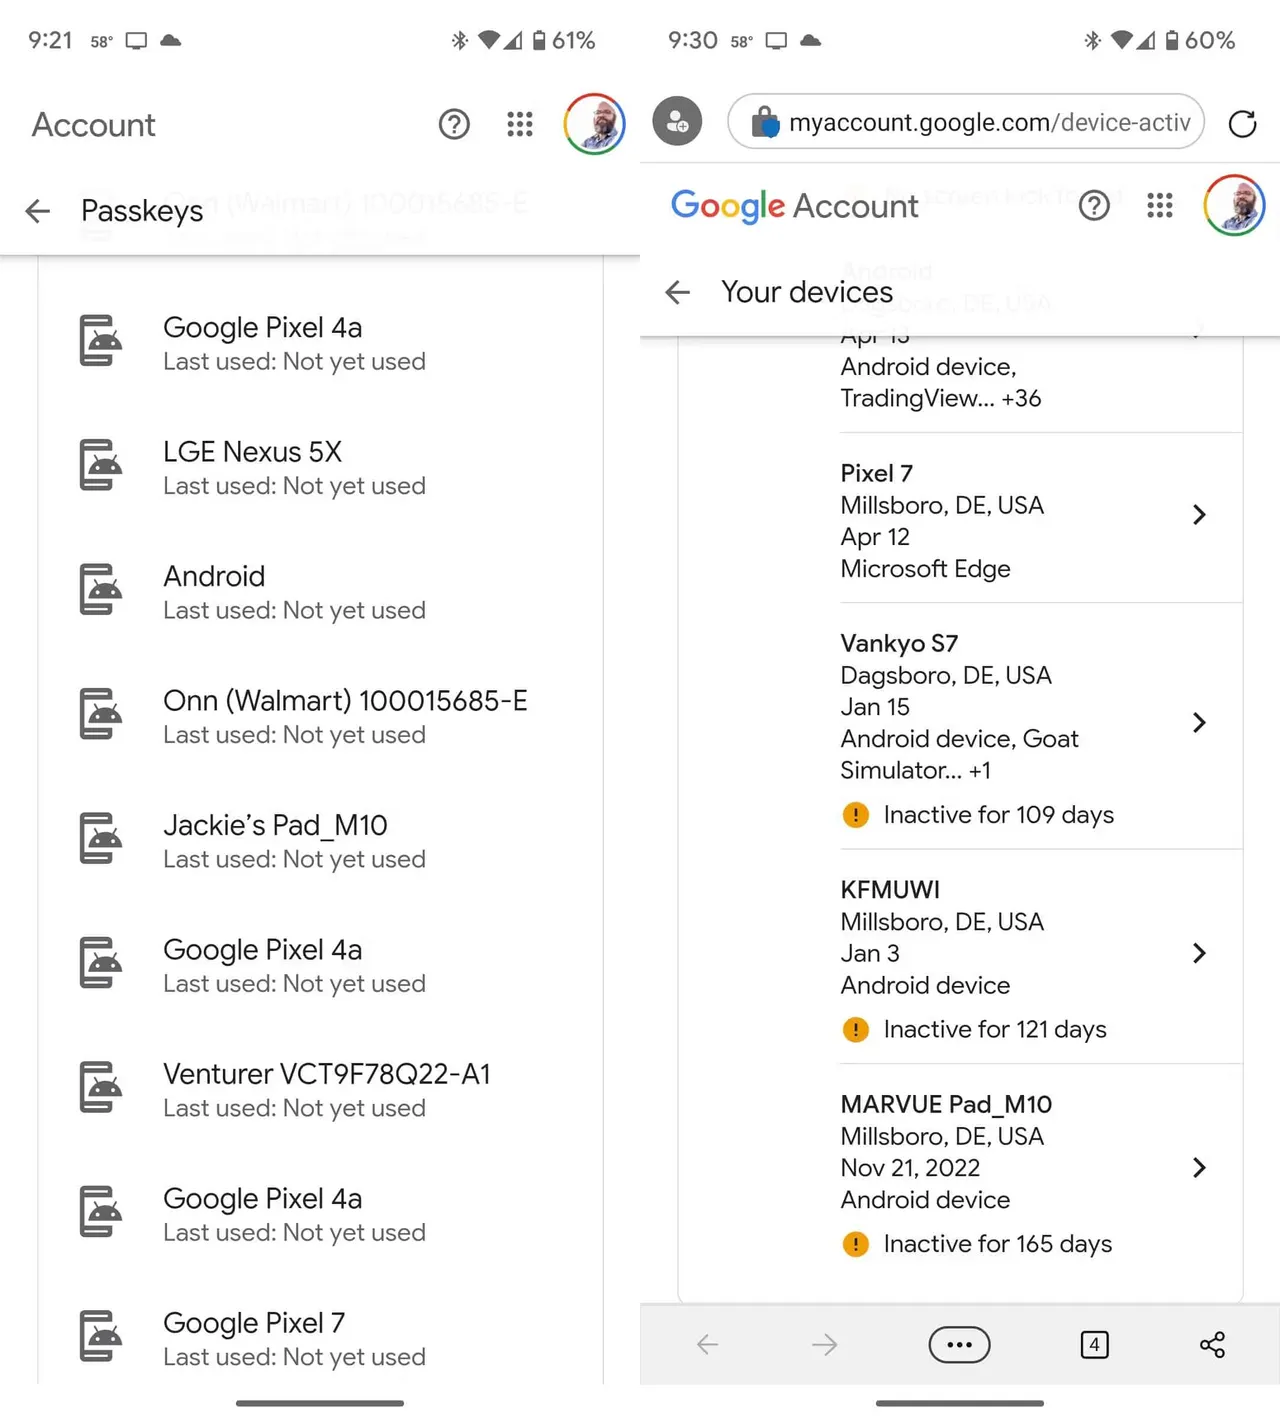
Once you have logged into your Google account, you might not find your specific Android device to set up the passkeys. In that case, you have to do the following –
- Head over to the Automatically created passkeys heading and get into Manage Devices
- Navigate to the X sessions of Android Devices (s) heading and scroll down
- Find your device and select it

IMG Src: makeuseof
When that’s taken care of, it will be time to create Google passkeys with your Android device. These are the steps that you need to follow –
- Return to the Passkeys page and tap Use passkeys
- Get into the Create a passkey for your Google account heading and tap Continue
- There should be a prompt where you just have to tap Done
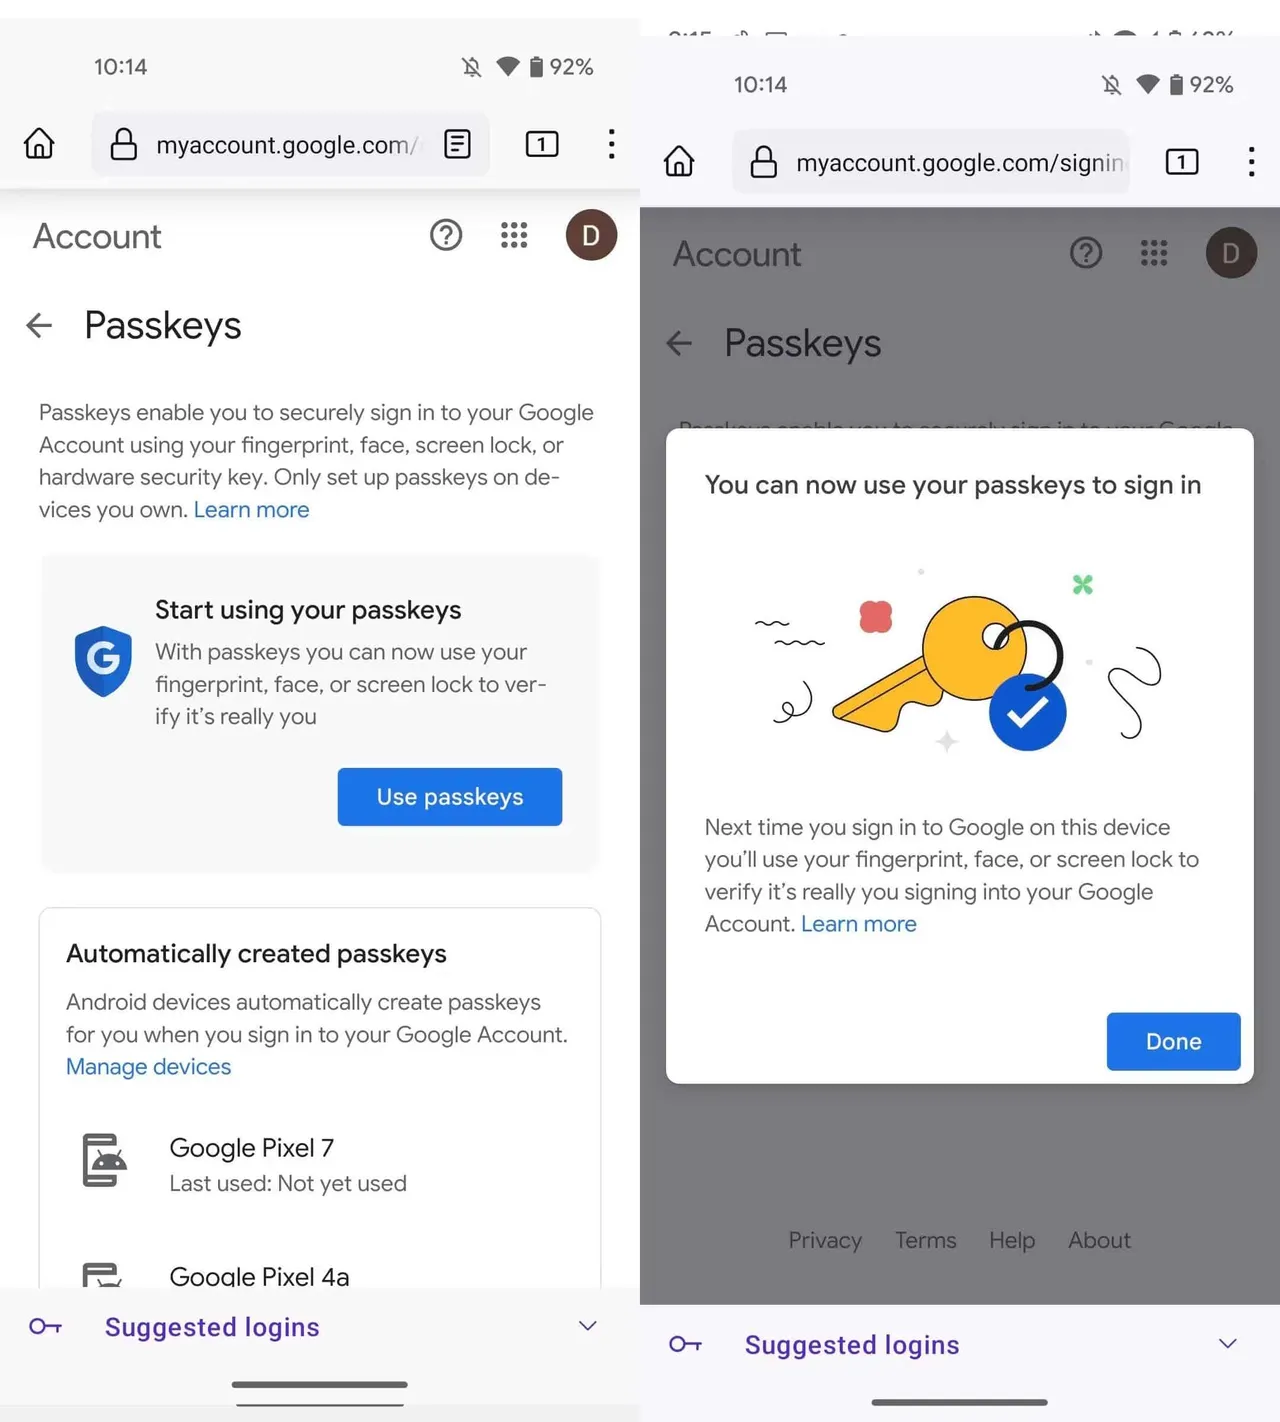
IMG Src: makeuseof
And that’s it! You have successfully set up Google Passkeys on your Android device. You can now use them to get into your Google account on other devices.
How to Use Google Passkeys
With the passkeys enabled, you will need to go through a few simple steps to use them while logging into your Google account. Take a look –
- You should see a new prompt when logging into your account where you need to tap continue
- Press Use a phone or tablet to get the QR code displayed
- Open the camera app of your Android device and point it toward to QR code
- Wait for a while and tap Use passkey
- Press Allow, then Allow again
- Use the device’s biometric data to authenticate the sign-in to your Google account
- Press continue if you want to generate a passkey that’s dedicated to that particular device

With that, you are all done using Google passkeys to get into your account. This login method adds an extra layer of security that will give you an advantage over the bad guys.
Popular News


Latest News
Loading