If you’ve had a PC for more than a few months, you might have noticed that it tends to slow down over time. This can happen because of various reasons, like accumulating files and apps, running multiple apps simultaneously, and having lots of temporary files using up space. It’s a good idea to clean up your PC from time to time to ensure it runs at its best. Here are a few tips to help you clean up and speed up your Windows 11 computer, in case you’re not sure where to begin. Let’s get started.
Restarting your Computer 
Absolutely, the classic “have you tried turning it off and on again?” trick can work wonders. You might have already given it a shot, but if not, restarting your PC is a simple yet effective first step to improve performance, especially if it has been running for an extended period.
It’s quite common for some folks to keep their laptops on without shutting them down, opting to simply close the lid when not in use. However, this practice can lead to a buildup of running apps in the background. If you haven’t done so already, consider restarting your computer by following these steps:
There are several ways to restart your Windows PC, depending on your preference and current situation. Here are three common methods:
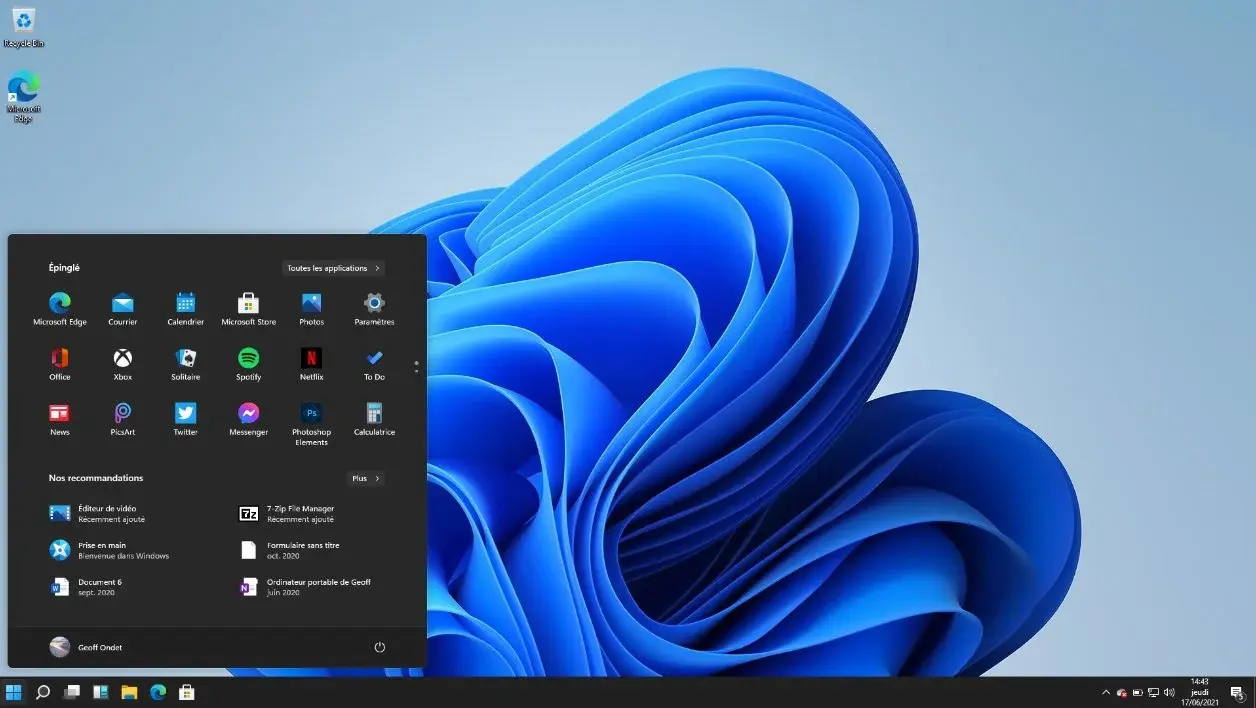
1. Restarting through the Start Menu:
- Click the Start button in the lower left corner of your screen.
- Click the Power button.
- Select “Restart” from the Power menu.
2. Restarting with the Keyboard Shortcut:
- Press the Ctrl + Alt + Delete keys simultaneously.
- Click on the Power button in the bottom right corner of the screen.
- Select “Restart” from the Power menu.
3. Restarting from the Login Screen:
- If you’re already at the login screen, click on the Power button in the bottom right corner.
- Select “Restart”.
Getting Rid of Unnecessary Files
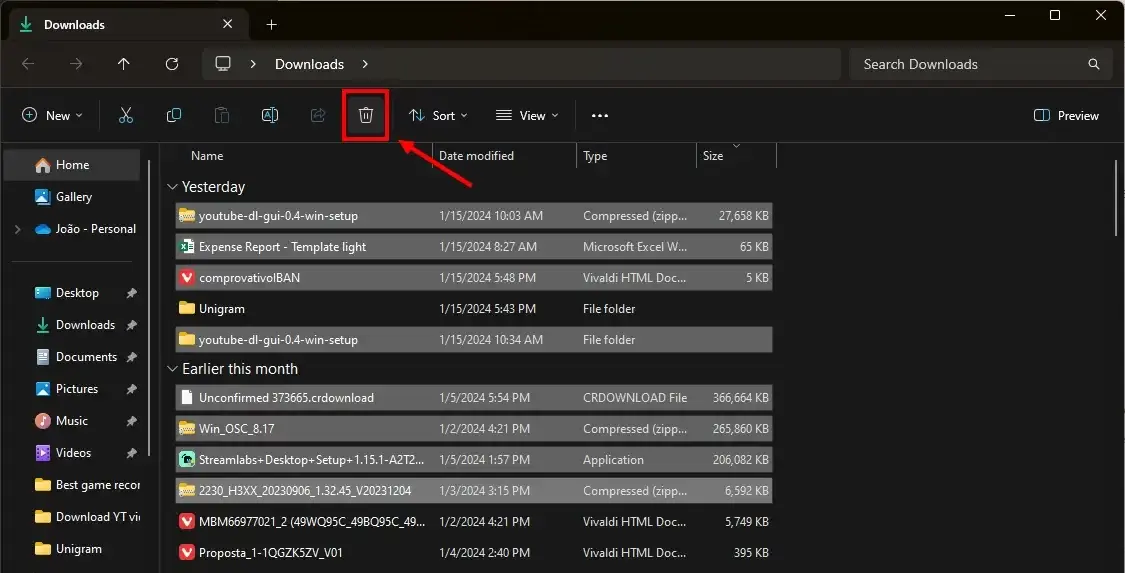
As time goes on, your computer accumulates various files, including ones you intentionally created and others that are temporary files generated by the system for different reasons. It’s a wise practice to clean up these files from time to time to prevent them from affecting your system’s performance by taking up valuable space on your drive.
A good starting point for cleaning up is your Downloads folder. Most of the things you download end up here, and many times, these are files you only use once and never revisit. To clean it up, open File Explorer, select Downloads from the sidebar, and go through your files. Delete anything you no longer need, especially focusing on larger files, as they can have a more significant impact on your computer’s performance.
Using the Disk Cleanup Tool 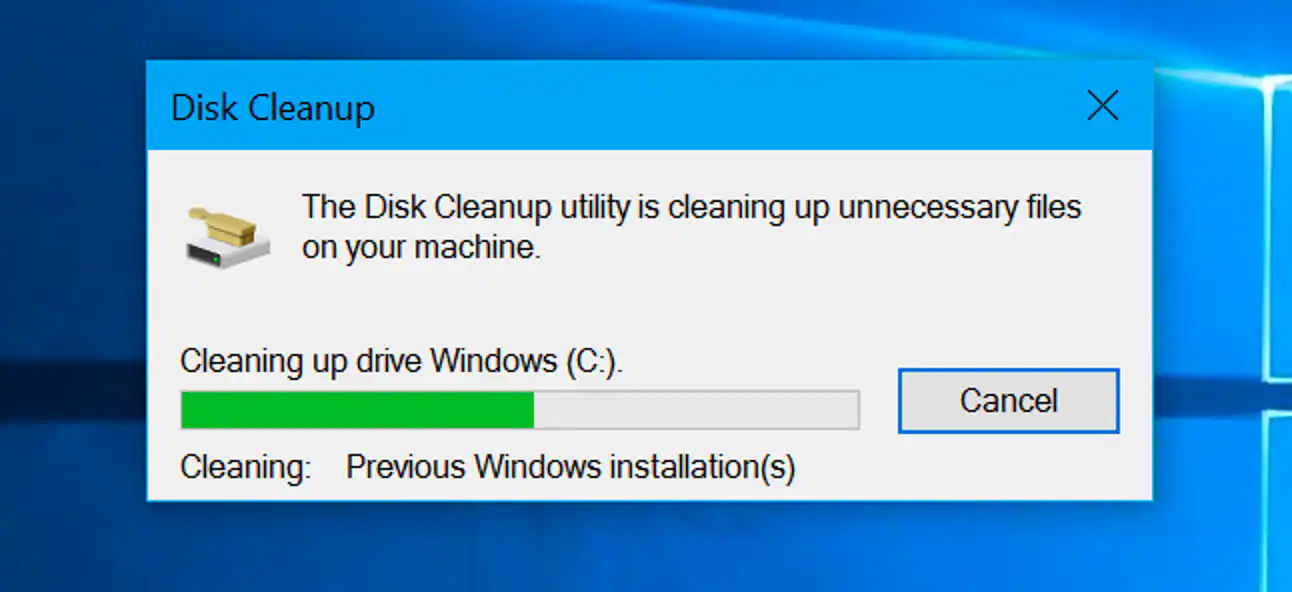
You can also clean up old files using the Disk Cleanup tool, now integrated into the Settings app on Windows 11. This tool can remove temporary files generated by the system, including items you might not be aware of. It’s an excellent method to create more space on your PC, and it’s advisable to run it regularly. Here’s how:
Method 1: Quick Access
- Click the Start menu.
- Type “Disk Cleanup” in the search bar.
- Click on the “Disk Cleanup” app.
- Select the drive you want to clean up (usually C:)
- Click the “Scan” button.
- Wait for the scan to complete.
- Review the list of files Disk Cleanup recommends for deletion. These categories may include Temporary Internet Files, Downloaded Program Files, Recycle Bin, Delivery Optimization Files, and more.
- Select the checkboxes next to the files you want to remove.
- Click the “Clean up system files” button.
- Select the additional system files you want to delete. These might include Previous Windows installations, System Restore points, and more.
- Click the “OK” button.
- Confirm you want to delete the files.
- Wait for the cleanup process to finish.
Method 2: Run as Administrator (Optional)
- Follow steps 1-3 from Method 1.
- Right-click on the “Disk Cleanup” app and select “Run as administrator”.
- Follow steps 4-13 from Method 1.
Additional Tips:
- Consider using the “Analyze disk” feature to find other files that can be deleted.
- Be careful when deleting files, especially system files. Only delete files you are sure you don’t need.
- Empty the Recycle Bin before running Disk Cleanup to increase the amount of space that can be freed up.
Close Unused High Demanding Apps in Windows PC
If your computer seems sluggish, it’s a good idea to see if there are any apps running that might be consuming a significant amount of resources. If you have a resource-intensive game or an application like Photoshop running in the background, it could impact the performance of other apps. To identify which apps are using more resources, follow these steps:
- Using Task Manager: This is the classic tool for monitoring resource usage. Press
Ctrl + Shift + Escto open it and sort the “CPU” or “Memory” column in descending order. You’ll see which apps are consuming the most resources. - Using Power & battery settings: If you’re concerned about battery life, navigate to “Settings” > “System” > “Power & battery” and click on “Battery usage.” Choose a relevant timeframe and scroll down to see individual app battery usage.
2. Close the Offending App:
- In Task Manager: Right-click the app and select “End task.” This instantly stops the app’s processes and frees up resources.
- From the Power & battery settings: Click on the three dots next to the app and select “Manage background activity.” Set it to “Never” to prevent the app from running in the background and draining battery.
Uninstalling Unused Apps in Windows PC
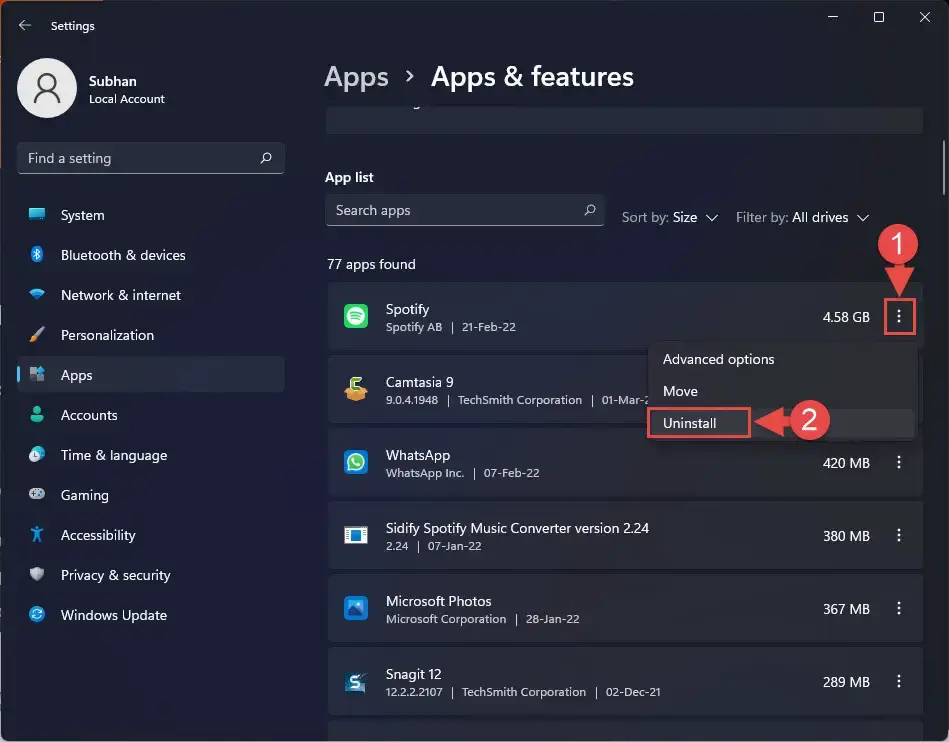
Apart from files, it’s common for apps to accumulate on your system. Often, you may have installed a program for a specific purpose that you no longer require, or you might have an app for an old printer that is no longer in use. It’s advisable to review the apps installed on your system and uninstall the ones you don’t need. There are several ways to uninstall unused apps in Windows 11, depending on your preference and where you find them listed. Here are some efficient methods:
1. Through the Settings App:
- Open Settings: Press
Win + Ior click the Start menu and select “Settings.” - Navigate to “Apps” > “Apps & features.”
- Scroll through the list of installed apps or use the search bar to find specific ones.
- Click on the app you want to uninstall.
- Click the “Uninstall” button.
- Confirm your choice in the pop-up window.
2. Using the Start Menu:
- Open the Start menu.
- Type the name of the app you want to uninstall.
- Right-click on the app icon and select “Uninstall.”
- Confirm your choice in the pop-up window.
3. Utilizing Task Manager:
- Open Task Manager: Press
Ctrl + Shift + Escsimultaneously. - Switch to the “Startup” tab.
- Right-click on the app you want to uninstall and select “Open file location.”
- This will open the app’s folder in File Explorer.
- Right-click the app’s uninstaller file (usually named “Uninstall.exe”) and select “Run as administrator.”
- Follow the on-screen instructions to complete the uninstallation.
4. Cleaning Up Old Programs:
- Open Control Panel: Press
Win + R, type “control panel” and press Enter. - Navigate to “Programs and Features.”
- This will show you a list of all installed programs, including older ones that might not appear in Settings.
- Select the old program you want to remove and click “Uninstall.”
- Follow the on-screen instructions to complete the process.
Disbale Windows Start-up Programs on your PC
In addition to uninstalling apps from your system, it’s beneficial to examine which apps are actively running on your PC when they’re not needed. Many apps create startup tasks, meaning they launch when your computer starts, consuming resources right from the beginning. Examples include Microsoft Edge (even if you use another browser), OneDrive, Steam, and Adobe Creative Cloud. Even if you want these apps on your PC, you likely don’t need them running continuously, so disabling their startup tasks is a wise move.
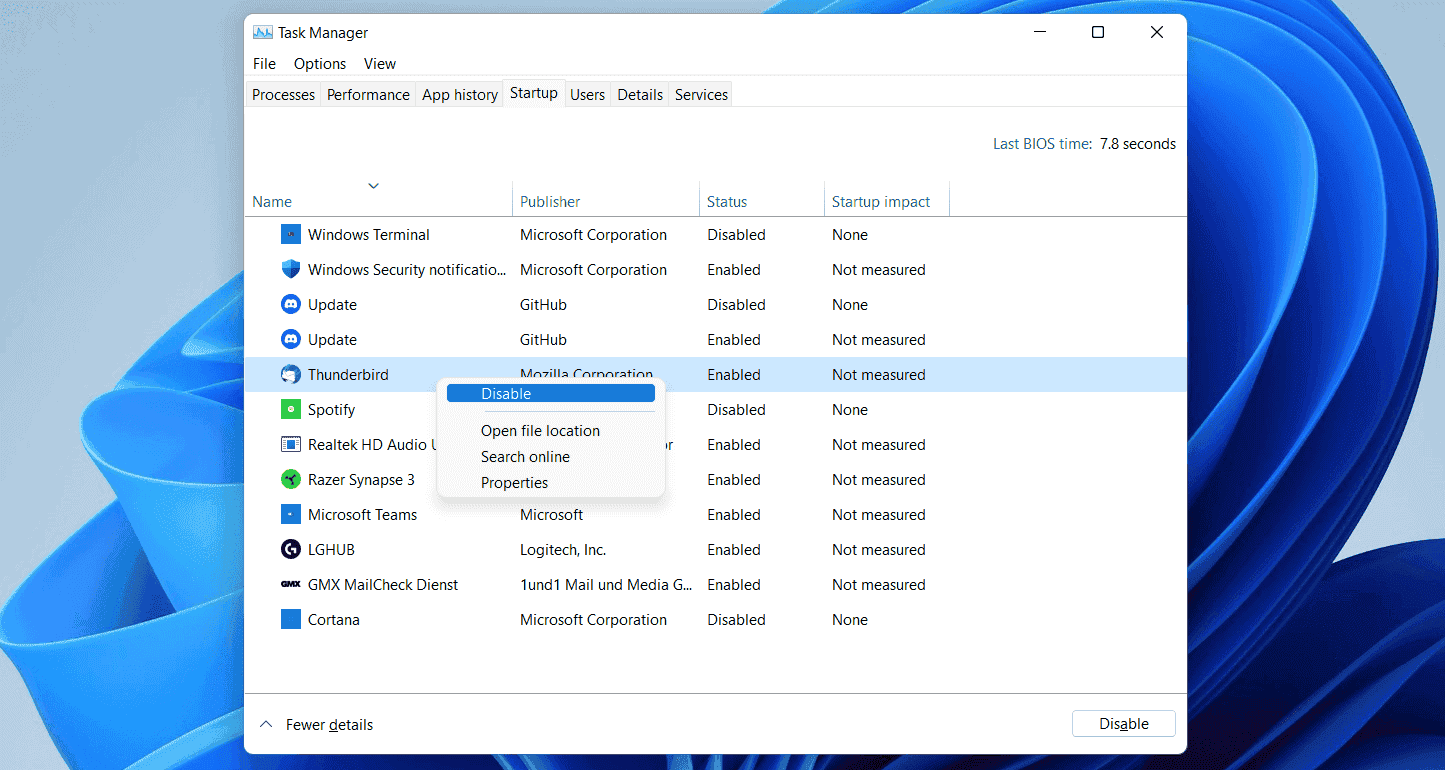
1. Using Task Manager:
- Open Task Manager: Press
Ctrl + Shift + Escsimultaneously. - Switch to the “Startup” tab.
- Right-click on the program you want to disable and select “Disable.” This prevents the program from launching automatically when you start your PC.
- Optionally, you can sort the list by “Impact on startup” to prioritize disabling programs with the highest impact.
2. Using Settings App:
- Open Settings: Press
Win + Ior click the Start menu and select “Settings.” - Navigate to “Apps” > “Startup.”
- Toggle off the switch next to the programs you want to disable. This achieves the same outcome as right-clicking and disabling in Task Manager.
3. Using System Configuration Utility (Advanced):
- Press
Win + Rto open the Run dialog box. - Type “msconfig” and press Enter.
- Click on the “Startup” tab.
- Uncheck the boxes next to the programs you want to disable.
- Click “Apply” and then “OK” to save the changes.
Avoid Visual Effects in your Windows PC
If your PC has lower-end specifications, the visual effects in Windows might contribute to slowing it down. To address this, you can disable certain visual effects that Windows uses to enhance performance. A simple step is turning off transparency effects. There are two main ways to disable visual effects in Windows 11: through the Settings app and through the Control Panel. Let’s explore both options:
Using the Settings App (Easy way):
- Open Settings: Press
Win + Ior click the Start menu and select “Settings.” - Navigate to “Accessibility” > “Visual effects.”
- Toggle the “Animation effects” switch to “Off.” This disables all animation effects like window minimizing/maximizing animations, scroll bars, and flyouts.
- Optionally, you can explore other visual effects settings below and disable specific ones you don’t prefer.
Using the Control Panel (Advanced way):
- Press
Win + Rto open the Run dialog box. - Type “sysdm.cpl” and press Enter. This opens the System Properties window.
- Click on the “Advanced” tab.
- Click on the “Settings” button in the Performance section.
- Select the “Adjust for best performance” radio button. This disables most visual effects.
- Alternatively, you can choose “Custom” and select individual visual effects you want to disable by checking or unchecking the boxes under “Visual effects.”
- Click “Apply” and then “OK” to save the changes.
Conclusion
While the suggestions mentioned earlier can certainly improve your PC’s performance, technology does age, and an old PC might struggle to keep up. If you’re using a laptop, it could be a good time to invest in a new one with the latest specifications for better performance in the coming years. If your current machine is over four years old, you’ll likely notice a significant improvement with a new one.
For desktop users, there are alternative options. Upgrading the CPU, GPU, or RAM can enhance performance, and switching from an HDD to an SSD is a major upgrade that greatly impacts speed. Researching compatible components and potential upgrades is necessary. If the idea of upgrading components isn’t appealing, there are also pre-built desktop PCs available if you have the budget for it.

