Windows laptop trackpads used to be a big headache, causing frustration for many users. In a 2011 ZDNET article by James Kendrick, he expressed this frustration vividly with the question, “Why do PC trackpads suck?” He wasn’t the only one; other reviewers of Windows laptops during that time shared similar complaints.
Things started to improve in 2013 when Microsoft introduced the Precision Touchpad with the Surface Pro 2 and Windows 8.1. This new touchpad hardware, paired with built-in Windows drivers, treated the touchpad as a distinct pointing device class. It processed taps, gestures, and movement as native actions. By 2015, top-notch laptops like the Dell XPS 15 were receiving praise from expert reviewers for having a trackpad that was as good as those on MacBooks.
Windows 11 brought about stricter hardware certification requirements for PCs. As part of this certification process, laptop manufacturers are now obligated to include Precision Touchpad technology. This ensures a standardized and improved touchpad experience across Windows 11 devices.
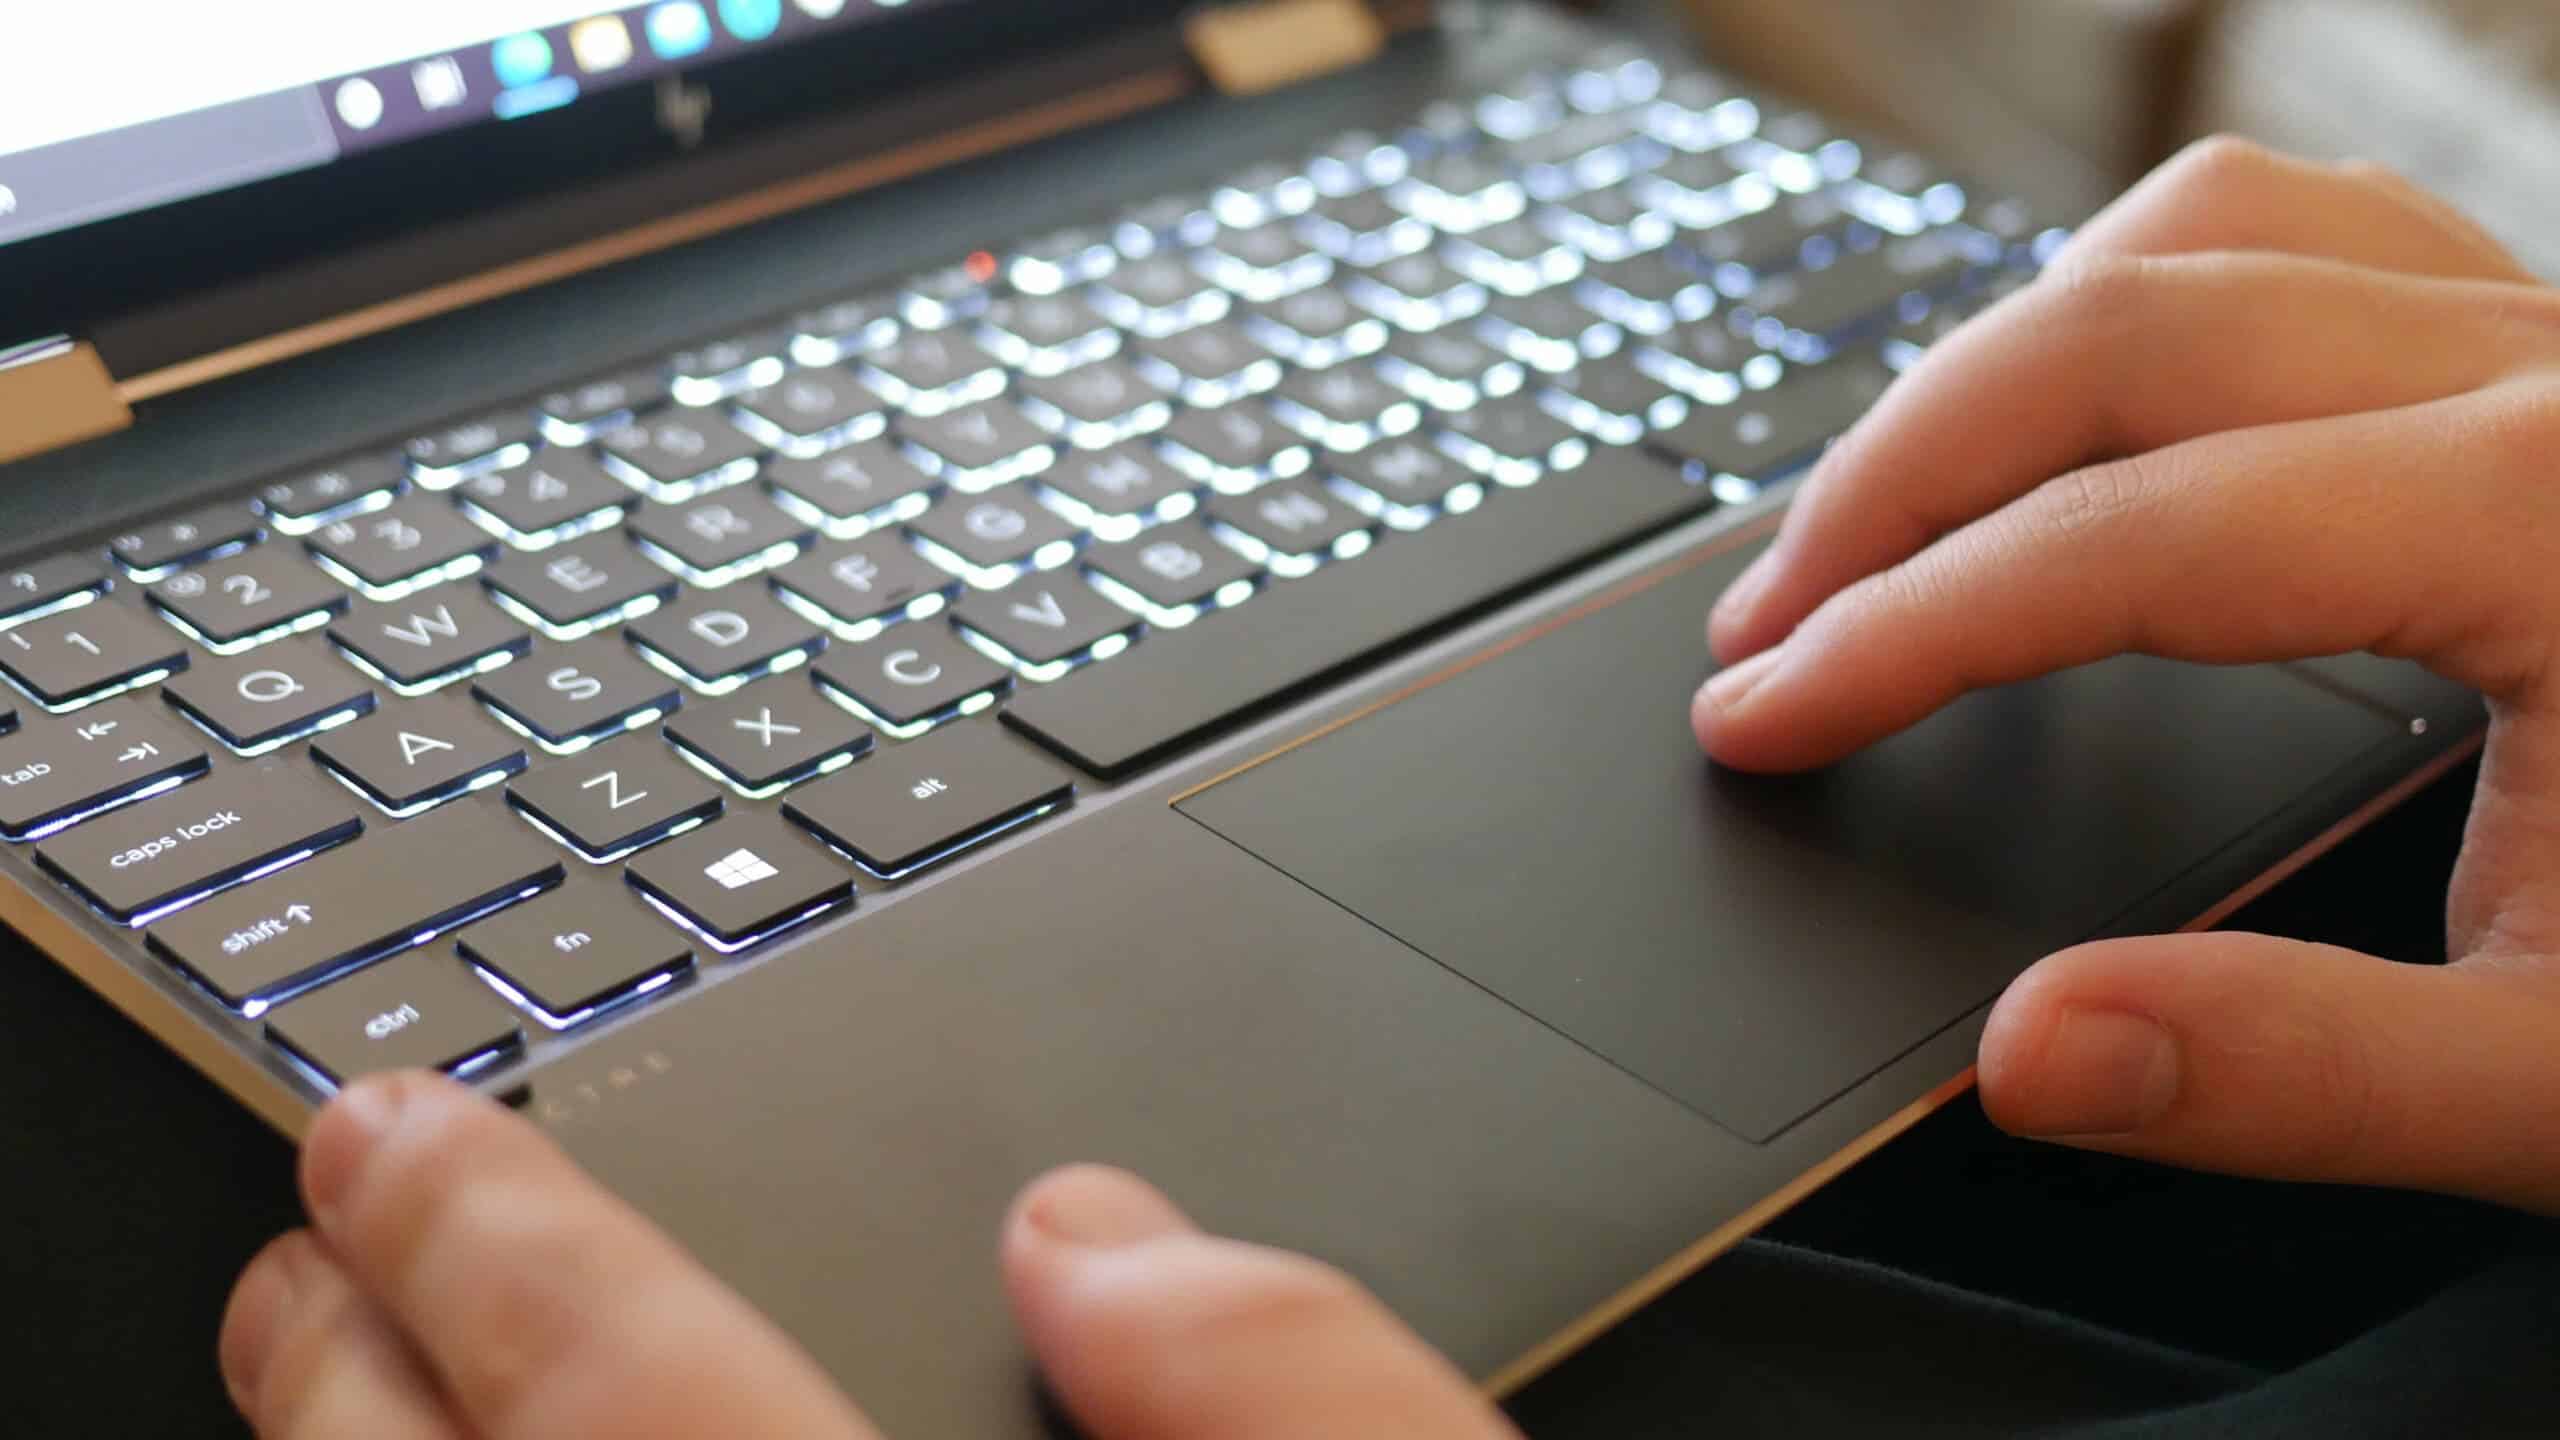
For a Precision Touchpad, you can access a wide range of customization options by going to Settings > Bluetooth & Devices > Touchpad (refer to the image below). On a Windows 10 PC with the right hardware and driver combination, you’d see a message at the top of that page saying, “Your PC has a Precision Touchpad.” In recent releases of Windows 11, you might not see this message, likely because it’s no longer needed. If you have the options displayed in the image, you’re all set.
Taking the time to learn how to use the default gestures on a Precision Touchpad can greatly boost your productivity. Additionally, spending some time exploring the Settings page can provide even more helpful insights and customization options.
Mastering these 11 techniques can significantly enhance your touchpad experience:
Switch Between Tasks with a Swipe on Windows 11 TouchPad
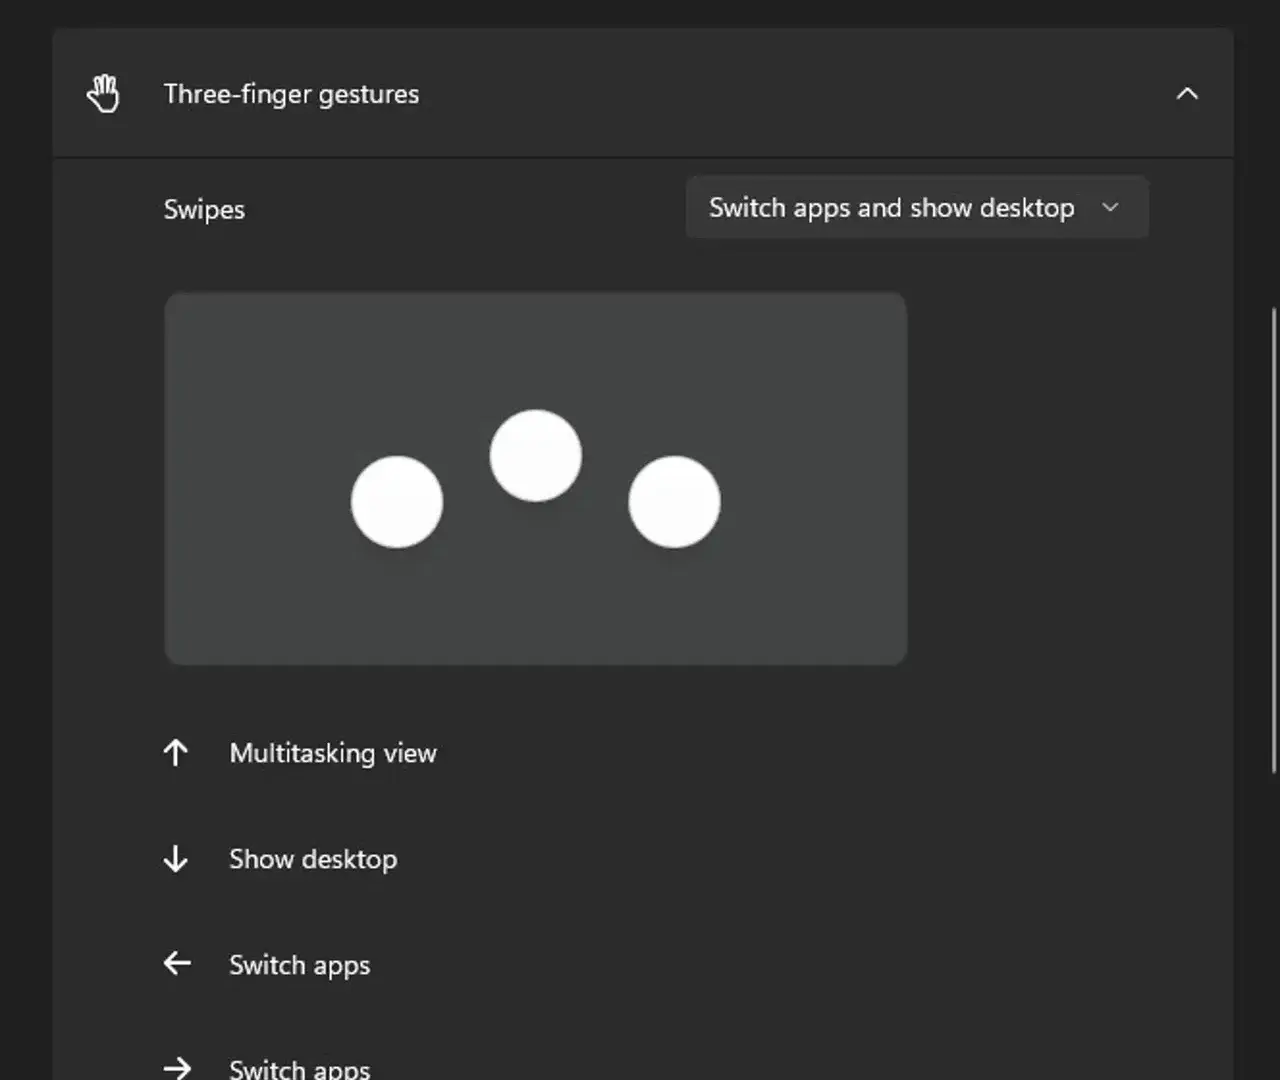
To switch into Task View on a Precision Touchpad, perform the following gesture: using three fingers, swipe up from the bottom of the touchpad (refer to the image below). This action will bring up Task View, displaying large thumbnails for each open window and virtual desktop. To select a window, simply tap on its thumbnail. If you wish to return to your previous position, swipe down with three fingers.
Switch Between Desktops with a Swipe
The Virtual Desktop feature in Windows 11 may not be used by everyone, but those who do often find it to be a valuable tool. It’s an excellent method for concentrating on specific apps while working. With Virtual Desktops, you can separate distractions, such as social media, onto a different desktop.
By default, you can switch between desktops using a four-finger swipe to the left to move to the next desktop or a four-finger swipe to the right to go to the previous desktop. This allows for a seamless transition between different workspaces, enhancing focus and organization.
Fast Scrolling in Windows 11
Forget about scroll bars! With a touchpad, you can achieve smooth scrolling in any direction using a two-finger swipe. Remember, swiping with one finger moves the pointer, not the page.
If the default speed of the pointer doesn’t suit you, adjust it easily with the slider at the top of the Touchpad Settings page. This allows you to customize the speed to make it faster or slower according to your preference.
Swipe to Snap Windows 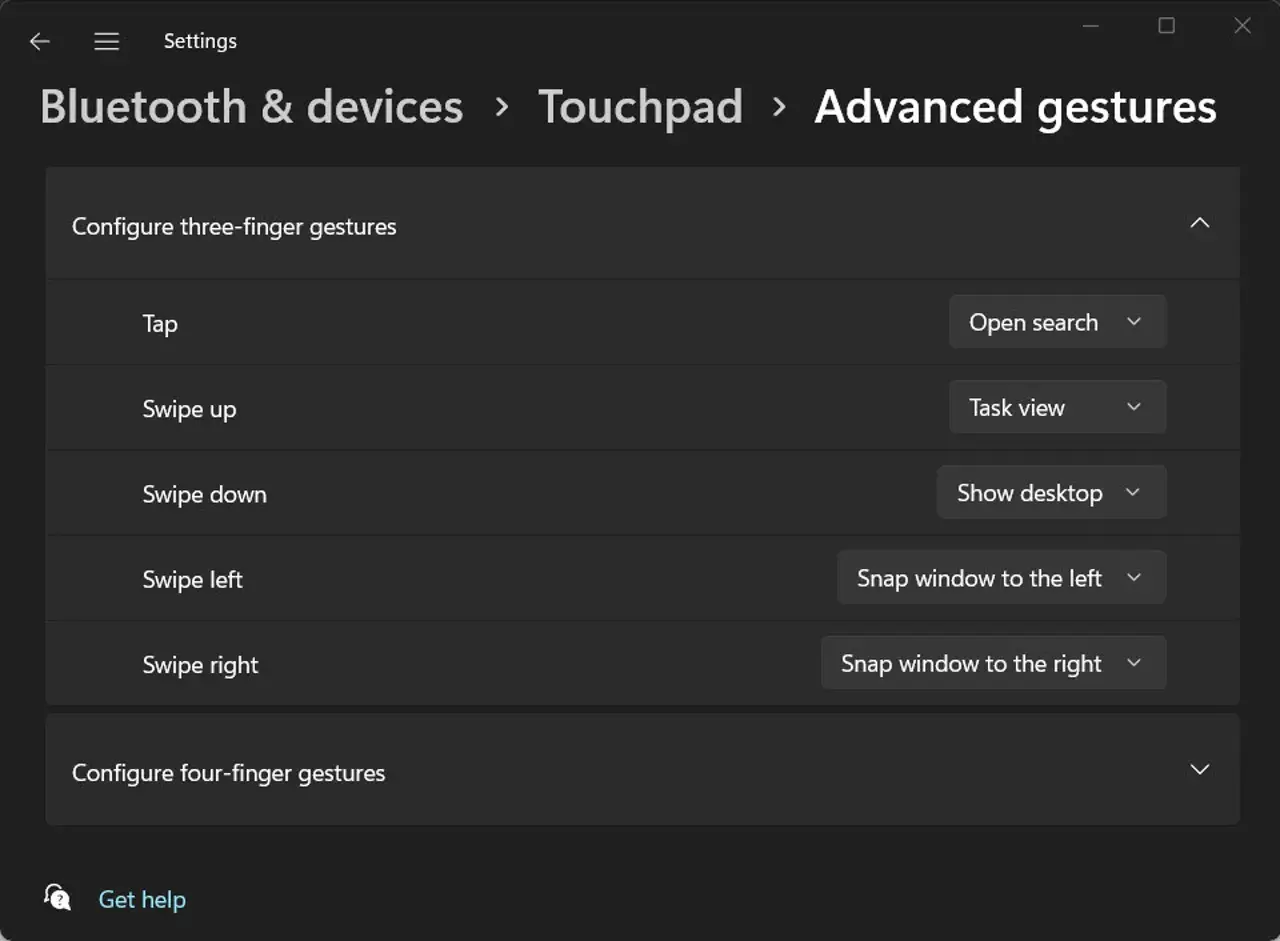
Here’s a favorite trick: customize the three-finger or four-finger swipe options to snap the current window to the left or right side of the display. Head to the Advanced gestures settings (refer to the image below). Change “Swipe left” to “Snap window to the left” and make the corresponding change in the “Swipe right” menu.
This tweak can significantly enhance your multitasking experience, allowing you to efficiently manage and organize your open windows on the screen.
Swipe to Increase or Decrease Volume in Windows 11

Here’s a handy trick, especially if you don’t use virtual desktops: On the Touchpad Settings page, go to the Four-finger gestures section and use the Swipes menu to change the function to “Change audio and volume” (refer to the image below). This setting allows you to adjust the system volume by swiping up or down slowly, and a slider will appear above the taskbar, showing the volume level. Moreover, with these settings, you can swipe left or right to play the previous and next tracks, respectively, even if your music player isn’t visible.
For an extra touch, go to the Taps menu at the bottom of that section and define a four-finger tap as “Play/Pause.” This way, you can easily control your music playback with a simple tap.
Transferring Touch Controls to Mouse
If you occasionally use a mouse with your laptop and prefer to disable the touchpad while doing so, Windows 11 provides a convenient option. Expand the Touchpad section at the top of the Settings page, and uncheck the “Leave touchpad on when a mouse is connected” checkbox.
This feature ensures that the touchpad is deactivated when a mouse is connected, preventing inadvertent taps and swipes while typing and giving you a seamless transition between different input devices.
Personalize your Gestures on Windows 11

For more customization in the Touchpad > Advanced Gestures section, explore the extensive list of options for assigning various taps and swipes. If none of the predefined options suits your preferences, consider the “Custom shortcut” feature, as shown in the image below. In this example, a three-finger tap is configured to open the Quick Start menu (Windows key + X).
This allows you to tailor your touchpad gestures to perform specific actions or open particular menus, providing a personalized and efficient user experience.
The “Custom shortcut” feature in the Touchpad > Advanced Gestures section allows you to assign any keyboard shortcut to a specific gesture. For instance, you can set a three-finger tap to open File Explorer using the Windows key + E combination. Alternatively, you could use Windows key + n (where n is a number between 1 and 9) to open the app pinned to that position on the taskbar. Additionally, Windows key + 0 (zero) opens the shortcut pinned to the 10th position.
This level of customization enables you to create touchpad gestures tailored to your workflow and frequently used shortcuts, enhancing the overall efficiency of your computing experience.
Sweeping for Forward and Backwards Navigation in Windows 11
If you often navigate through browser history or photo slideshows using the back and forward buttons, you can enhance this experience by assigning gestures to these actions. Here’s how:
1. Go to Settings > Bluetooth & devices > Touchpad > Advanced gestures.
2. Navigate to the sections for three-finger or four-finger gestures.
3. Change the assignment for “Swipe left” to “Backward navigation” and “Swipe right” to “Forward navigation.”
This customization allows you to seamlessly navigate through your browsing history or photo slideshows using intuitive gestures. It goes on to provide a more fluid and efficient user experience.
Making the Gestures Feature do Nothing in Windows 11
If you prefer to keep your touchpad gestures straightforward and avoid unintentional actions, you can configure Windows to ignore certain gestures completely. Here’s how:
1. In the three-finger and four-finger gesture sections, choose the “Nothing” option for the gestures you’d like to disable.
2. For additional customization, go to the Touchpad > Advanced Gestures section and configure each tap and swipe option to “Nothing.”
By selecting the “Nothing” option, you can tailor your touchpad settings to your preferences. This avoids any gestures that might lead to unexpected actions. It also ensures a more straightforward and controlled touchpad experience.


