Stellar Data Recovery Review: Powerful Windows Data Recovery Software
softwareSaturday, 27 September 2025 at 05:20
Stellar
Data Recovery is one of the most talked-about tools for recovering lost or
deleted files. Many articles online cover it briefly, missing important details
that can help users make informed choices.
This review
focuses on the Windows version, covering installation, setup, real-life
testing, key features, pricing, and usability. A small note on Mac support is
included at the end.
Installation and Setup
Stellar
Data Recovery is a robust Windows Data Recovery Software for recovering lost files and more on
Windows. It’s straightforward. You don’t need technician skills to
be able to use this software and extract the best of it. It’s a valuable tool
for those who can’t afford to lose precious files and are always prepared for accidental
losses.
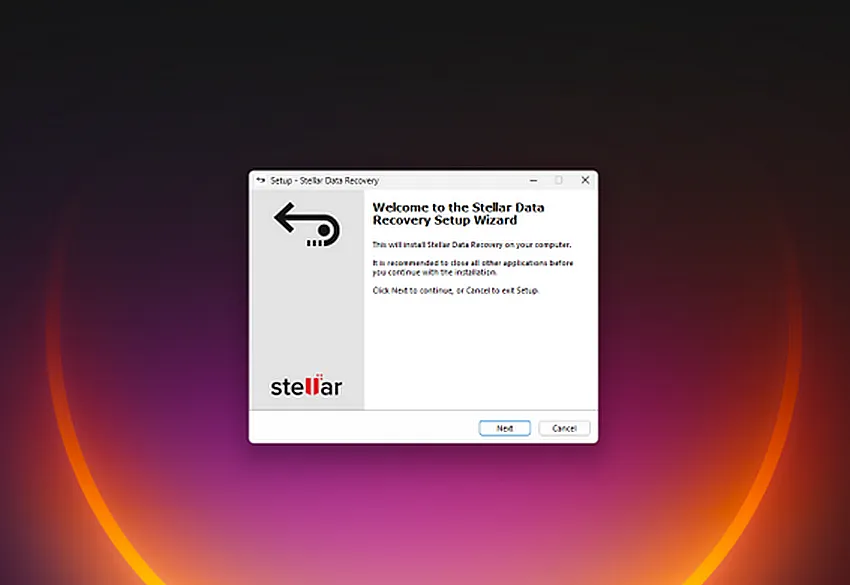
Installing
Stellar Data Recovery on Windows is simple and straightforward. Start by
downloading the installer from Stellar’s official website. Once the EXE file
is downloaded, double-click it to open the installation wizard.
- Accept the license agreement.
- Choose the folder where you want to install the software.
- Click Install and wait for the process to finish.
The
installer is clean with no bundled software or malware. Once installed, launch
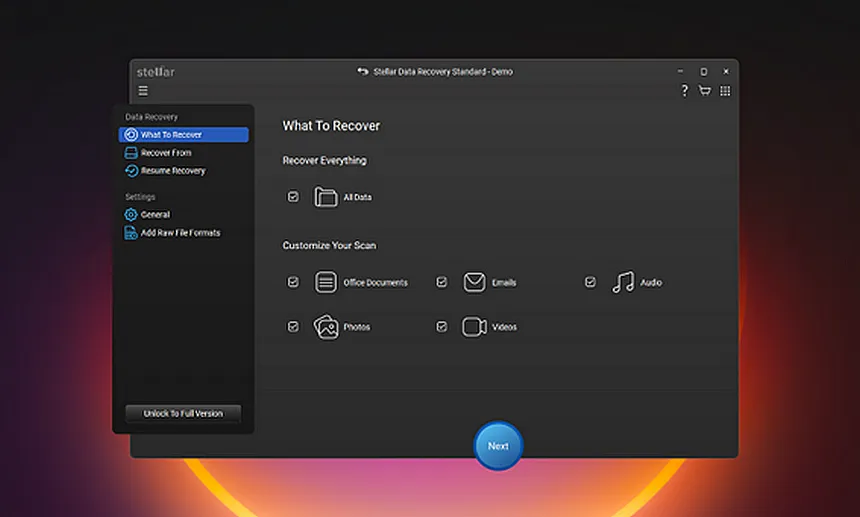
the app to see a simple and clear interface. You are greeted with
options to select file types, the storage device to scan, and whether to use a Deep
Scan. Deep Scan is recommended for corrupted drives or partially
overwritten files, while a regular scan is sufficient for simpler cases.

Selecting Files and Devices
Stellar
allows you to choose which file types to recover. You can select documents,
photos, videos, audio, emails, or all file types at once. This helps save time
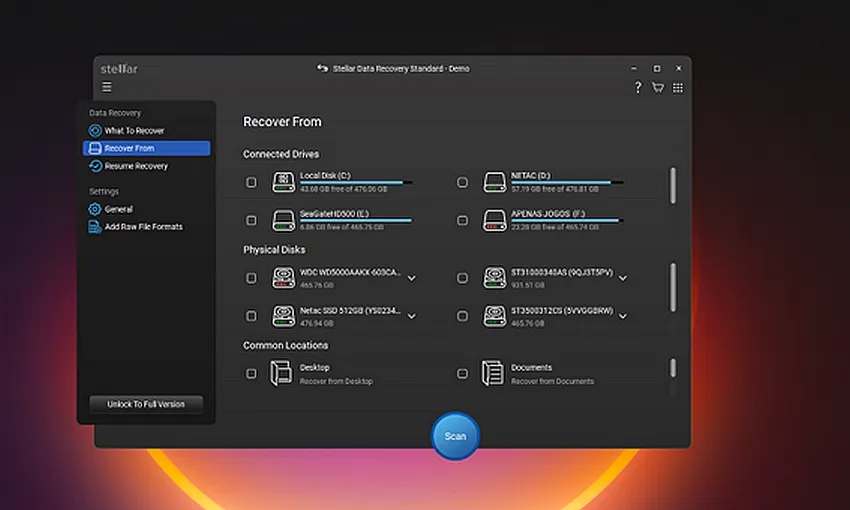
and system resources. Next, select the drive or device to scan. This can
be your system drive, external hard drive, USB stick, or SD card.
The
software supports NTFS, FAT32, and ExFAT file systems on Windows. This covers
most modern storage devices. If your drive has bad sectors or is RAW, the
software may struggle, so always back up data regularly.
Scanning Process
Once
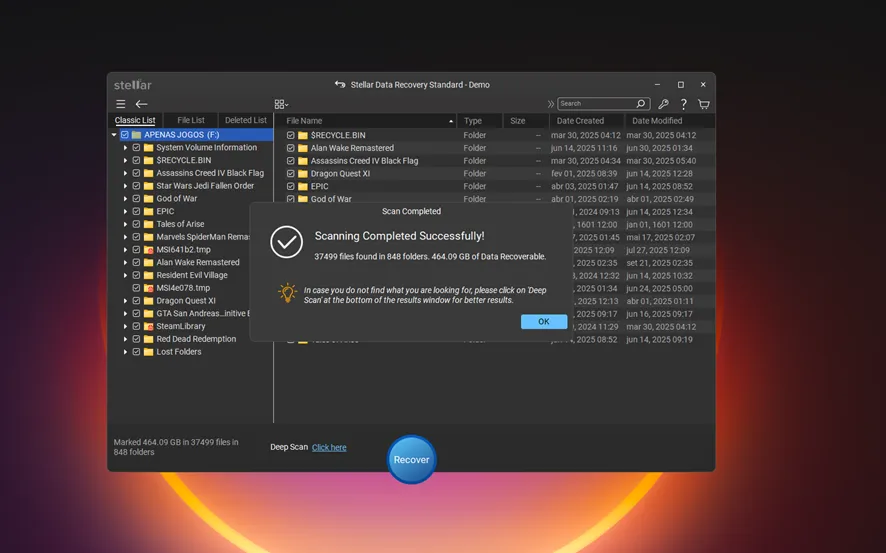
scanning starts, Stellar displays recovered files in multiple views:
- List view – see files in a simple table.
- Tree view – browse by folders.
- Deleted list – quickly find recently removed files.
- Cover flow – useful for photos and videos.
A preview
feature lets you open files up to 100 MB before recovery. You can also use
the search bar to locate specific files by name or part of the name.
In a
real-life test, a 16 GB USB drive with 9 files totaling 270 MB was
scanned. Stellar found 3,999 files in 47 folders, totaling 3.66 GB. This
shows that the software can recover older or partially overwritten files. The
scan took 25 minutes. It may sound a long time, but this is a deep scan.
Data Recovery Process
After
scanning, select the files you want to recover. All files are ticked by
default, but you can deselect folders or file types. Click Recover and
choose a safe location, ideally on a different drive to avoid overwriting
existing data.
The
software restores files quickly and maintains their original structure. Video
and photo files that are slightly corrupted can also be repaired with Premium
licenses, giving users a better chance of usable recovery.
Key Features
Stellar
Data Recovery offers many tools that are useful for both beginners and
professionals:
- Multiple storage device support – HDDs, SSDs, USB drives, SD cards, CDs, and DVDs.
- Three scan types – Quick Scan, Deep Scan, and Signature Scan. Signature Scan is the most thorough.
- Disk image creation and cloning – Create full backups of disks for safety.
- Photo and video repair – Available with Professional and Premium licenses.
- S.M.A.R.T. monitoring – Check internal drives for health issues.
The Windows
version supports common file systems (NTFS, FAT32, ExFAT). Mac support
exists separately for HFS+ and APFS, but some advanced features, like RAID
recovery or disk cloning, are Windows-focused.
Pricing and Licenses
Stellar
offers a free tier, allowing scanning, preview, and up to 1 GB of data
recovery. Paid plans include:
- Standard – Unlimited recovery and BitLocker support.
- Professional – CD/DVD recovery, disk image creation, and disk cloning.
- Premium – Adds photo/video repair and thumbnail extraction.
Licenses
can be monthly, annual, or lifetime. Features like video repair and RAID
support require higher-tier licenses.
Real-Life Use Cases
Stellar
works best in these scenarios:
- Beginners who want a simple interface.
- Recovering data from normally functioning disks.
- Repairing videos or photos with Premium tools.
- Recovering files accidentally deleted or lost due to formatting.
It may
struggle with severe corruption, RAW drives, or disks with bad sectors. For
heavy-duty recovery, a specialized RAID or professional tool may be more suitable.
Step-by-Step Installation Example
- Download the EXE installer from the Stellar website.
- Run the installer. Accept terms and select the installation folder.
- Click Install. Wait for progress to finish.
- Launch Stellar Data Recovery.
- Select file types and the drive you want to scan.
- Enable Deep Scan if needed.
- Start scanning. Monitor progress in the main window.
- Preview files as they appear.
- Select the files to recover.
- Click Recover and save them to a safe location.
This simple
flow ensures that even beginners can get started without confusion.
Conclusion
Stellar
Data Recovery for Windows is a reliable tool with a clear interface, strong
recovery capabilities, and extra tools like video/photo repair. While it can be
slower than some competitors and struggles with complex corruption, it is
highly effective for everyday recovery tasks.
For Mac users, Stellar offers
similar functionality,
including support for HFS+ and APFS. Separate licenses are required for mobile
recovery on iOS and Android devices.
Overall,
Stellar Data Recovery deserves its reputation as a solid, user-friendly
solution for recovering lost files, particularly on Windows systems. We can’t
help but recommend it as a valuable companion for recovering lost files.
Popular News

Latest News
Loading