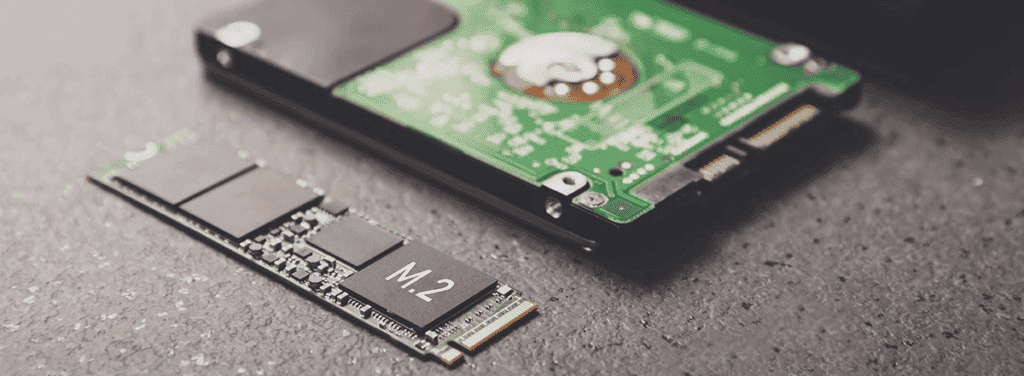
Nowadays, it’s easy to build PC setups with multiple Hard Disk Drives or Solid State Drives. Motherboards come with multiple ways of adding disks for storage, from the conventional Sata connectors to the M.2 slots for newer SSDs. However, Disk management and partitioning is an important knowledge that will help you on Windows 11. Even if you have multiple disks, learning how to partition your disk is a great way to improve your storage management. It allows the separation of Windows from games, programs, and files. You can, for example, set a specific amount of GBs for Windows and the programs, and create a partition to store files, games, and other stuff. Through this article, we will teach you how to create and delete partitions on Windows 11. (Via: Carisinyal)
Before partitioning your HDD or SSD, it’s important to keep a backup of your files. Make a good backup of your important data to avoid possible loss of important data. The following methods apply to both Hard Disks and SSD Storage devices. The process remains largely the same, only the type of storage media varies. It is worth noting that Microsoft offers a native application for disk management. It has been available since older Windows iterations like Windows XP, 7, 8, 8.1, 10 and now remains alive in 11. The feature didn’t change much over time in terms of interface, so it’s easy to follow these tips regardless of the Windows version you’re running.
How To Create Hard Disk or SSD Partition in Windows 11
You can easily create a hard disk or SSD partition without any additional software. Windows 11 keeps the built-in partitioning tool called Disk Management. We will guide you step-by-step and help you to create partitions on your SSD, or perhaps, just split it into two large sectors.
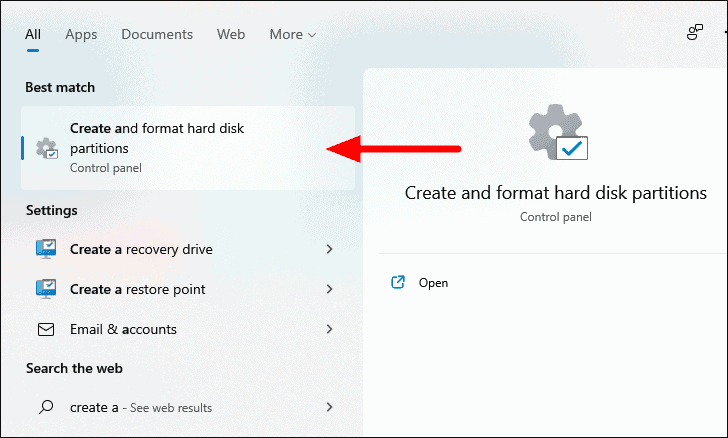
- Step 1: Open the Disk Management in Windows 11. You can type “Disk Management” in the Windows Search, or you can right-click on the Start Button and Select Disk Management right from there.
- Step 2: Open it with Administrator Privileges, Right-Click, and Select “Run as Administrator”.
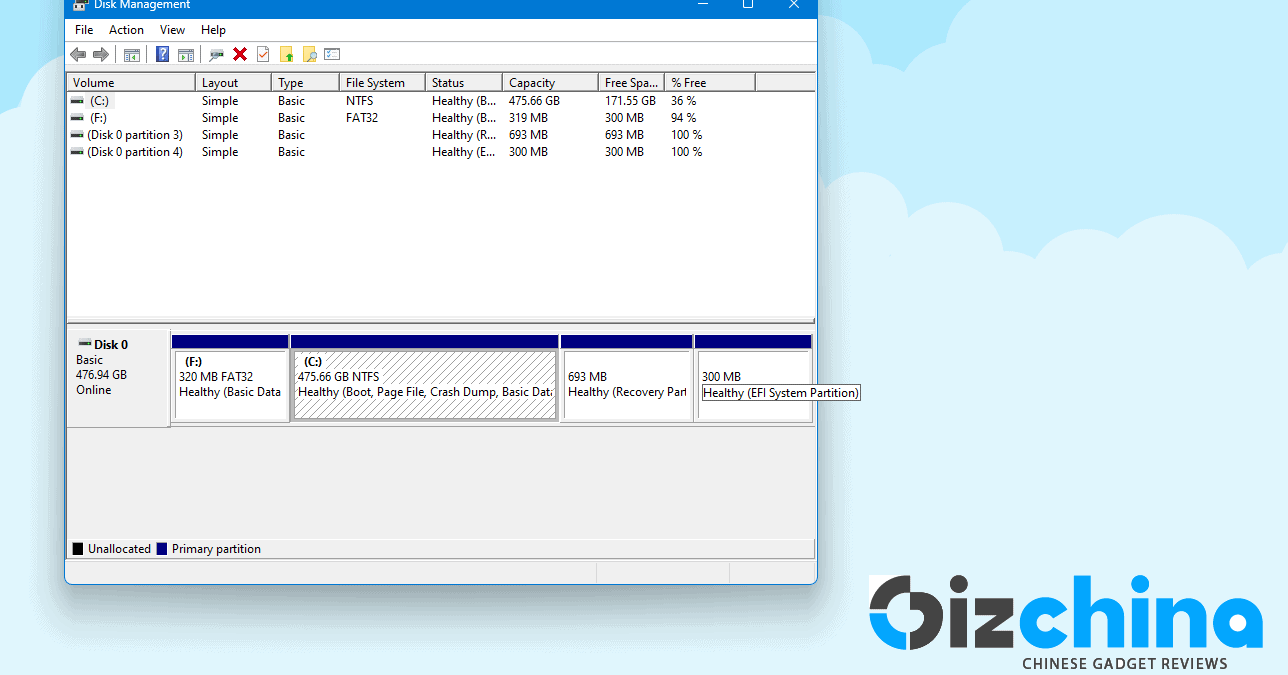
- Step 3: You will see all your Hard Disk or SSDs listed here. If you already have partitions, you will be able to handle them from here. The Manager will list each disk, and you can shrink a volume, extend, or create a new partition. Windows won’t allow you to mess with the System. So you don’t need to worry about breaking your OS in this process.
- Step 4: If you have only a single disk and partition, you will need to shrink the capacity or volume of your C Drive. Remember that drive C is your main Windows Partition.
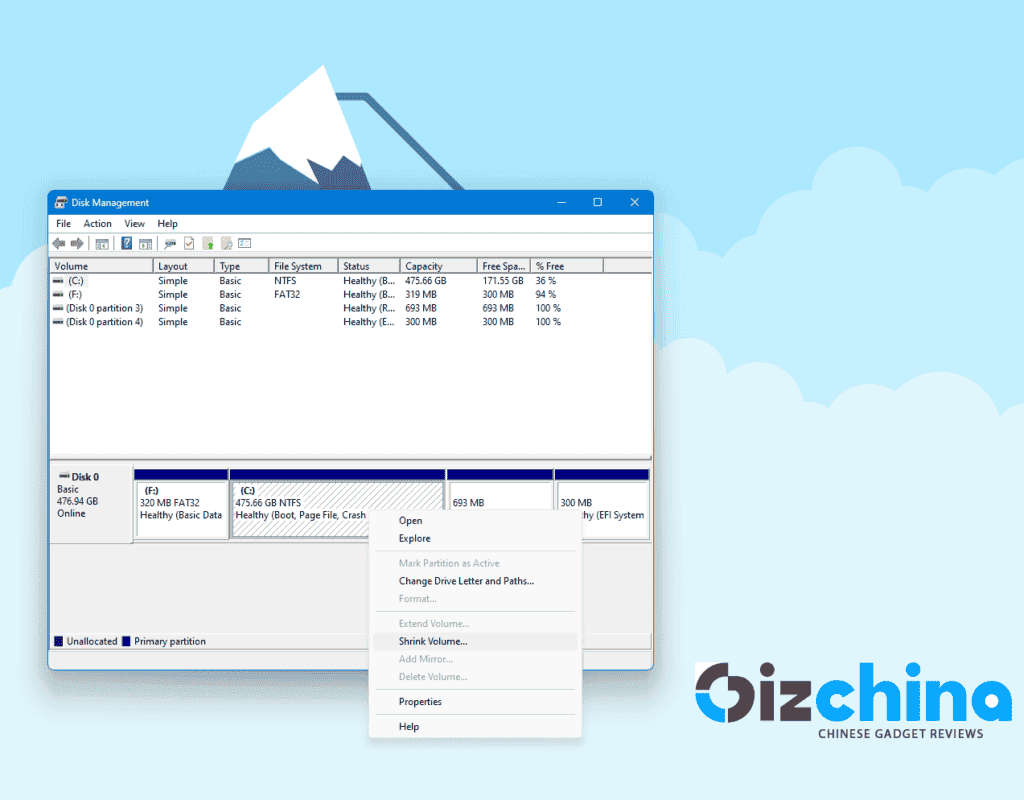
- Step 5: To Reduce Capacity and Get Room for a new Partition, Right-Click on Drive C: and select “Shrink Volume”.
- Step 6: In the Window that opens, specify how much the capacity or volume of drive C will be reduced. The capacity or volume is specified in MB units. Therefore, if you want to reduce 100 GB, you can multiply it by 1,000. So the number written is 100,000 MB.
- Step 7: Enter the Total Capacity into the column next to the words “Enter the amount of space to shrink in MB”.
- Step 8: Press the “Shrink” button.
- Step 9: After that, a box with the predetermined capacity will appear. The box, however, will show “Unallocated” space.
- Step 10: Right-click on the Box, then select “New Simple Volume”.
If you want to use the entire capacity or volume of the specified drive, you don’t need to change the values. However, if you want to create multiple partitions, you can set the value according to your needs. So once you’re ready click “Next” to continue.
In the next step, you will be asked to assign a letter for the Drive Name. Usually, Windows assigns a letter automatically. However, you can choose a different letter if you wish. Once you’ve made your selection click on “Next”.
- Now, configure the format and name for the newly created partition. To do so, select “Format This Volume with the following Settings”.
- Check the box that says “Perform Quick Format”.
- Click “Next” and complete the process and then “Finish”.
After completing the process of creating a hard disk partition, the newly created partition will be automatically visible in File Explorer. As a result, your Windows 11 PC or laptop will now have two drives. You can leave one particular drive for the System and Applications. The secondary can be used for storing your data files. If you need to make changes on Windows, your data drive will be safe from any change you do in the operating system.
You may also be wondering if it is possible to delete a hard disk partition in Windows 11. The process is quite simple. Check the step belows and learn how to delete hard disk partitions in the OS.
How To Delete Disk Partitions on Windows 11
Besides creating a new partition, you can also delete a previously created hard disk or SSD partition. Maybe you’ve changed your mind and now needs to delete the partition you’ve created before? Or perhaps, your SSD storage is limited and you’re starting to run out of storage for apps or games. Well, you can delete partitions and get more storage for the system partition.
If you’re going to use a partition that was previously in use, make sure to perform a backup of your files. If you delete a partition, all files inside will be automatically deleted. So make sure to backup the files you don’t want to lose so easily.
- Step 1: Open “Disk Management” right-clicking on the Start Icon and Selecting the Option.
- Step 2: You can open it through Computer Management or using the shortcut on your keyboard.
- Step 3: In Disk Management, locate the hard disk partition you want to delete.
- Step 4: Right-Click on the partition and select “Delete volume…” to start the process of deleting the partition.
- Step 5: If you receive a confirmation warning, select “Yes” to proceed with the deletion.
- Step 6: After succesfully deleting it, the deleted partition will show the capacity or volume and have the name “Unallocated”
- Step 7: The next step is to move the capacity to another partition.
- Step 8: You can do this by right-clicking on the partition to be added, then selecting “Extend Volume”.
- Step 9: The next thing to do is to select the highest value suggested and select “Next” to continue. The process speed will depend if you’re handling a Hard Disk or a SSD.
- Step 10: After everything is done, click “Finish” as the last step.
Things to Take Into Consideration
Before managing your Hard Disk or SSD it’s important to take some factors into considerations. First of all, you need to check the size of your disk to judge if you have enough space for creating multiple partitions. If you have a SSD with 256 GB or even 128 GB, there isn’t enough space for multiple partitions. The System already takes a good chunk of your storage space, depending on how many apps or games you’re going to install, you will need space. If you start running out of storage for the system, you might experience slowdowns. Take your storage space into consideration before making partitions and adjust their size accordingly.
The next thing you need to take into consideration is to always perform backups of your files before deleting partitions. You can easily lose all your files if you click on delete and don’t make any backup for it.
Do You Need To Have Multiple Partitions on PC?
There are some pros and cons to having multiple partitions. One of the first big benefits is that makes easier to reinstall the OS. Since you can keep personal files on separate “drive”, reinstalling Windows does not delete your data, and if any damage has been done to OS files, you can get back to a working state easily.
Multiple partitions are necessary if you want ot dual-boot Windows and other OS, for example. It’s also easier to back up your personal data if it’s stored on a separate drive. However if you have a PC, consider adding more than a single disk. If you have a large SSD for system and apps, you may want to grab a cheaper HDD for your files to be stored.
The price of SSDs is dropping year by year, but you will still get more storage on old Hard Disk Drives. They aren’t the best for apps and system nowadays, but for simply storing files they can be a viable option over multiple partitions on a SSD. Some laptops, offer room for two disks, so you can also build a setup with SSD + HDD. Anyway, don’t get me wrong, even if you have multiple drives, you may still need multiple partitions. Especially if you plan to do dual boot.
Apart from the advantages, a separate partition won’t help if your drive itself starts to fail. After all, the physical drive is the same for both partitions. So if it starts going bad, both partitions will suffer all the same.
Conclusion
As you can see the process for creating and deleting partitions on Windows 11 is quite simple. Use it as you wish and make wise decisions. It is worth noting that the process is basically the same on Windows 10. The Disk Management software didn’t change much over the years, so it’s basically the same process for older Windows iterations that have this app.


